 The anchor trolley is a fairly essential part of anchoring up whilst fishing. In a nutshell it allows you to position the point along the kayak at which your anchor line will enter the water. This allows you to position the kayak in a comfortable and, more importantly, a safe position relative to the wind, swell and tide..... You really don't want to be anchored side onto a strong tide or big swell because you will inevitably be going for a cold swim - potentially a very dangerous situation. The anchor trolley allows you to move the anchor line to either the bow or stern of the kayak - the safest positions for an anchor line to enter the water, all from the safety of your seat i.e no climbing around the kayak! In calm conditions you can use the trolley to position yourself so that your not facing the sun and having to squint all day long! There are many different ways of setting up an anchor trolley but are all essentially built around a continuous loop of cord running through 2 pulleys - one at the front of your kayak and one at the back. Some people use a trolley running only half the length e.g from midpoint to stern or mid point to bow, others have full length trolleys set up on both sides of the kayak to provide more options for positioning the kayak at anchor. I use a full length anchor trolley set up on the starboard side of the kayak. Here's how i set up my anchor trolley on the Hobie Outfitter: What you will need:
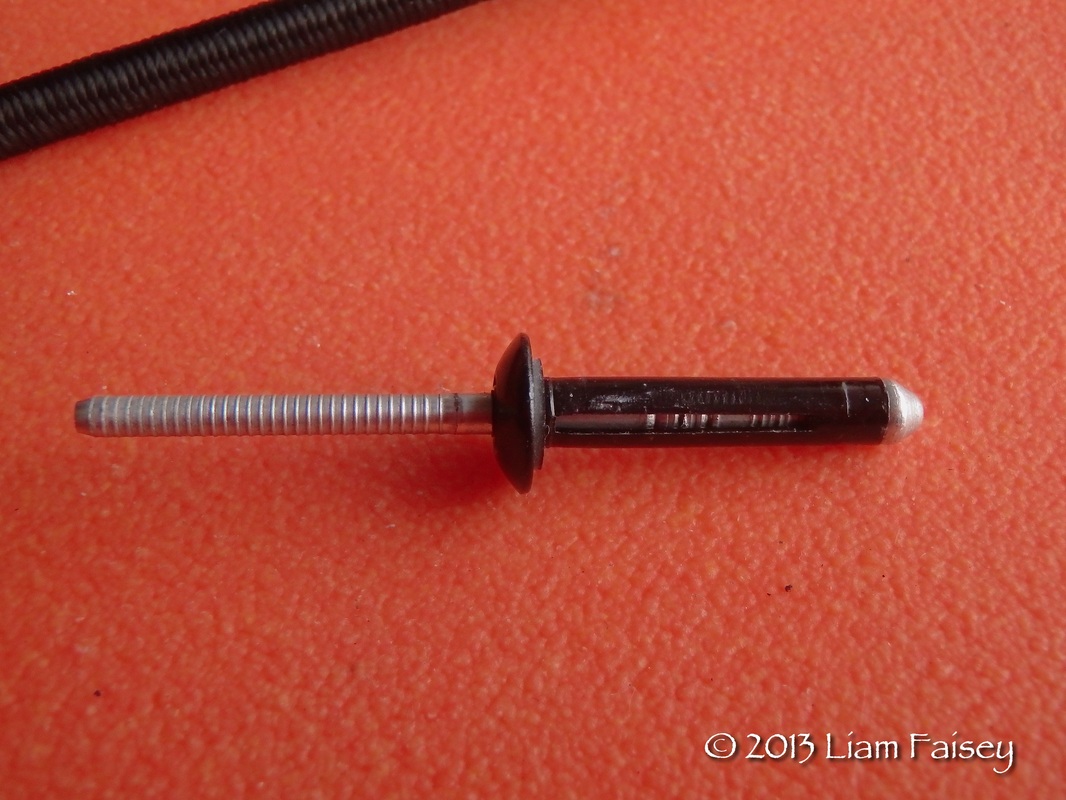
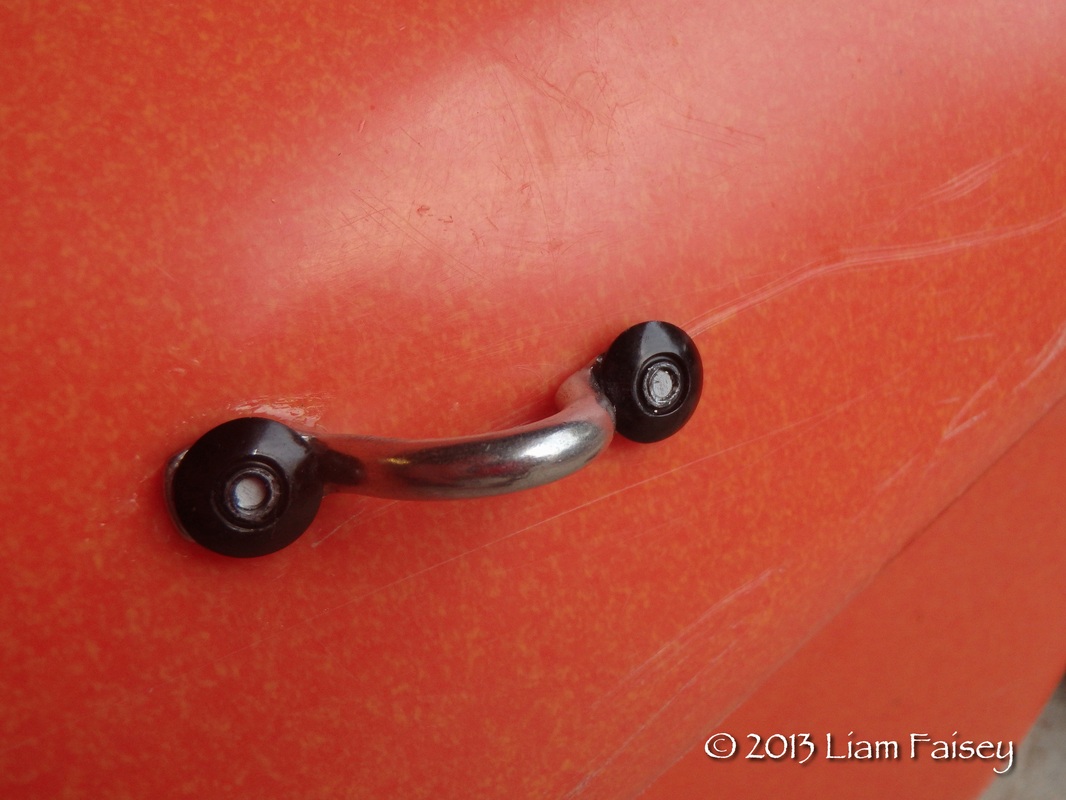
All this equipment should be available in your local chandlery shop. If your not near a marine chandlers then it can all be brought online - Cornwall Canoes stock an good range of marine hardware for kayak anchoring. First step was to mark out where the pad eyes will be fixed, one at the bow and one at the stern - mine are positioned approx. 6 inches back from each and approx. 4 inches below the top of the hull - more importantly they will be above the waterline. After that its a case of drilling holes the same size as the the diameter of the rivet of well nut. I use marine trifold rivets which are perfect for use on kayaks - the rivets have a silicon seal and neoprene gasket to give a waterproof seal. The soft aluminium shaft of the rivet collapses and splays in three sections giving maximum hold in soft plastics. I have used well nuts on my teksport and they do the job reasonably well but since using the rivets i wont be using them again. I found that the holes in the pad eyes/lashing hooks well too small to take the rivet so they were drilled to increase their size. I also use a dab of clear silicon on the rivet before pushing it into the hole to further reduce the chance of water entering the hull.
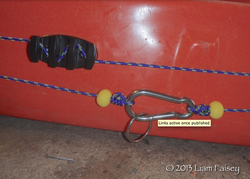
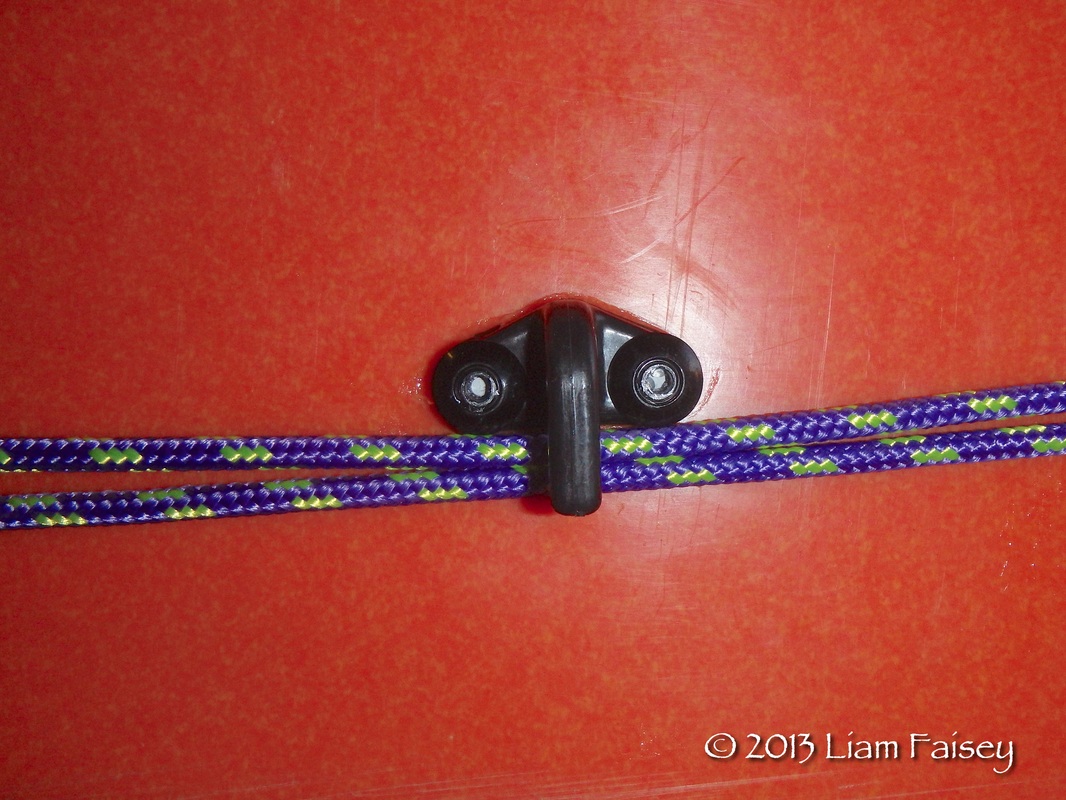
Once the pad eyes are in place you can clip on the small carbines and pulleys. Then set up the loop of cord that will run the length of the kayak, set up as shown in the images below, with the large carbine, beads and stainless ring incorporated into the loop. 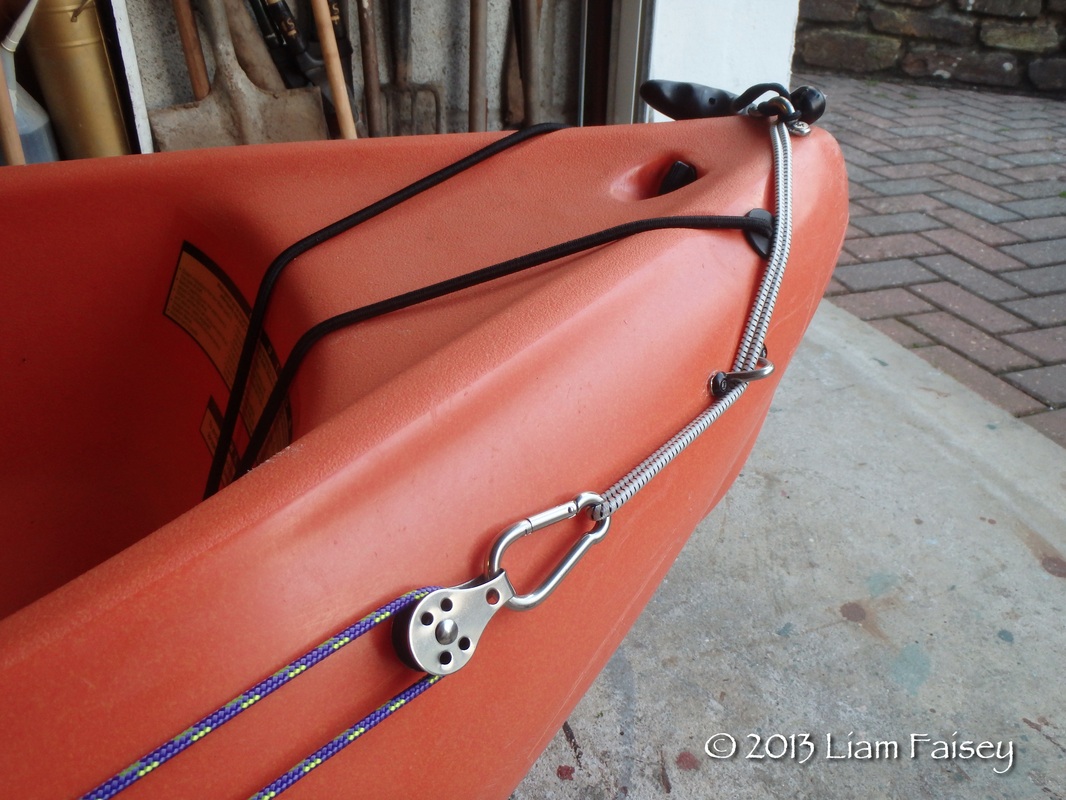 I have used a doubled up length of elastic (threaded through a stopper bead and knotted) that i have passed through the pad eye on the very front of the Hobie then through the pad eye i have fitted. The carbine/pulley then clips onto this. This helps buffer some of the movement between the kayak and anchor line and keeps the loop of cord taut. The length of elastic could equally just be attached to the pad eye i fitted. At the stern the carbon/pulley is clipped directly onto the pad eye. 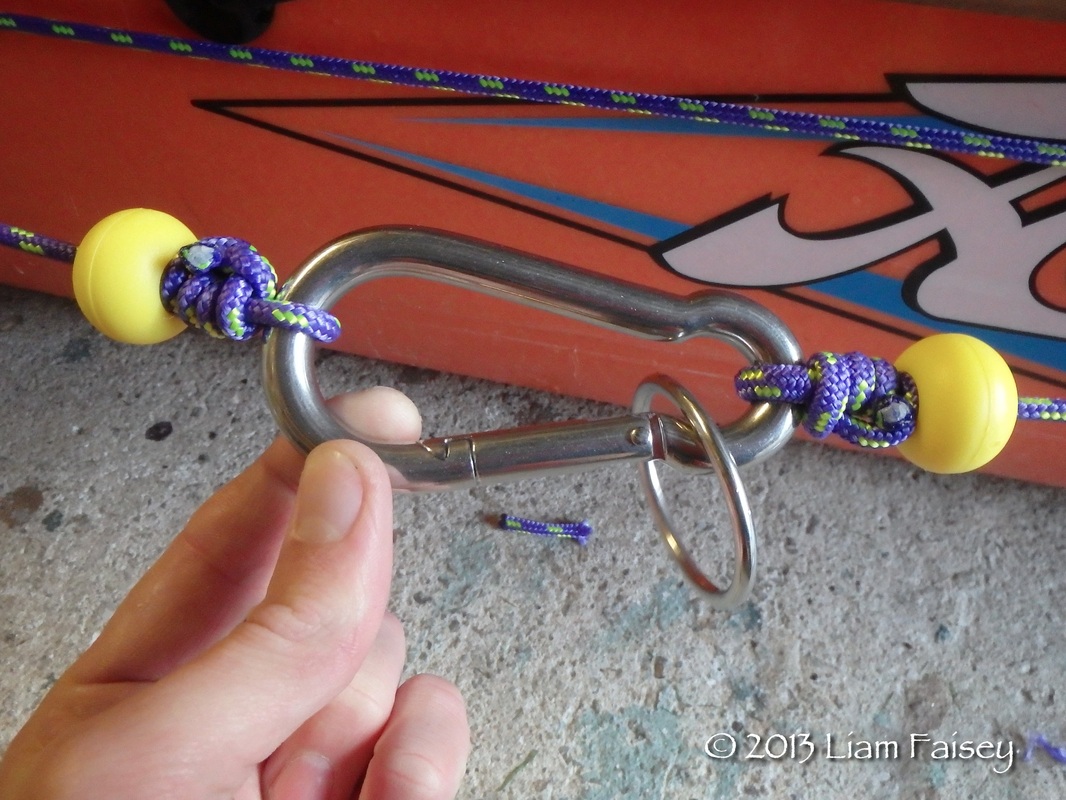 The anchor line will eventually pass through the stainless steel ring. This allows me to unclip the ring and throw the anchor reel overboard should i need to un-anchor at speed for any reason. The anchor reel wont sink as it will be supported by a buoy - more on that in part 2. Once i was happy with the set up of the cord loop the next step was to position the zig zag cleat and rivet it in place. I position mine within easy reach of my seating position. I applied a good coating of silicon to the base of the cleat to create a waterproof seal. The cleat is used to stop the trolley sliding between the pulleys therefore keeping it held in your desired position. 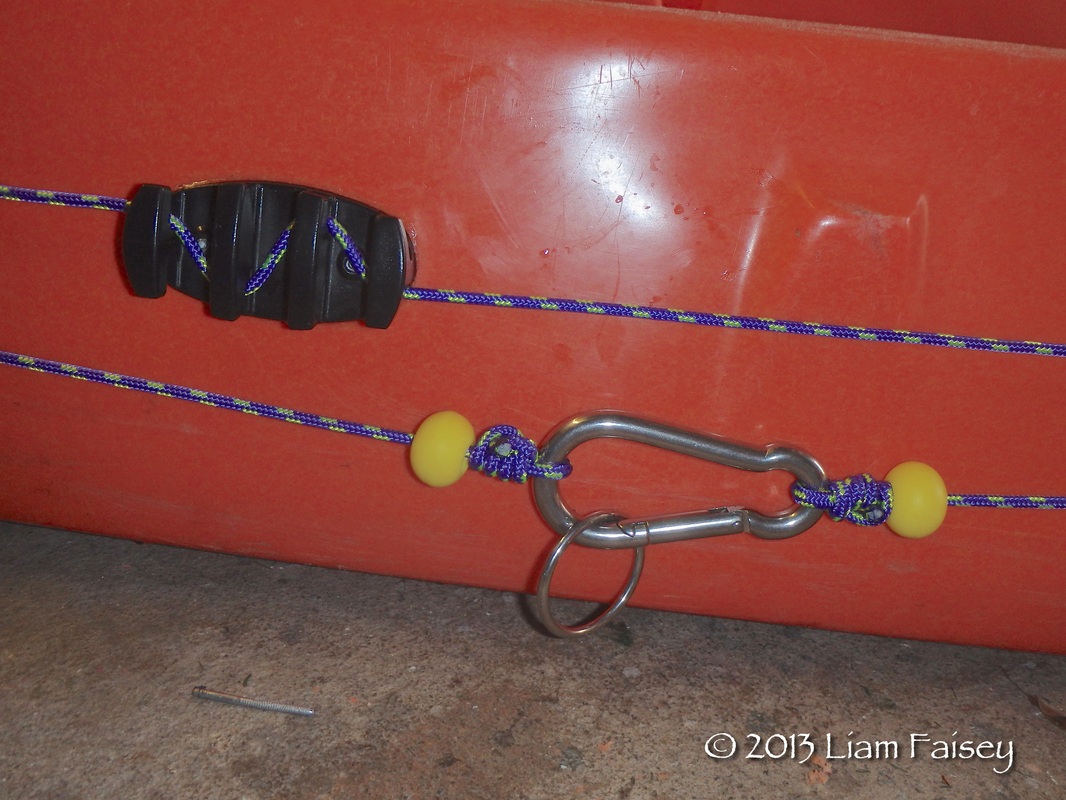
So thats how i have set up the anchor trolley on my Teksport Xplore 330 and the Hobie Outfitter. The anchor trolley cost me approx. £20 to set up but is a worthwhile investment. The Anchor reel and Anchor set up is cover in Part 2. 2016 UpdateOver the past few years i have been tinkering with my anchoring method. I am also no longer using a large carabiner to pass the anchor line through - instead i have opted for a smaller 60mm carabiner. This seems to keep the anchor line closer to the stern when at anchor. A full run through of my latest anchoring set up can be found on the following link: Rigging the RTM Rytmo Angler for Kayak Fishing.
Steve Jory
29/12/2018 19:42:49
Mate, great explaination, just setting mine up and researching as much as possible before drilling holes. Comments are closed.
|
AuthorLiam Faisey 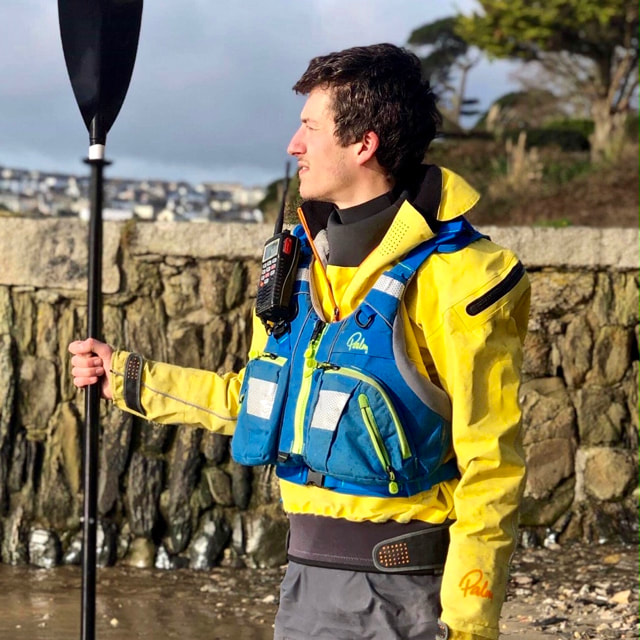
My Tackle Shop
SPONSORS
Proudly associated with

Cornwall's only specialist kayak fishing shop
Archives
March 2023
Categories
All
Add my blog to your feed reader by clicking the button below
Get blog updates via email
Kayak Fishing Videos
Custom feed reader powered by FeedWind
Useful Links
Anglers Afloat
Cornish Shore & Kayak Fisherman Cornwall Canoes Palm Equipment Penzance Kayak Fishing Meet Info Saltwater Kayak Fisherman Magic Seaweed XC Weather 
|

 RSS Feed


|
|
Website powered by pasties and the hope of good weather!
© 2023 Liam Faisey
© 2023 Liam Faisey