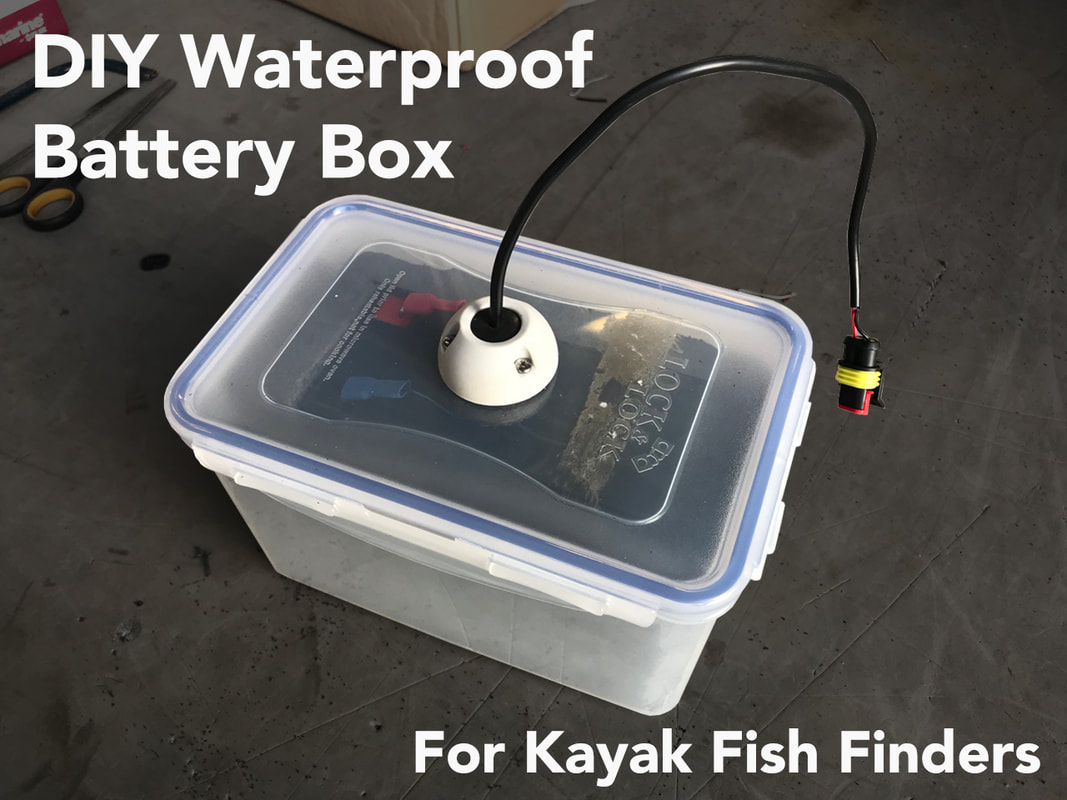
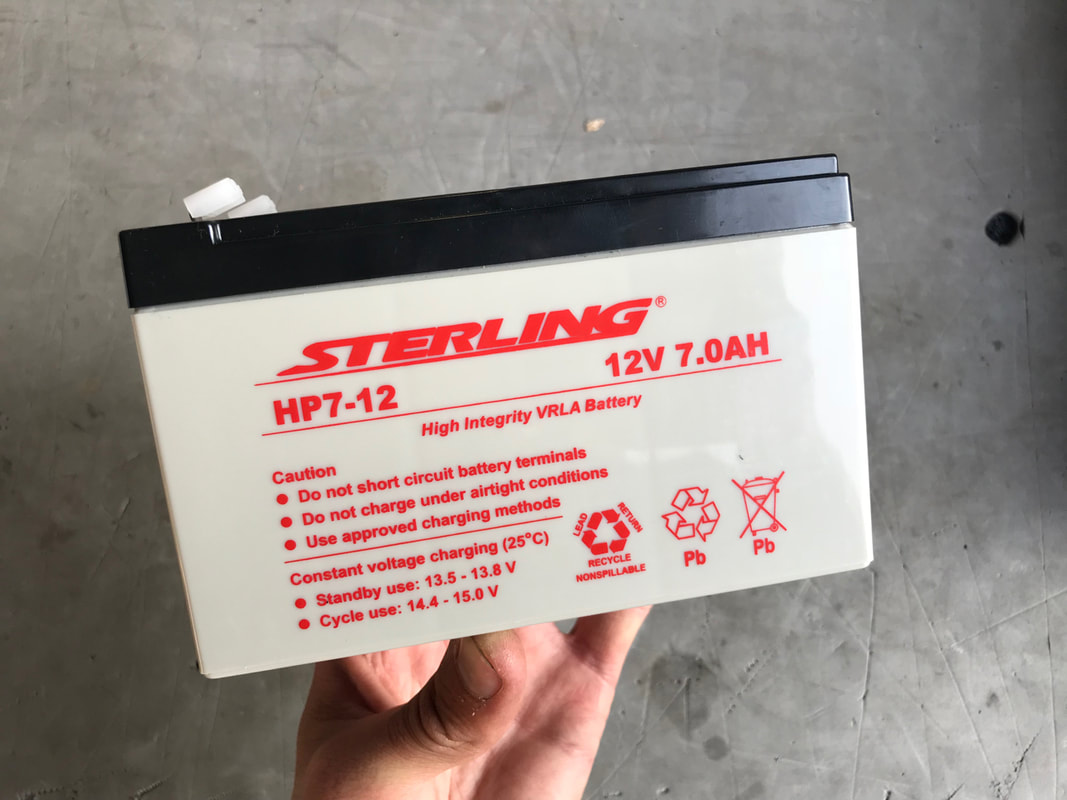
Batteries for Kayak ElectronicsThe water is an unforgiving environment especially for electrical equipment. If you fish on saltwater then you can add the corrosive nature of seawater to the unforgiving mix. Most fish finders are built to withstand splashes and quick dunks, but are rarely included with a power source as they are designed to be wired into the 12V supply found on motor boats. On a kayak this power source will need to be provided in the form of a re-chargeable battery. Most popular are Sealed Lead Acid (SLA) batteries, also known as Valve Regulated Lead Acid (VRLA) batteries. These are relatively inexpensive and readily available from hardware stores or online and come in a range of sizes measured in Amps per Hour (Ah). The higher the Ah, the bigger the battery, the more charge it will hold, and longer run time you will have between recharges. The downside is that the bigger they are the heavier the battery is! Most popular for 3-inch to 5-inch display fish finders is a 7Ah battery and these will usually last a couple of days on the water before they need recharging. Larger screen sizes, touch screen units or side-scan units may require batteries of over 10Ah for a days fishing. A 12V trickle charger is ideal for re-charging these relatively small batteries. Whilst called a sealed battery, these are not entirely waterproof as the terminals are exposed. Getting these wet risks shorting out your electronics, or damaging the terminals through corrosion and salt deposit build up. A waterproof box provides an ideal solution to keeping your power source dry whilst on the water. DIY Waterproof Box for KayaksA waterproof battery box is fairly easy and relatively inexpensive to make. See below for a step-by-step guide on how i make a waterproof battery box for my 12V 7Ah battery which powers my fish finder.
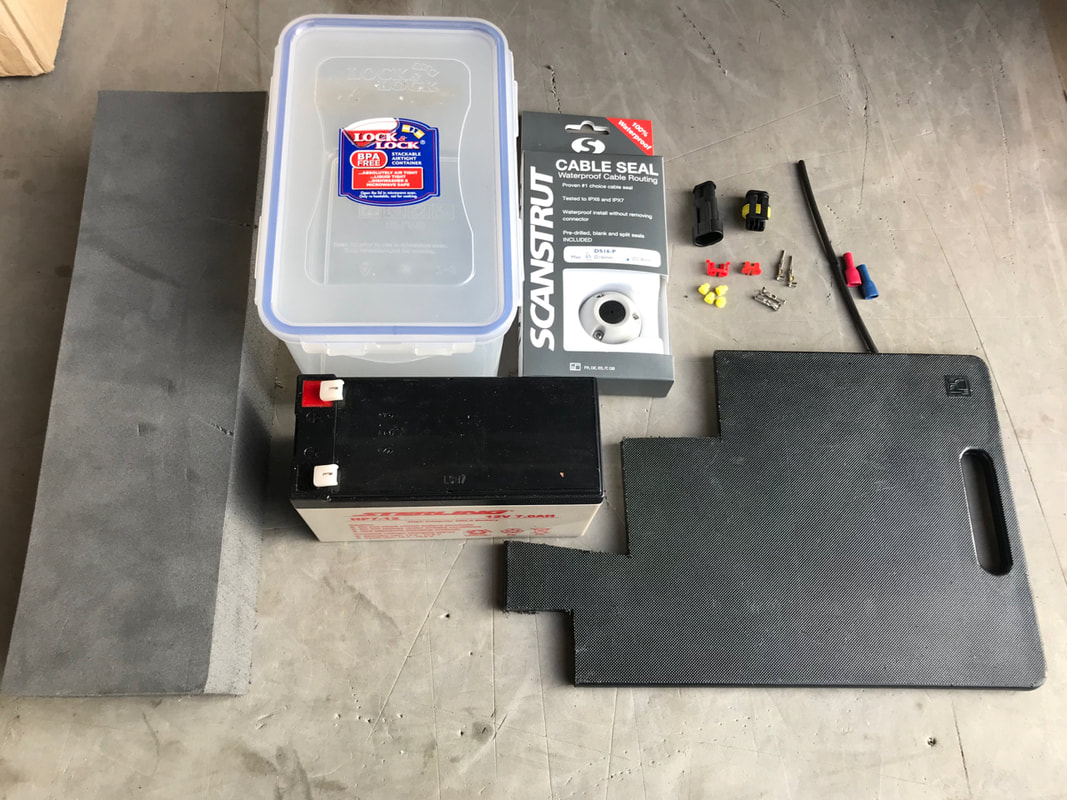
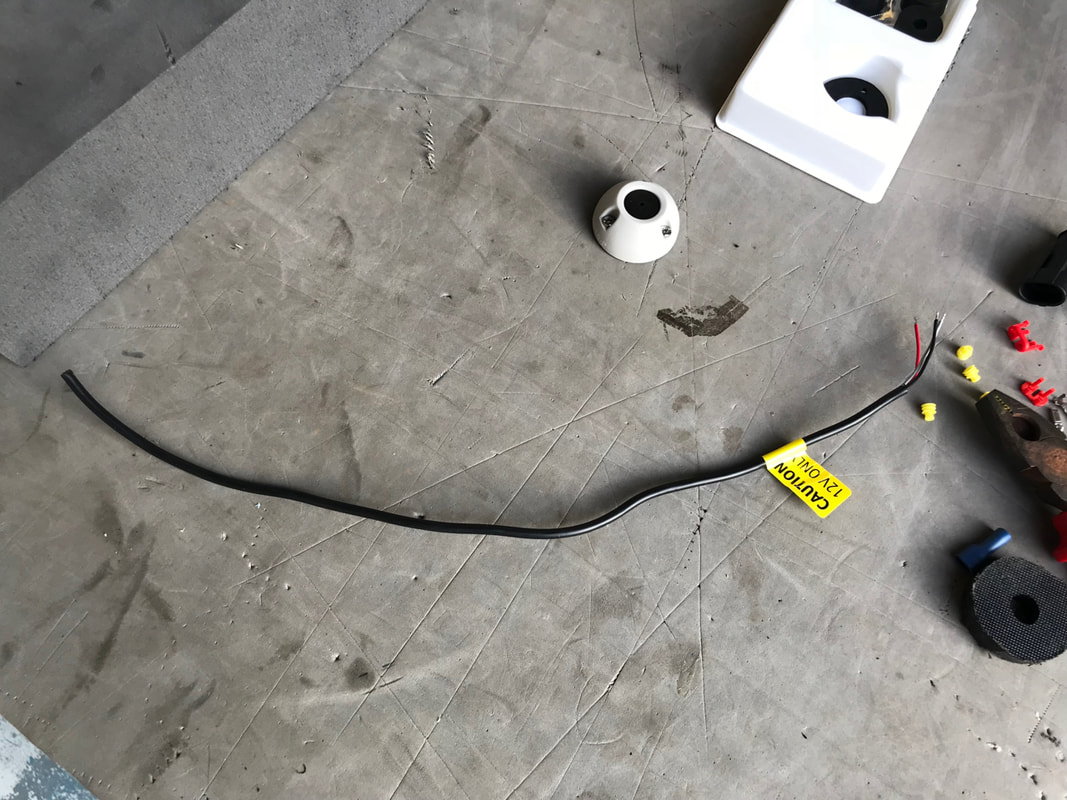
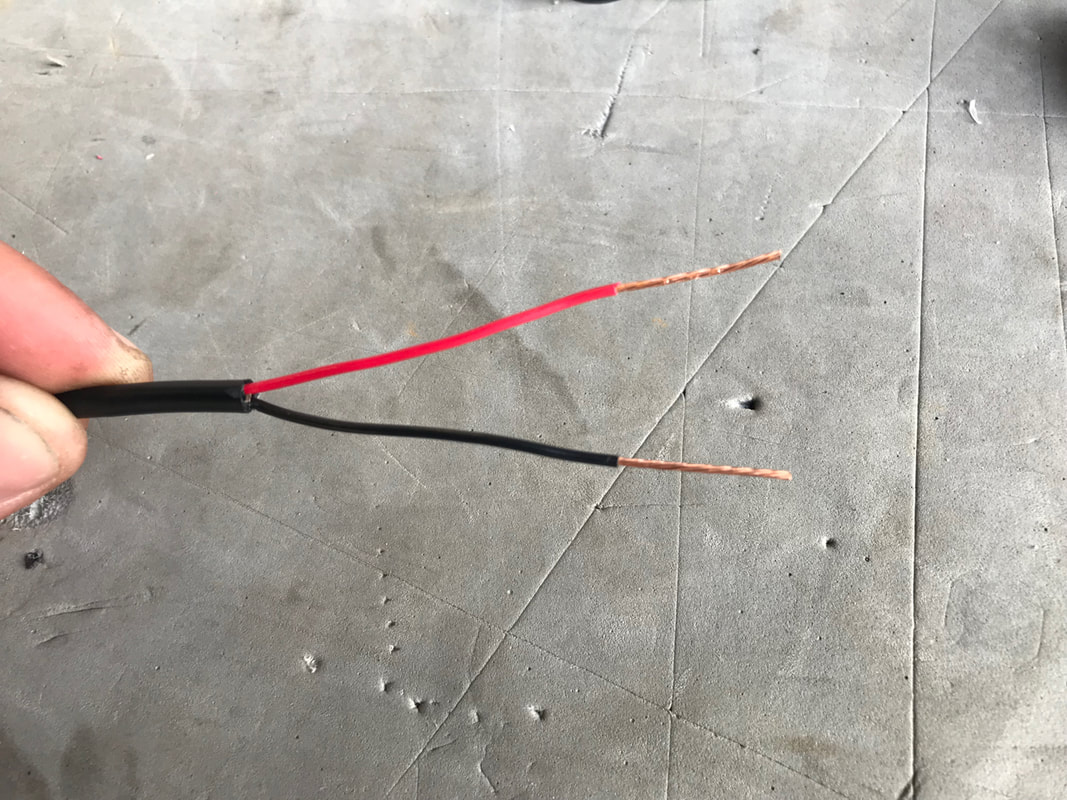
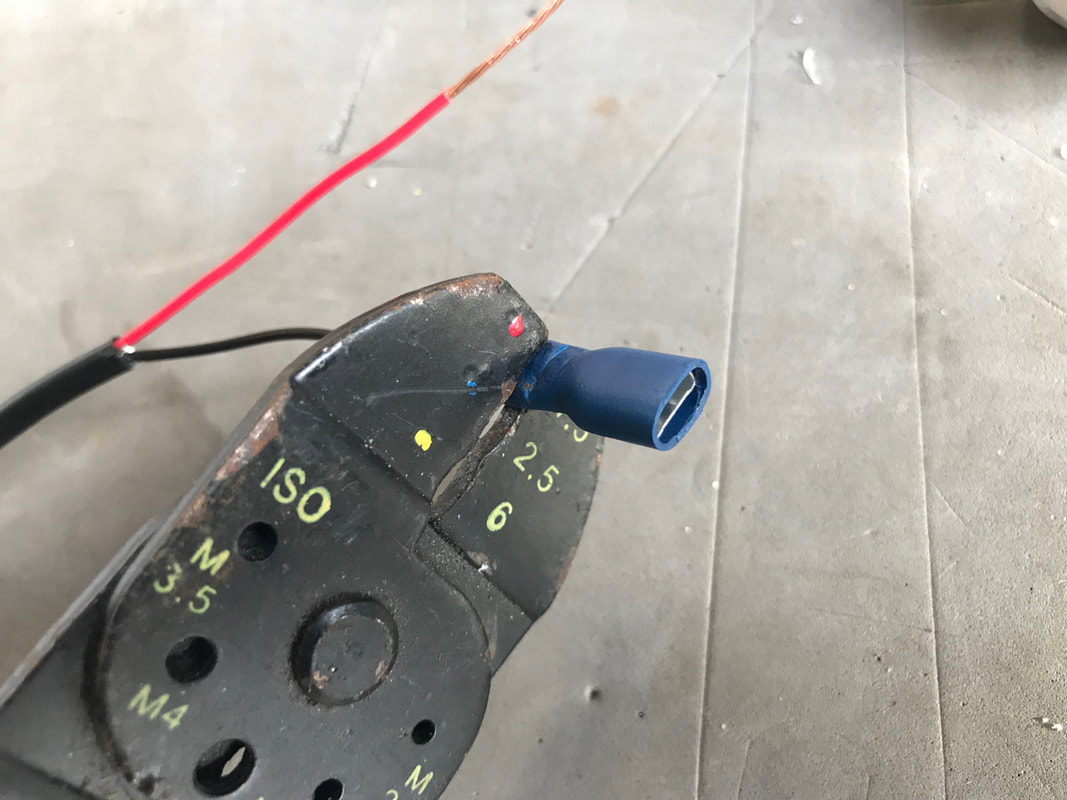
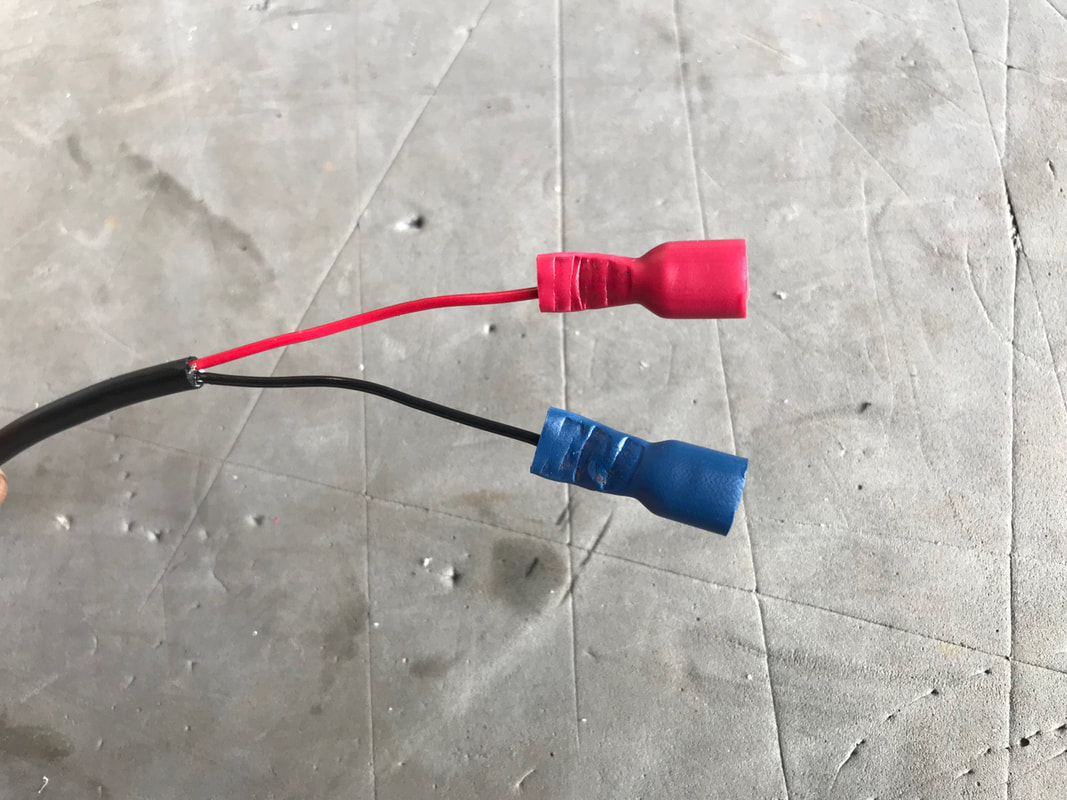
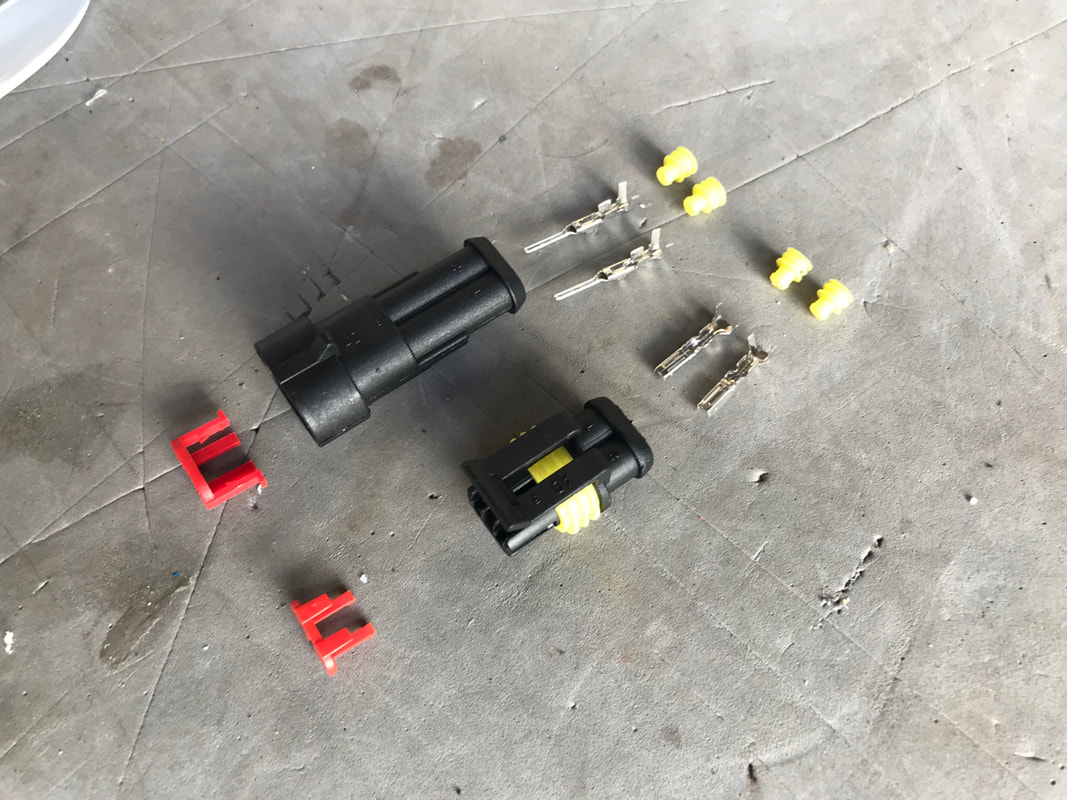
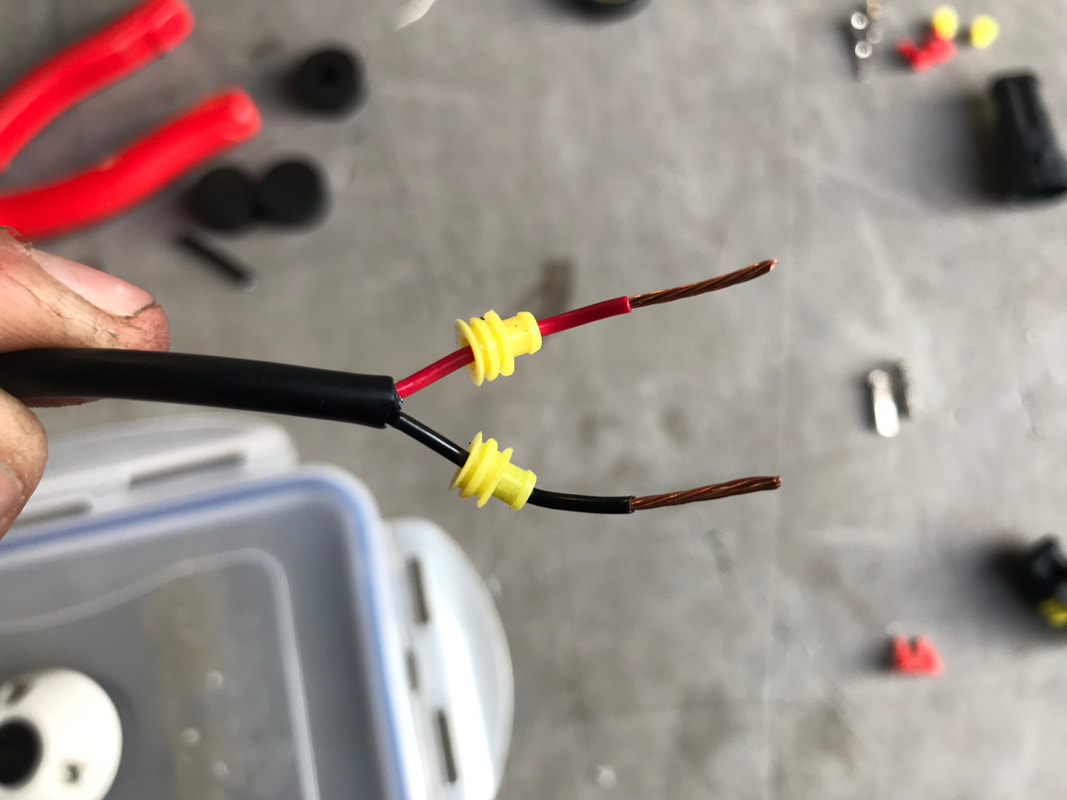
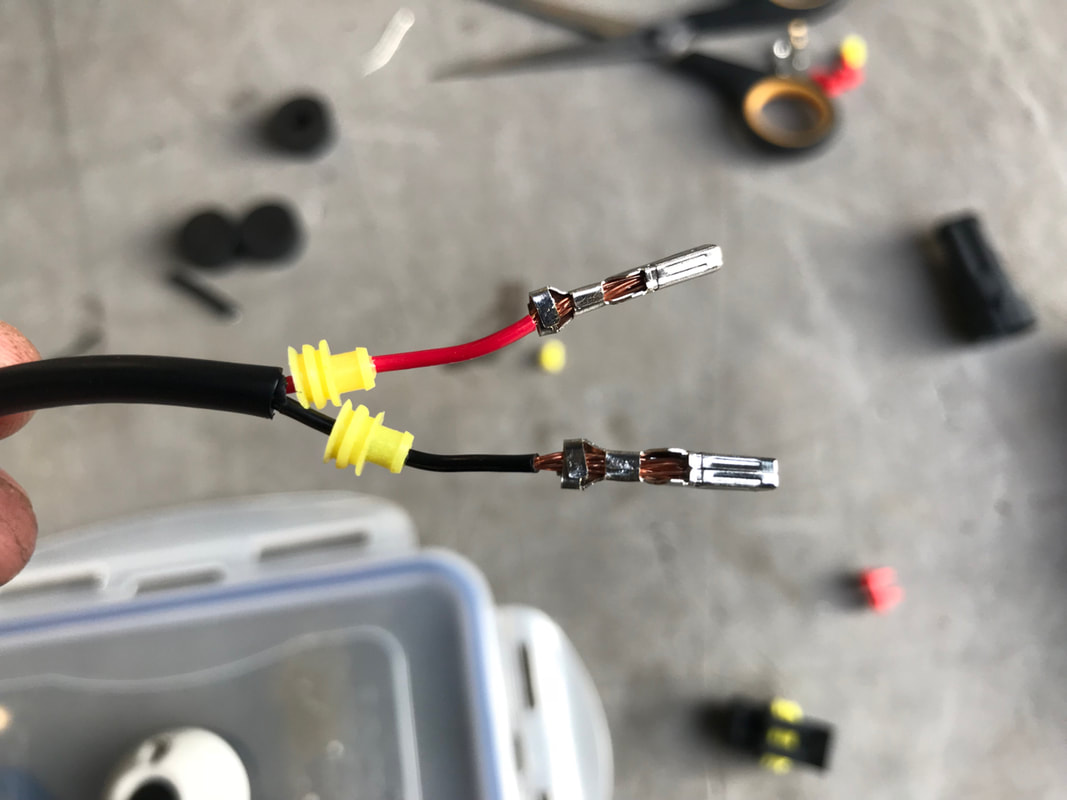
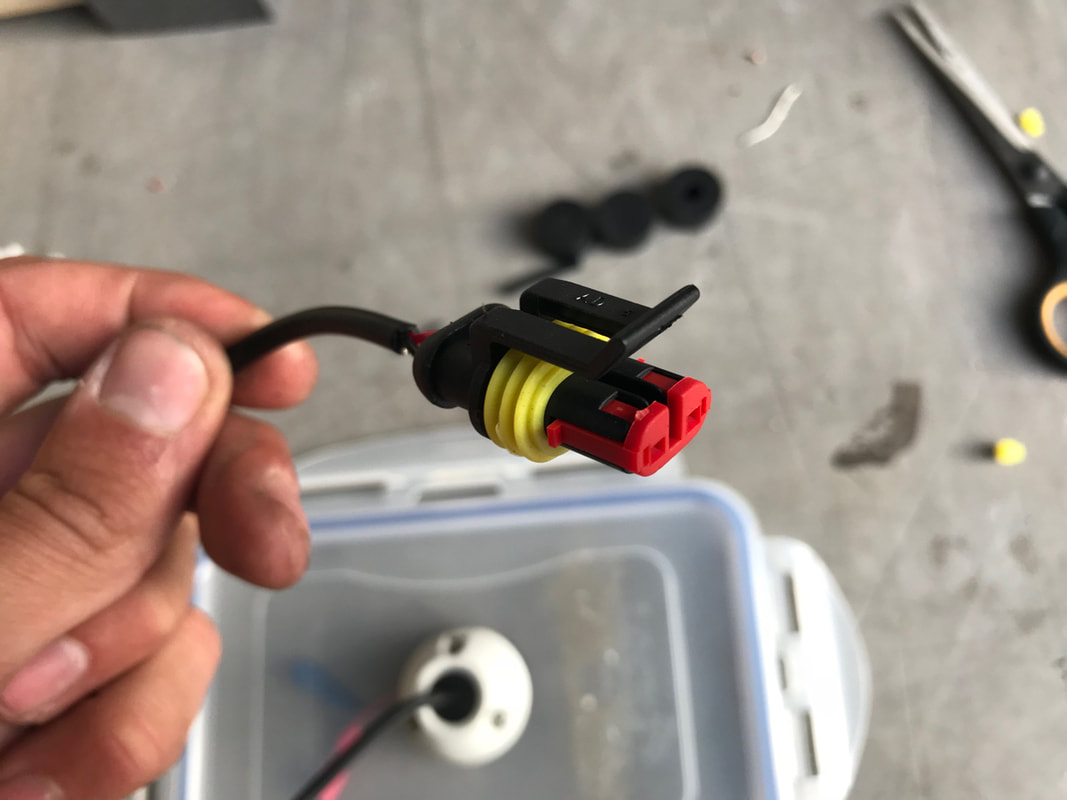
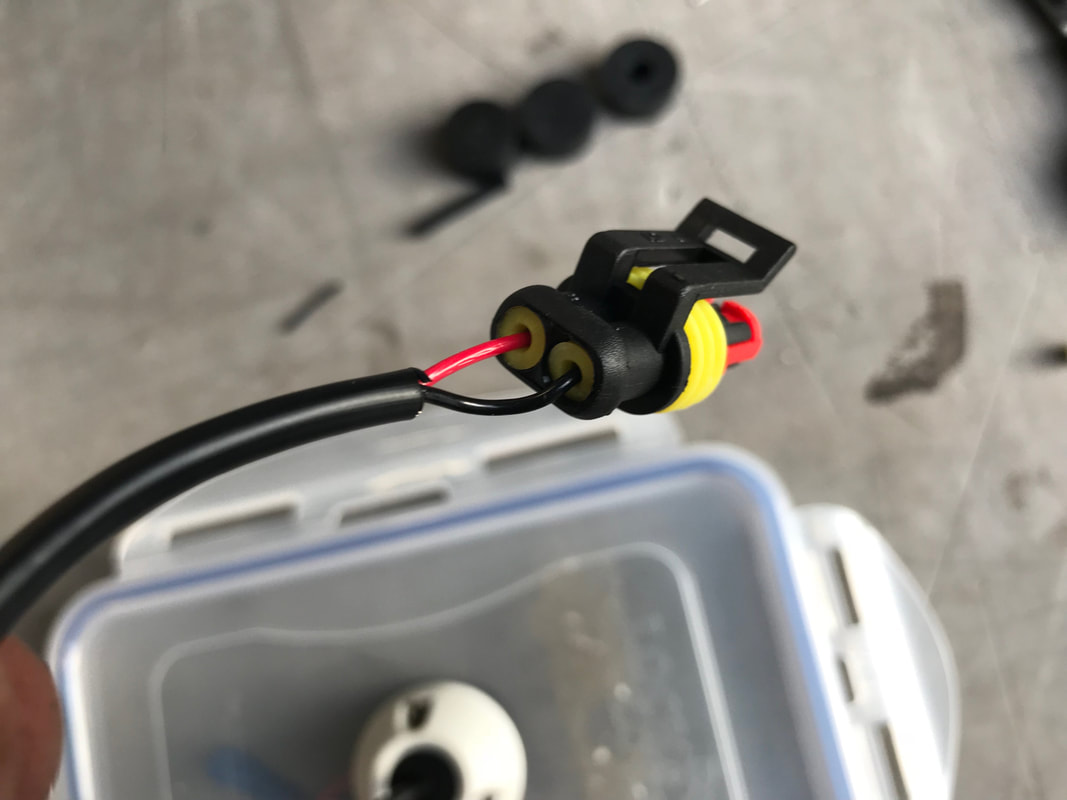
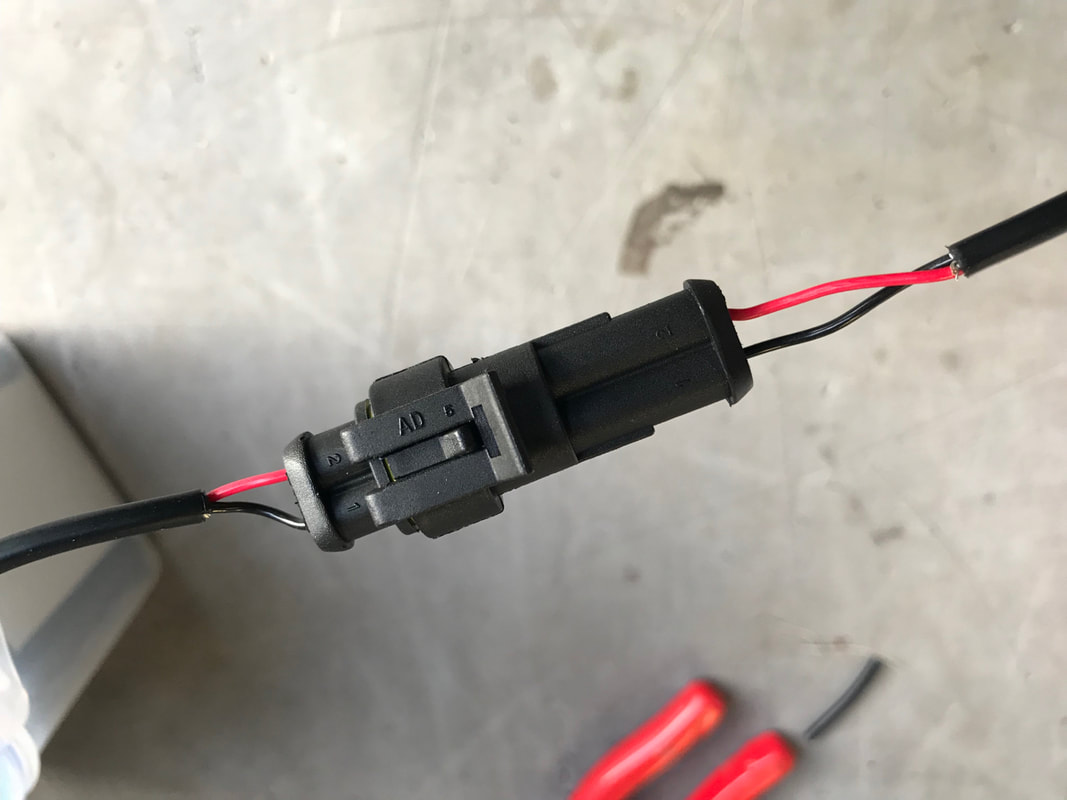
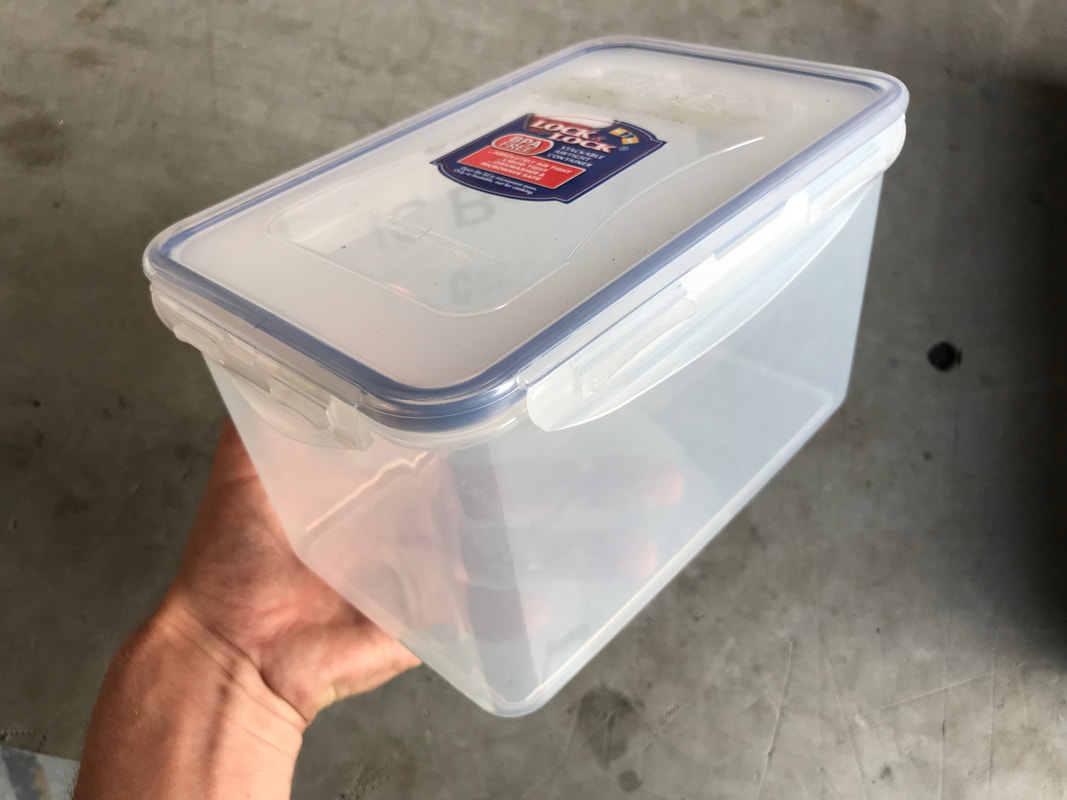
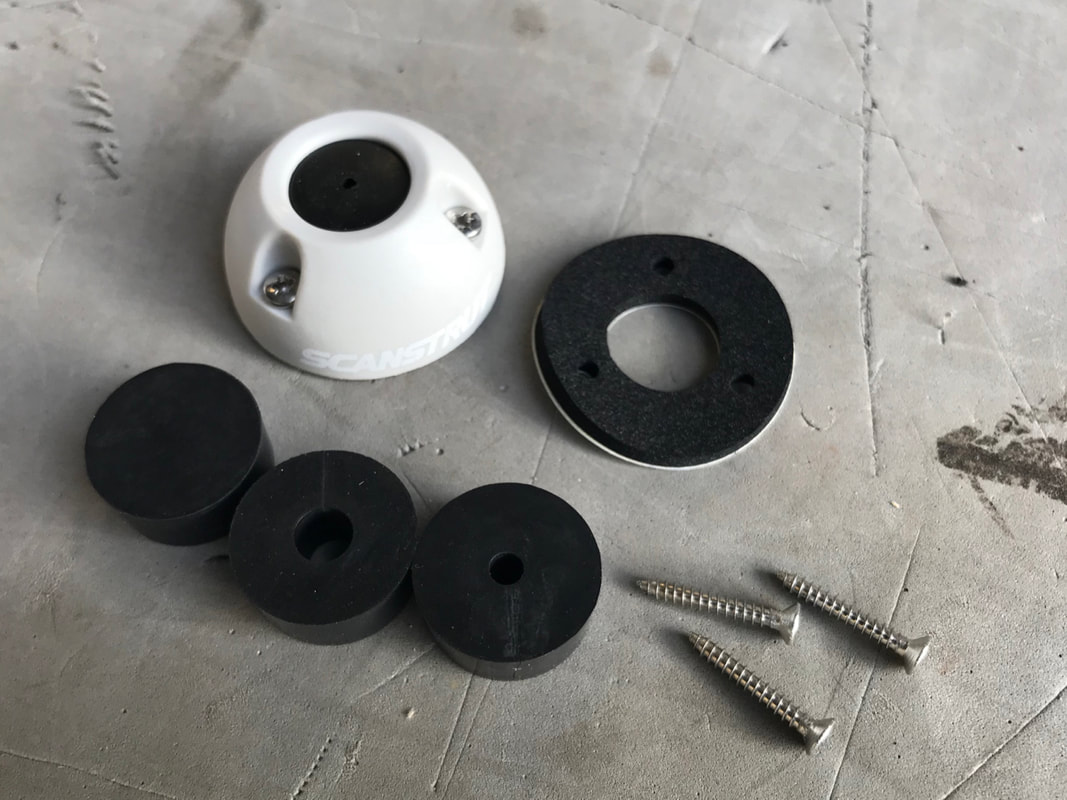
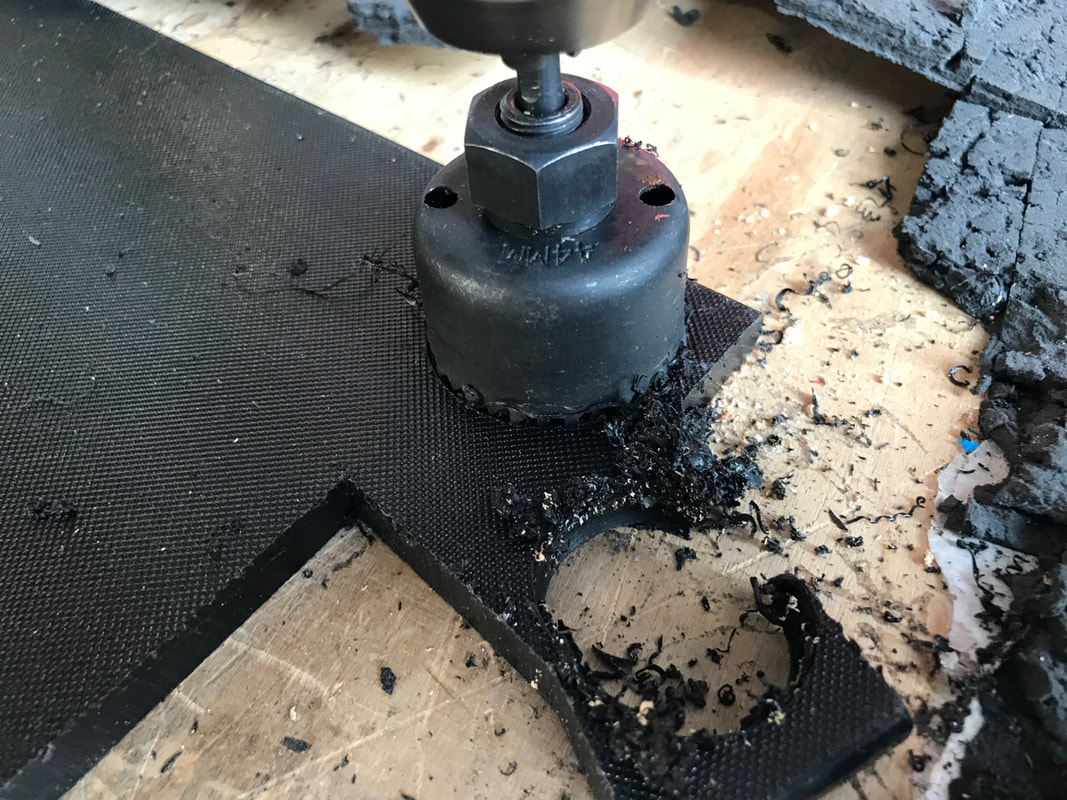
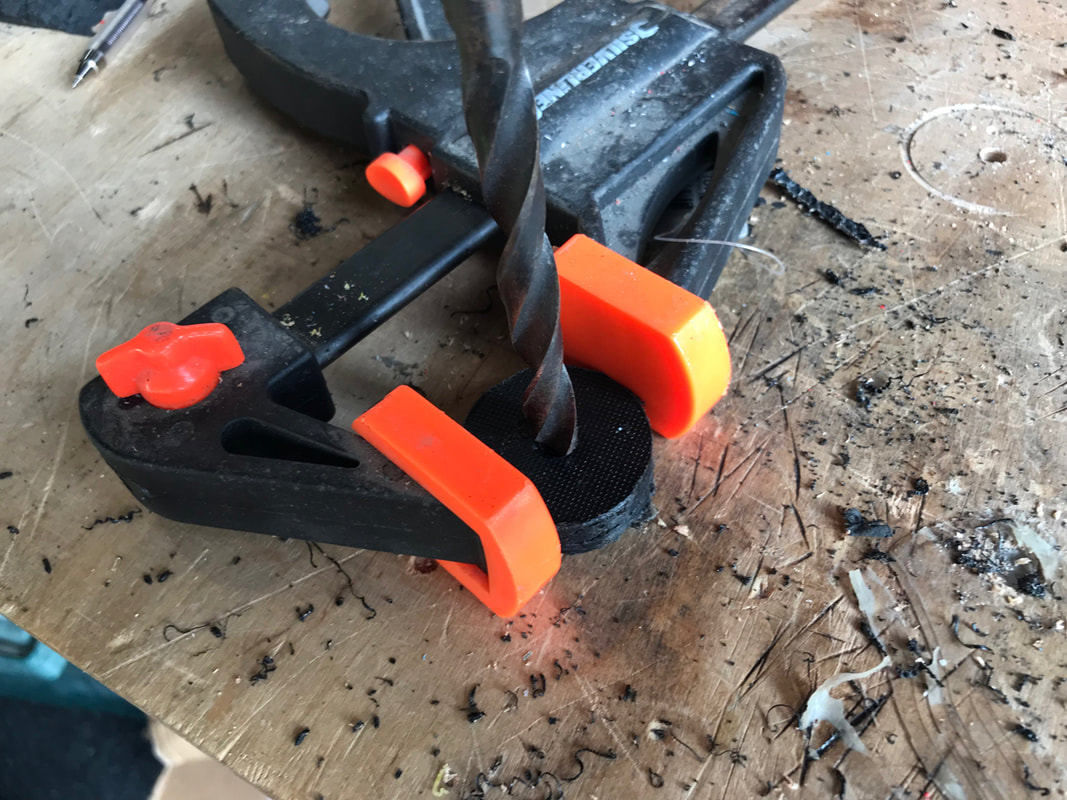
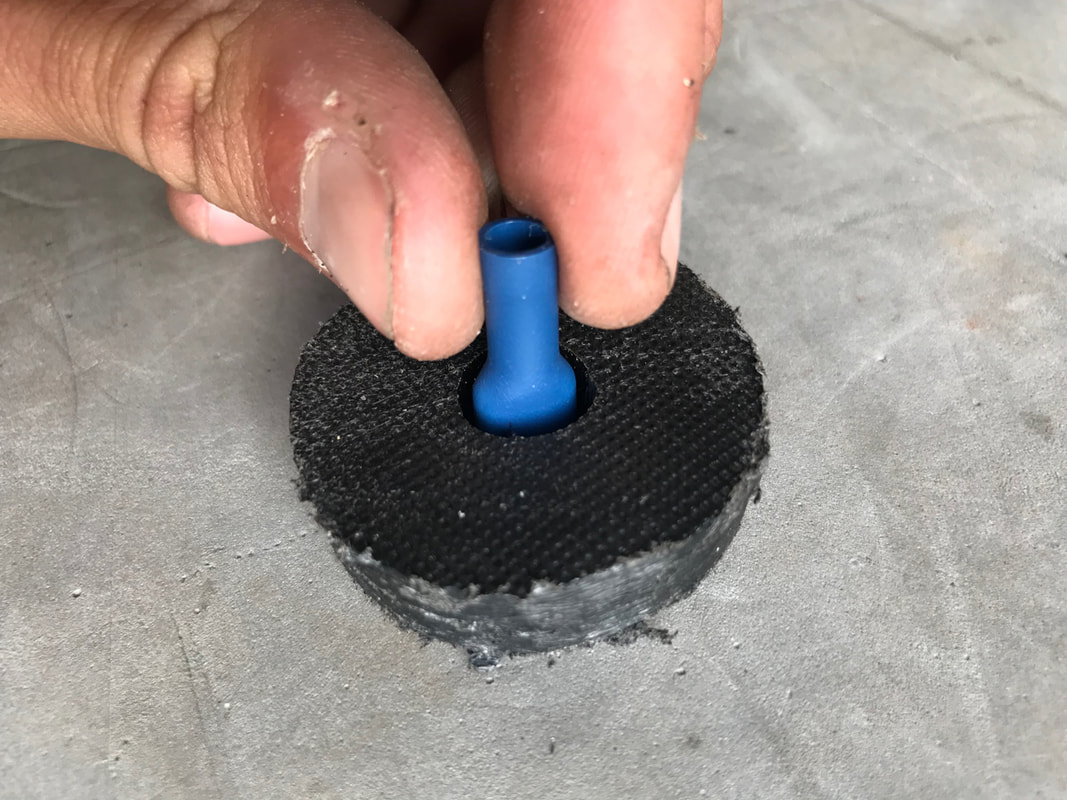
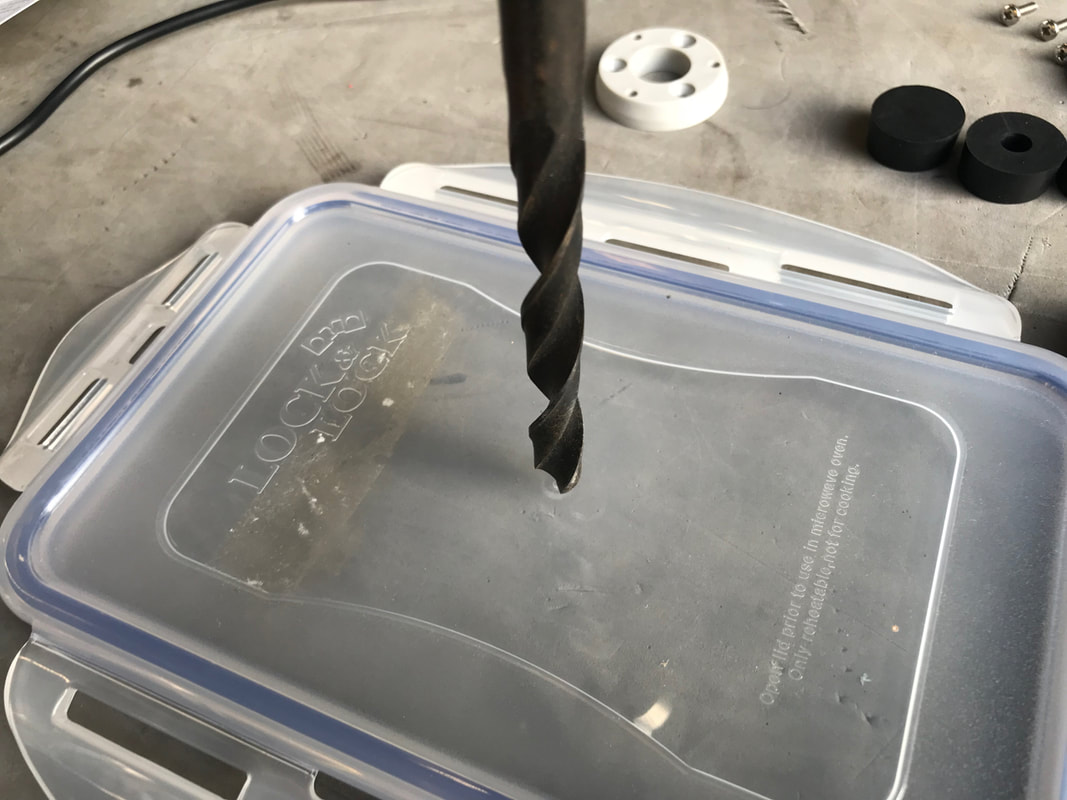
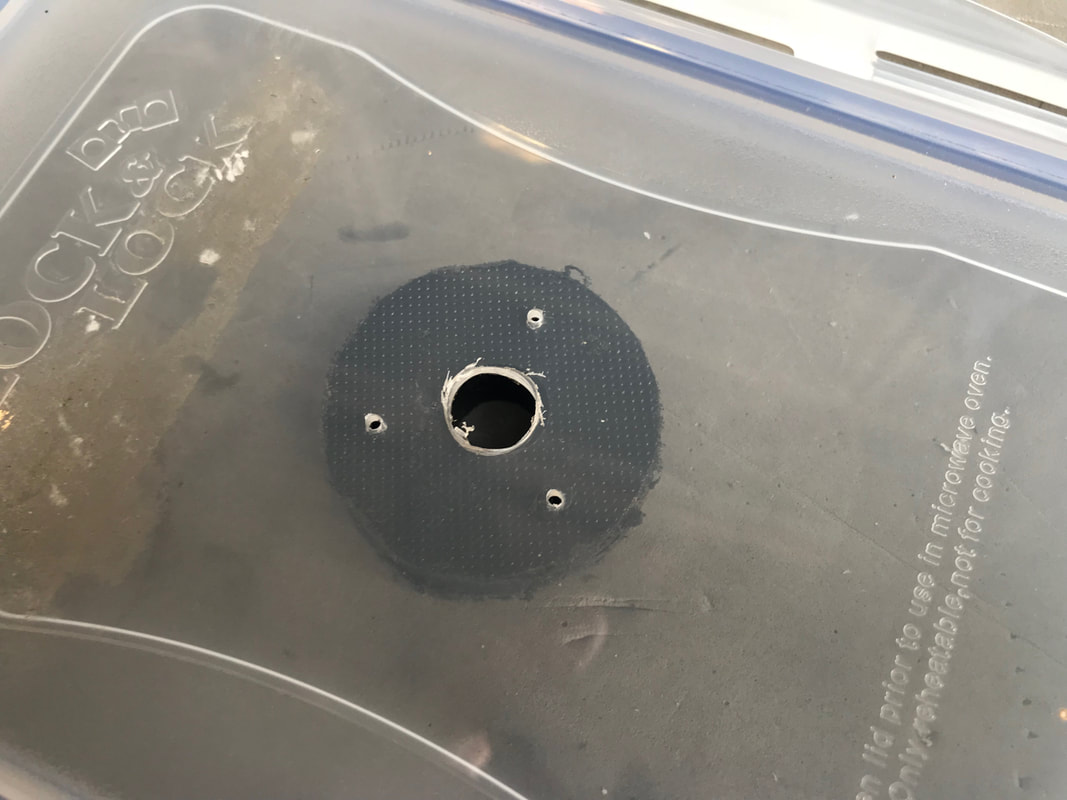
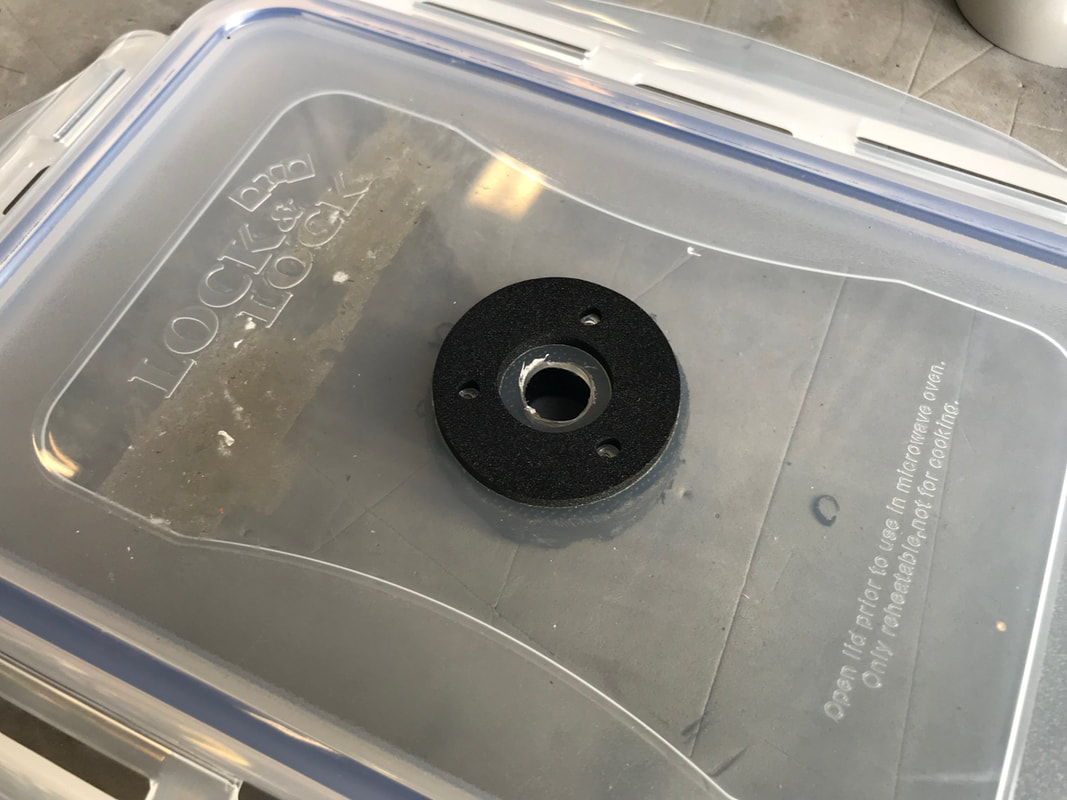
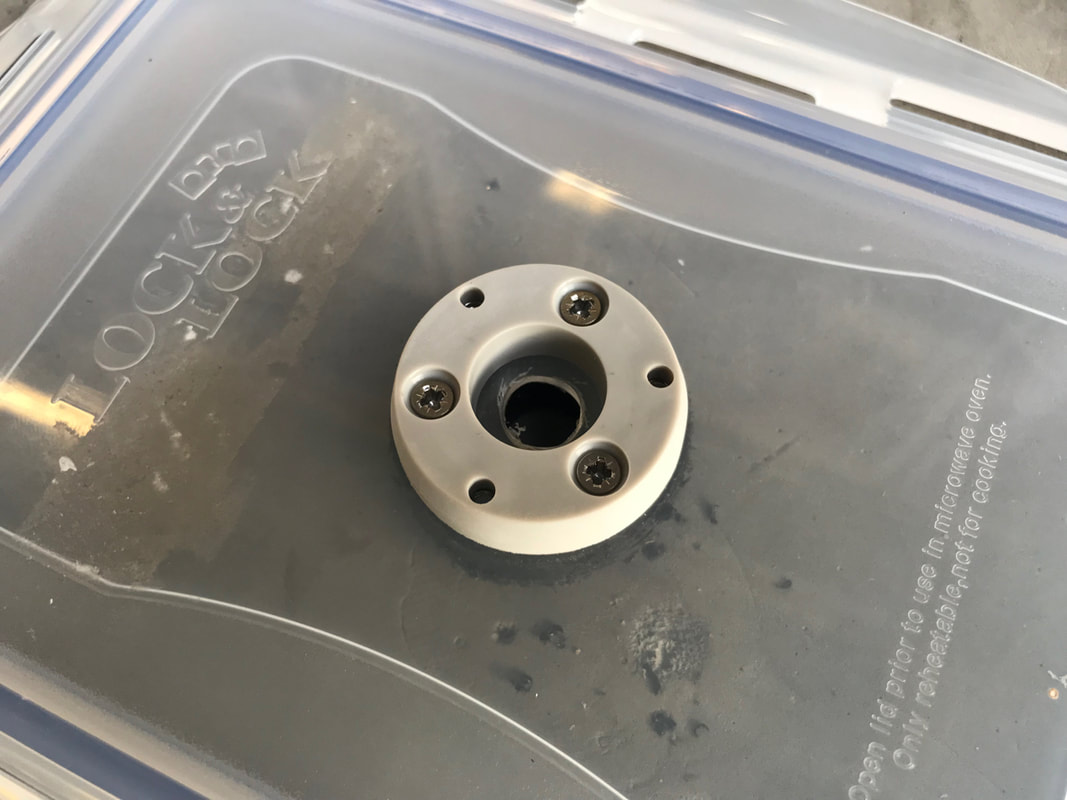
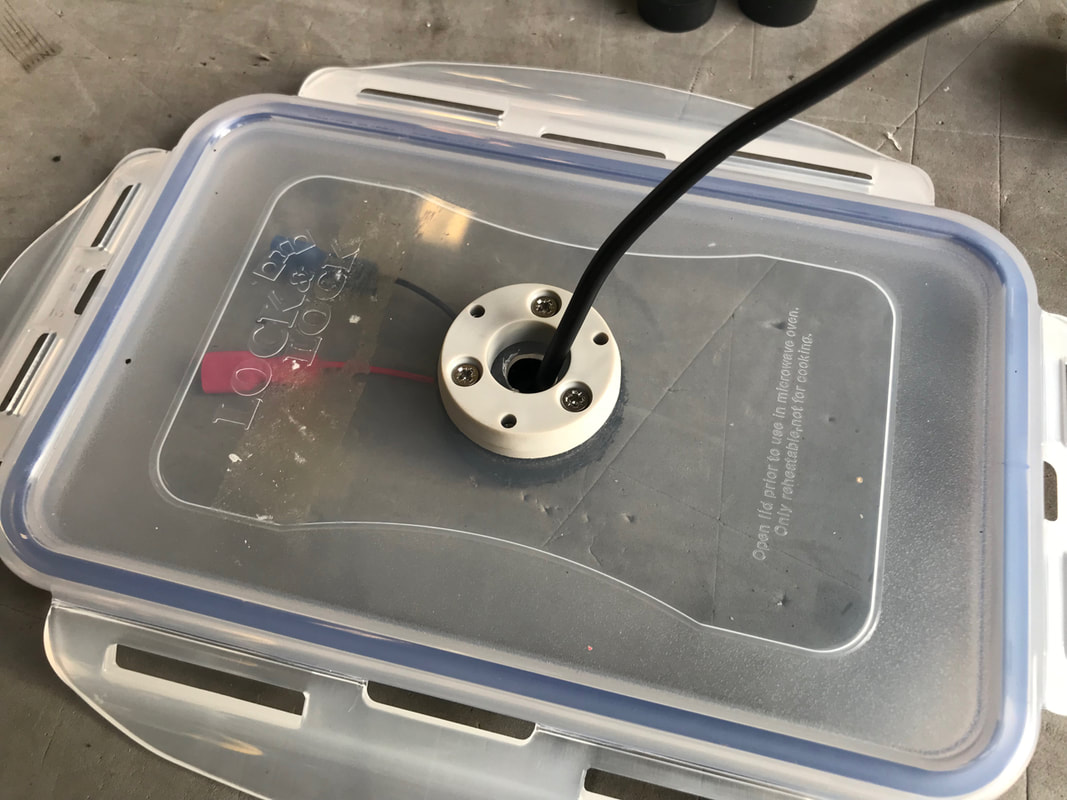
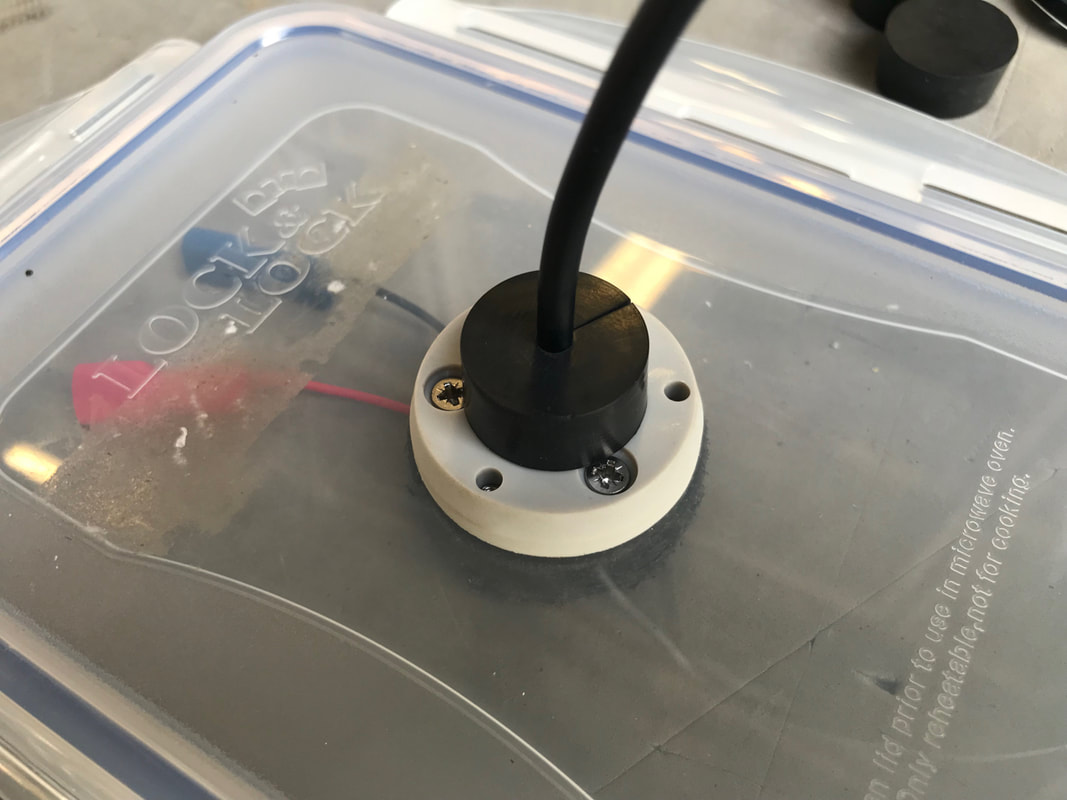
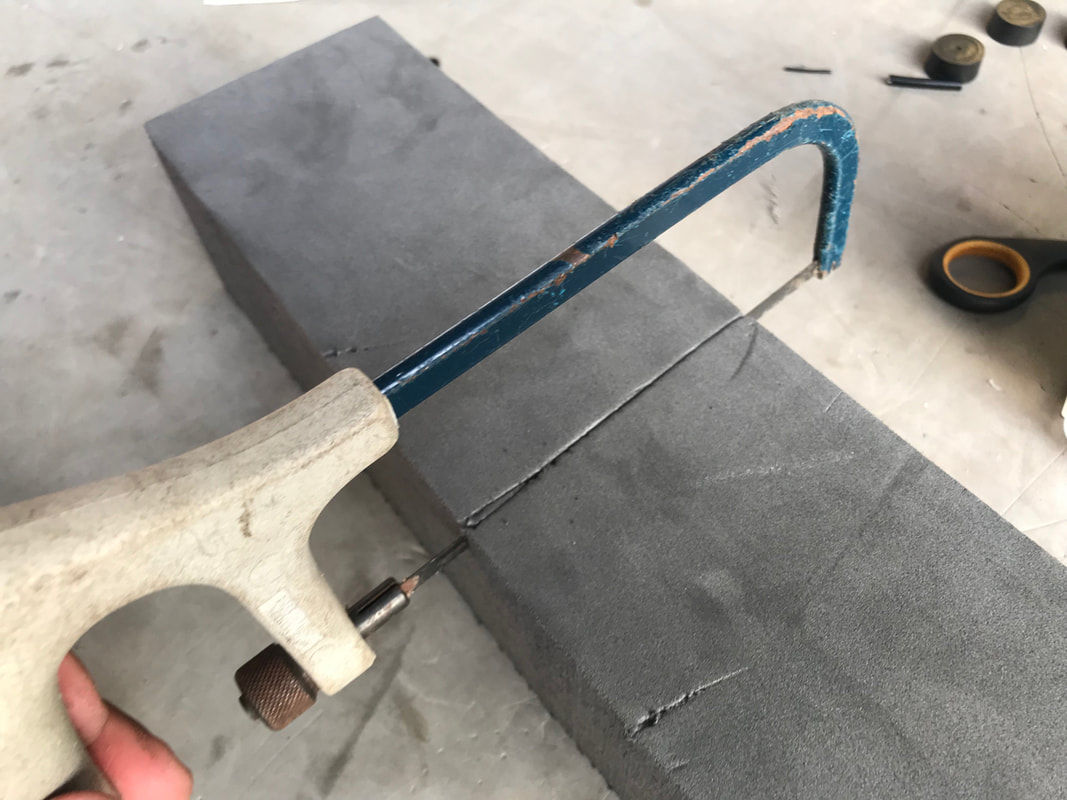
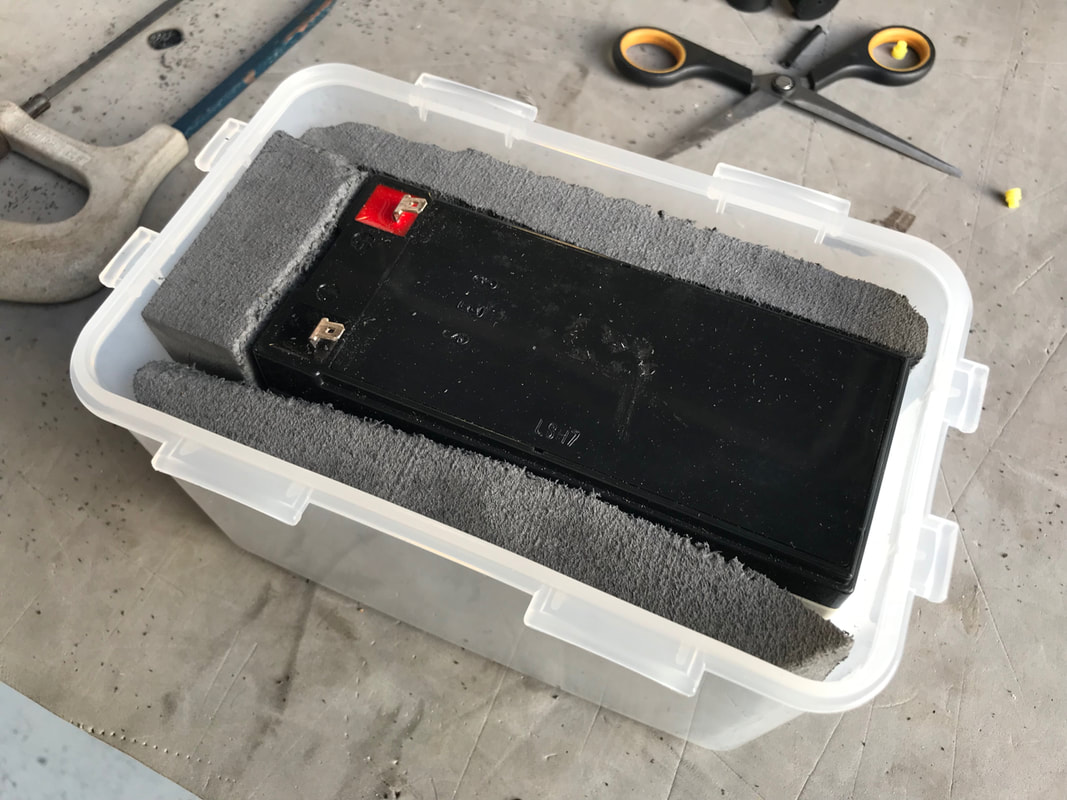
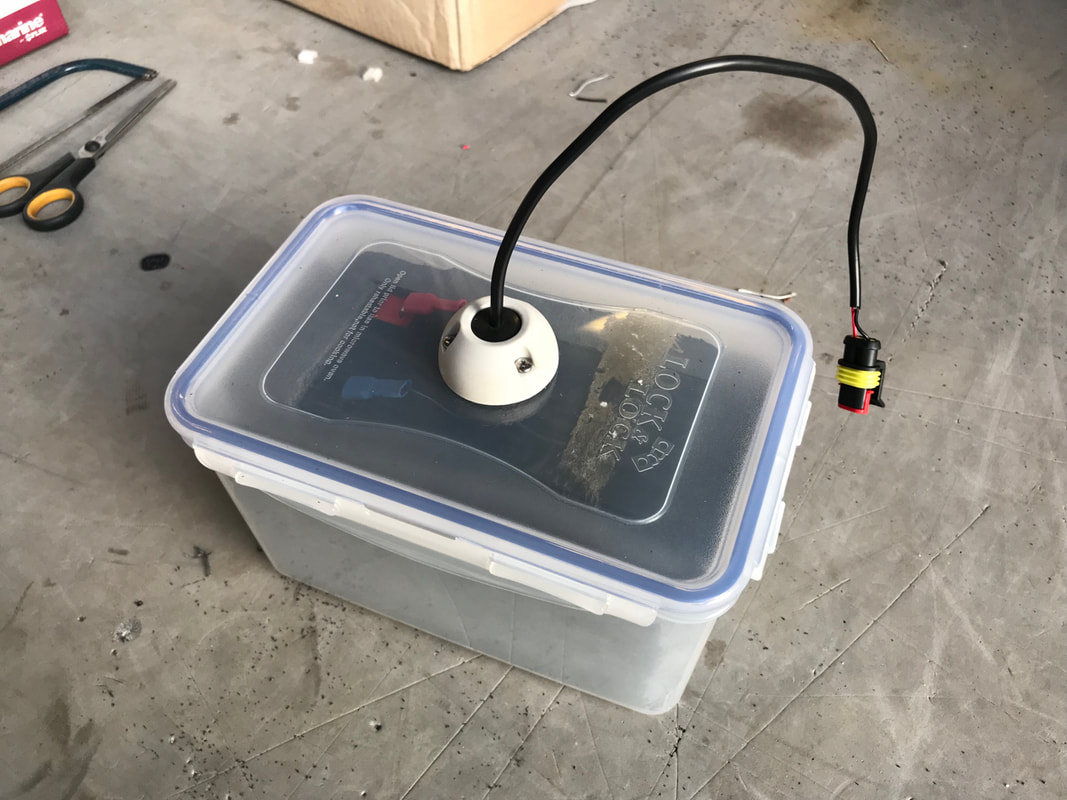
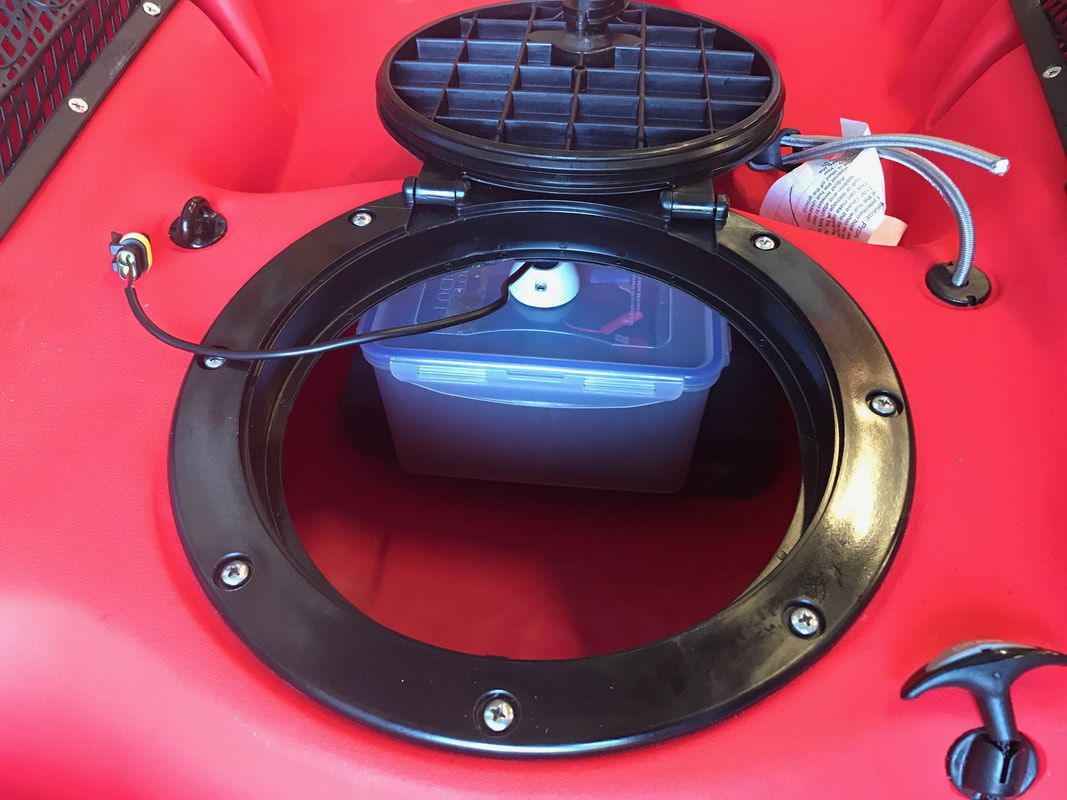
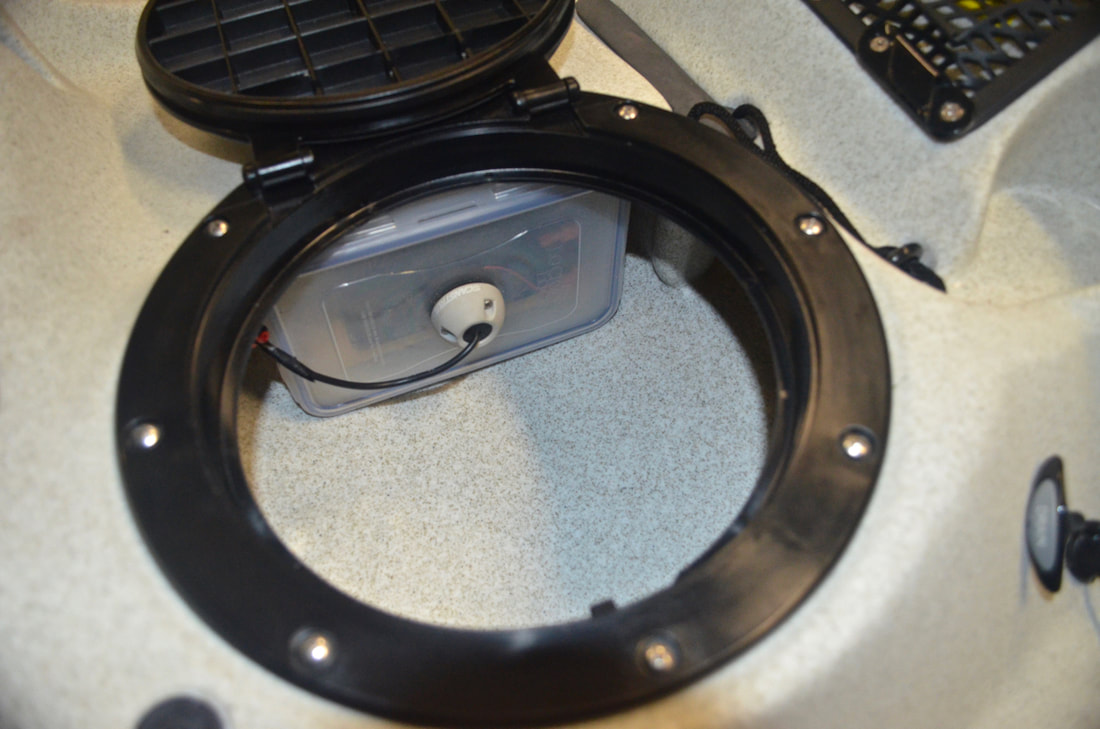
These components are readily available from most chandlery stores, hardware stores or online. Preparing the Power CableTake a 30cm section of power cable from your fish finder cables. Alternatively buy some twin-core 12V power cable of similar diameter from a hardware/electronics store. Strip back 3 or 4 inches of black outer covering from the wire at either end, and then strip about an inch of both the red and black wires to expose the copper core. Either use a wire stripper for this or carefully use a pair of scissors or blade. To one end you need to crimp-on spade end connectors using either a crimping tool or pliers. To the other end of the wire you will need to attach one half of a two-way Superseal connector - i use the male half. The Superseal connectors come in small kits including the male and female sections of the connector, pins and wire seals. These are quite fiddly to assemble and takes a few minutes to do. Firstly, slide a wire seal onto the red and black wires. Next, crimp on the short pins to the wires as below. These pins then slide into the male connector and with a bit of wiggling and patience should click/lock into position. This sometimes take a few attempts. Once in position a red end cap clips over the end of the connector and locks the pins in place. A dab of sealant can be smeared around the wire seals to ensure a fully waterproof install. The same process is carried out with the female connector, with the longer pins, to attach it to the fish finder power cable running to the fish finder unit/connector. Just ensure that the positive (red) and negative (black) wires are inline when the connector is put together! Assembling the Waterproof Cable Seal on the BoxLock and Lock produce a range of waterproof storage tubs which make excellent battery boxes with a little modification. Essentially all we need to do is fit a waterproof cable seal for the wiring to pass through. Scanstrut make the best cable seals and these are 100% waterproof when installed correctly. These cable seals are supplied in kits ready to fit where needed. The kit comprises of a base ring with foam gasket which screw mounts to a surface. A rubber seal and top cover then bolt down to this base ring once fitted. The cable seal is designed to be screw-mounted to a surface, however the lid of the box is only thin, so we need to make a backing plate for the cable seal to screw down into. For this i use a piece of chopping board. Simply cut out a 44mm (or similar size) circle of board using a hole saw. You can then use an 8mm drill bit (or similar size) to drill a central hole in the backing plate for the wiring to pass through. Use a vice or grips to hold the disc whilst drilling. The spade end connectors are 6.3mm so will fit through the 8mm size hole easily. An 8mm hole can now be drilled in the box lid - dead centre for OCD reasons! I also placed the base ring of the cable seal over the hole and drilled some pilot holes for the screws. The foam gasket is sticky backed and can be stuck down in the required position. The base ring can then be screwed down using the supplied self tapping screws. The wiring assembly can now be put in position by passing the spade end connectors through the hole in the lid. Note: Thread on the plastic cable seal cover onto the wire first. The cable seal is supplied with a number of rubber seals, 3 that are pre-drilled with various diameter holes and one blank seal. I used one of the pre-drilled seals which had a 6mm hole, and this was the perfect fit for the power cable on my fish finder. If you cannot find a match from the pre-drilled rubber seals then drill a custom size hole in the blank seal and then cut a slit from the edge to the hole with a blade. Once in the desired position then you can slide down the plastic over and bolt this down onto the base ring. Assembling the Battery BoxPlace the battery inside the box and then cut some sections of high-density (closed cell) foam to pack out the battery box and hold the battery securely in place. Use a hacksaw or serrated blade for this. You can now attach the spade end connectors to the battery terminals and clip down the lid of the box. The waterproof battery box is now complete! This can now be positioned inside the hull or on the deck of the kayak where required, providing a waterproof power solution for you kayak electronics. The box can easily be disconnected from the kayak to take the battery away for re-charging. Likewise, the battery can easily be disconnected from the battery box to connect it to a charger. As the battery is sealed, the box can be laid on its side if required too. Either use some double-sided velcro or some bungee cord to secure the box in place inside the kayak or on the deck. I have been using one of these battery boxes for the last 3 years and it is still going strong. Including a battery, this waterproof powering solution costs around £35. An easy to make and inexpensive way to ensure your power source stays dry during use!
Any questions on this build, feel free to ask below in the comments.
Nick
13/8/2018 20:45:34
Really useful article Liam. I built my box today. Those Superseal connectors are super fiddly, I had a nightmare with one side.
We are professional manufacturer for rechargeable Litium-Ion battery and we have UN38.3, CE, ROHS, UL, MA, SGS,ISO9001 certificates.We supply ideal lithium battery for lead battery replacement, electric tools,medical equipments,ebikes,wheelchairs, marine and fishing,scooter,segway,led light,emergency light,robots,golf trolley,off grid power storage,UPS,solar light,toys,ect which need reliable power.
Davide Schachter
23/4/2019 19:45:37
First off thank you so much for sharing this information it has been super useful as I had no idea how to make a watertight case for my battery. I followed your instructions literally and everything came great except for a couple of things that made me think that something was wrong with your instructions and in particularly the fact that you and some other guy found kinda difficult putting the connectors back together so I've been searching the web and found a couple of very useful youtube tutorial about the superseal water proof connectors. In these tutorial is explained how to use these things and it was actually a piece of cake. What caught my attention was that the yellow wire seals should be crimped and not left free to move that is probably why you found very difficult to put the pins back inside the connector. Also the female connector has a red piece of plastic inside which is where you put the pins through well that particularly piece is not supposed to be taken apart the way it's shown in your pictures it should be left the way it is inside the female connector than you just simply insert the pins through them. This is also something that made me scratch my head because I didn't know how to take this piece of plastic apart without damaging the female connector. So my comment is not meant to criticize but to just redirect, at some point, people to these youtube tutorial instead of struggling to figure things out. Thanks again! 27/4/2019 12:49:32
Setting up the battery,especially if you're not good with the electronics its become indeed trouble, Thanks for sharing the guide, It would be really useful!
Alex
14/3/2021 11:34:30
Hi Liam, great article. I've just purchased a Profish 400 with the tackle pod - the original version which doesn't have the built-in transducer pocket.
Ben haigh
15/5/2021 21:09:13
Hi brilliant thread and such a great idea! went out today and quite possibly pushed the share prices of Tupperware through the roof but finally found a suitable watertight box in Tesco’s of all places! (Forgot to take a tape measure with me hence why I bought maybe 12 different boxes!!) 8/10/2021 14:00:30
Excellent article! Your post is essential today. Thanks for sharing, by the way.If you are looking for coupon codes and deals just visit coupon plus deals dot com
marco
25/2/2022 08:43:54
big thanks from the continent. Comments are closed.
|
AuthorLiam Faisey My Tackle ShopSPONSORSProudly associated with
Cornwall's only specialist kayak fishing shop
Archives
March 2023
Categories
All
Add my blog to your feed reader by clicking the button below
Get blog updates via email
Kayak Fishing VideosCustom feed reader powered by FeedWind
Useful Links
Anglers Afloat
Cornish Shore & Kayak Fisherman Cornwall Canoes Palm Equipment Penzance Kayak Fishing Meet Info Saltwater Kayak Fisherman Magic Seaweed XC Weather |
|
Website powered by pasties and the hope of good weather!
© 2023 Liam Faisey
© 2023 Liam Faisey







 RSS Feed


