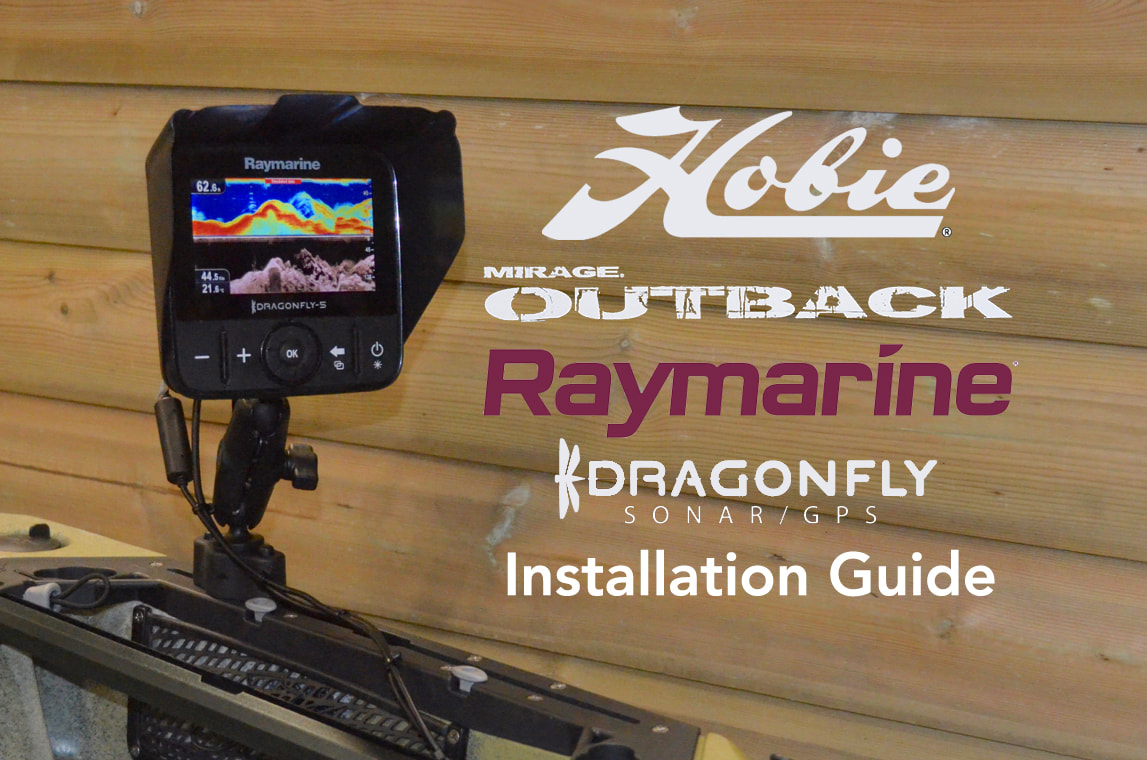
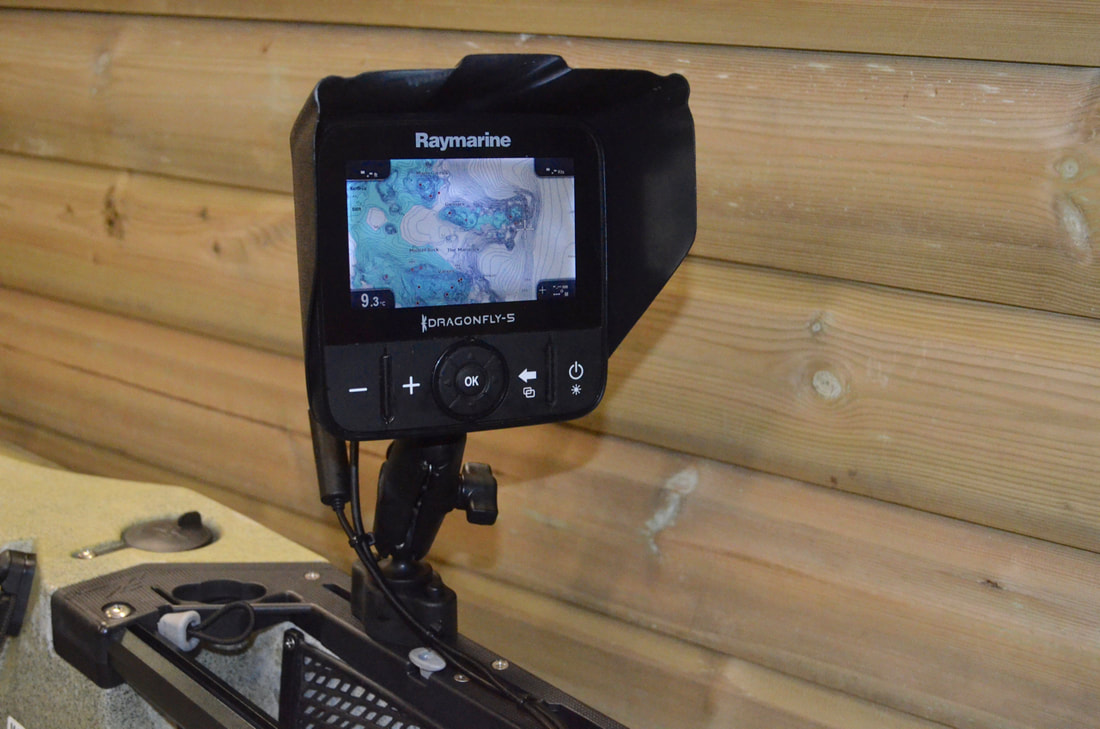
The Raymarine Dragonfly 5 ProThe Raymarine Dragonfly 5 Pro is a fish finder and GPS chart plotter combo unit. The display is bright and clear, and the unit offers both CHIRP (Compressed High-Intensity Radiated Pulse) Sonar and DownVision Imaging. CHIRP sonar uses a pulse of sonar at a range of frequencies to provide greater resolution of objects and the seabed beneath the kayak. It provides greater target separation meaning that it is easier to distinguish between individual fish, between large fish and baitfish and between fish and the seabed. DownVision Imaging uses higher frequencies to provide greater resolution of the seabed structure. When used in combination, and viewed side-by-side on the screen you can get a very good idea of what is going on beneath the kayak. The Dragonfly 5 Pro offers full GPS Chart Plotter functionality allowing you to plot productive marks and drifts, or mark fishy-looking features so that you can return time and time again. GPS provides your vessel speed, vessel heading and allows you to set routes to and from waypoints for easy navigation. As standard you get a very simple land and sea base map, however the unit has a MicroSD card slot to allow you to upgrade the base maps to high detail seabed bathymetry maps. I use Navionics+ charts which offers seabed 'Sonar Charts' at 0.5m contour intervals for incredible detail of the ground beneath the surface. This makes navigation to reefs, drop-offs, sandbanks, holes and other underwater features very easy! The Dragonfly 5 Pro has proved to be an invaluable asset on my fishing kayaks providing me with detailed info on the world beneath my kayak. One Fish Finder, Two KayaksI have been using a Raymarine 5-Pro for several years now on my Hobie Revolution 16 and other kayaks. I now have the new Hobie Mirage Outback 2019 and it was time to install the Dragonfly to my new kayak. I would still be using the Revolution 16 so needed to be able to use the unit on both kayaks. The main head unit can be easily transferred between kayaks, however the transducer and power cable are fitted to my Revolution 16 using the Lowrance-Ready system - details of which are outlined in a previous blog post. In order to use my Dragonfly on the Outback i had to purchase a separate transducer with power cable. Components for Installation
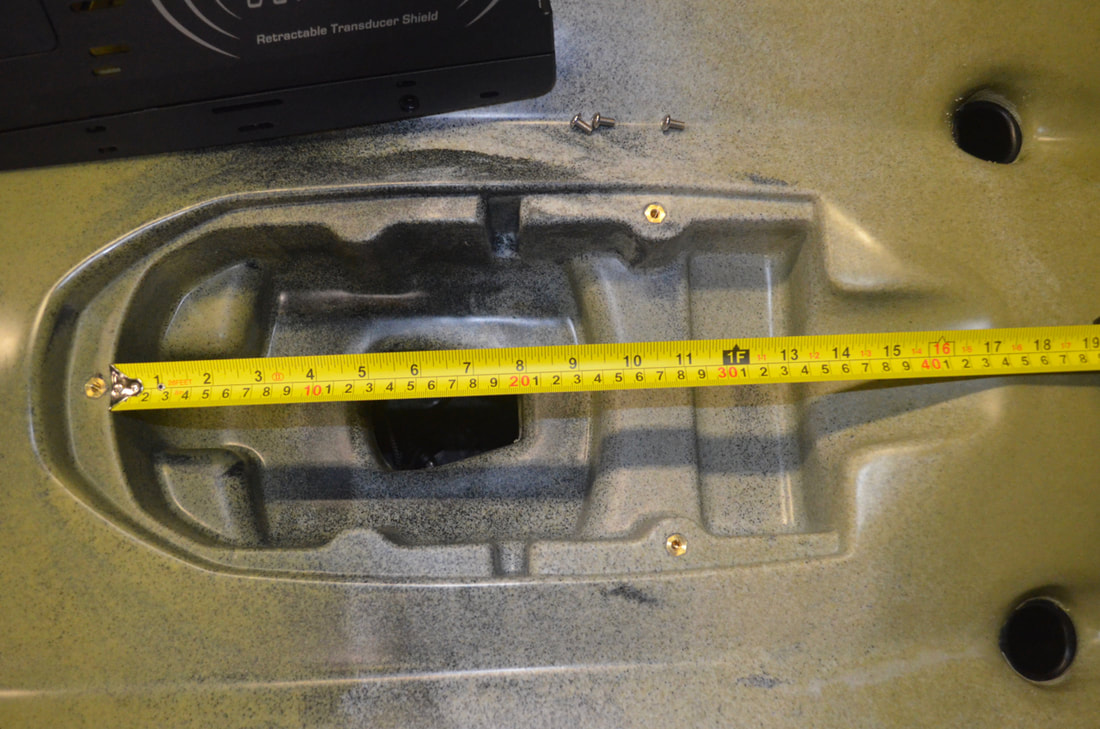
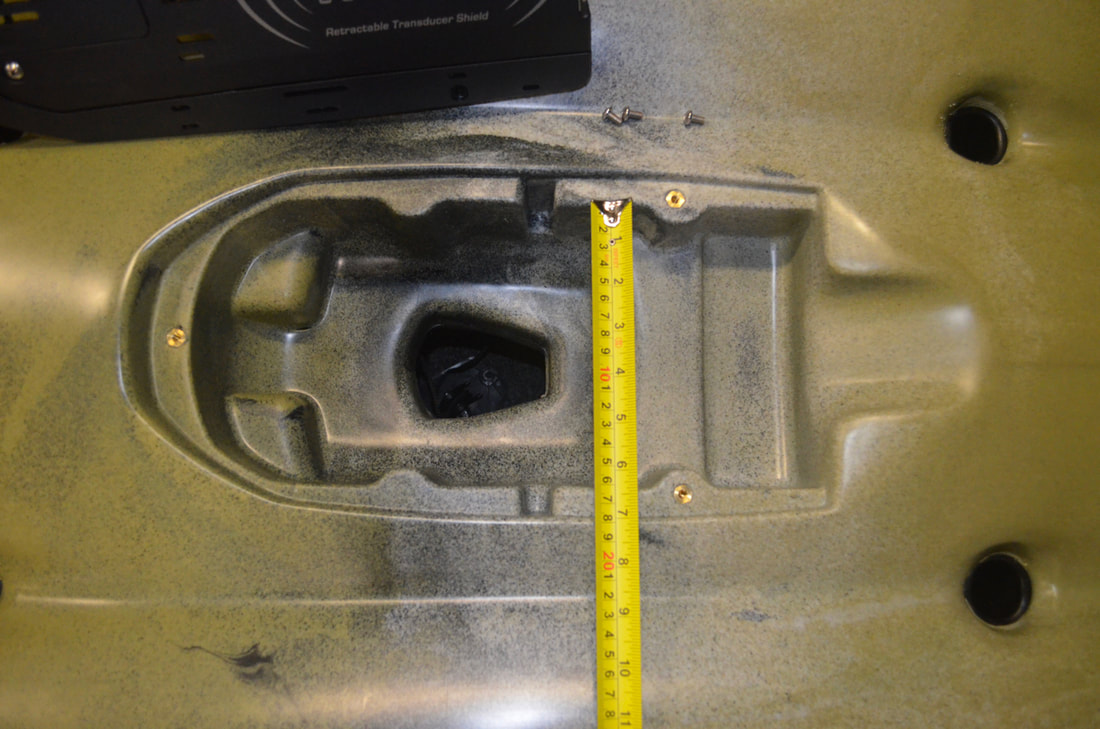
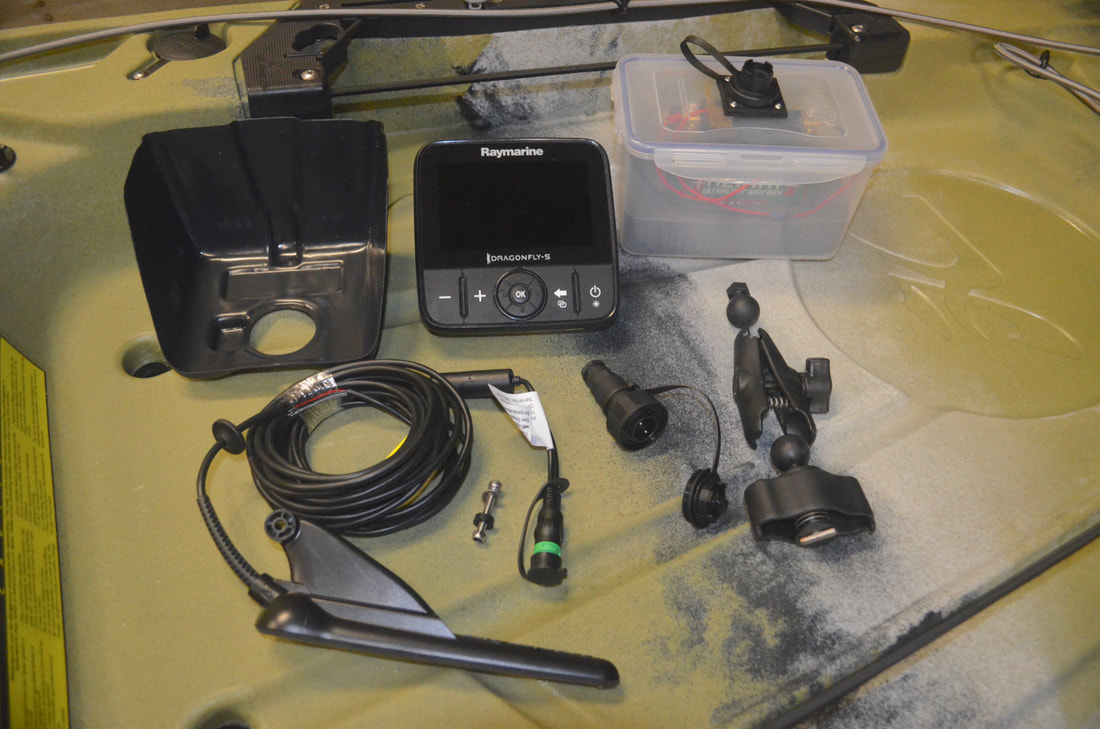 There are 3 main parts to this installation: mounting the main head unit, installing the transducer and wiring in the power supply. I'll start with the transducer... Installing the Raymarine Dragonfly Transducer to the Hobie Guardian Transducer ShieldThe new Hobie Outback comes fitted with the Hobie Guardian Retractable Transducer Shield. 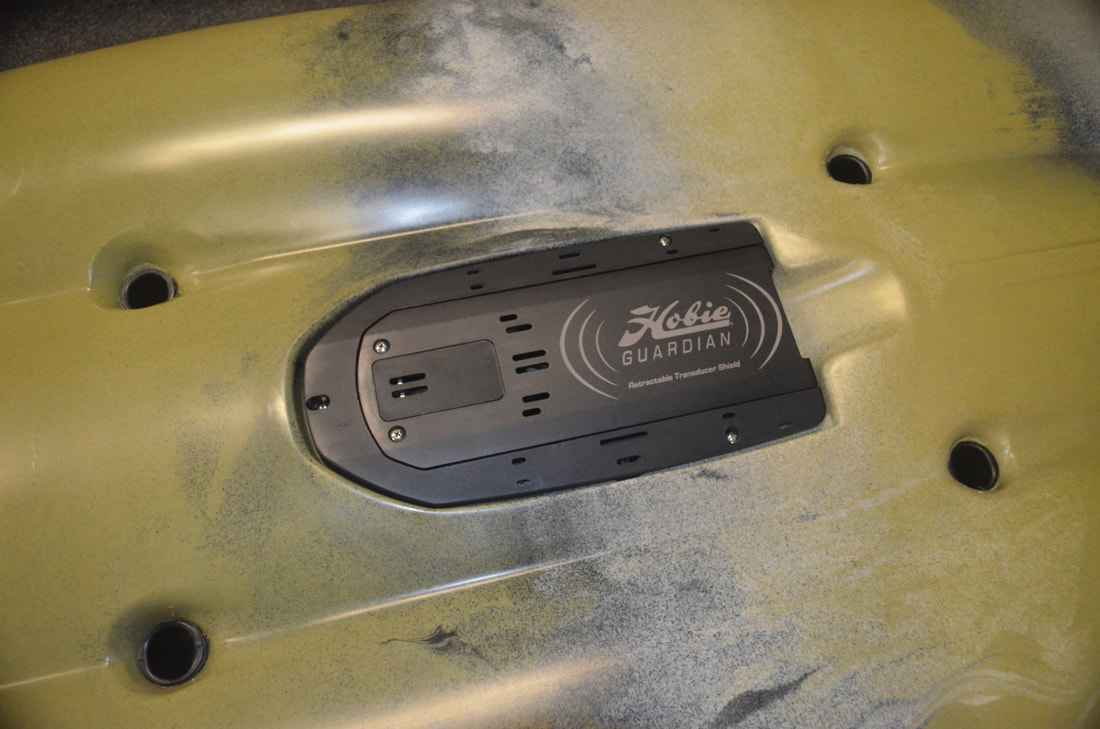 This is the latest development in the kayak fish finder installation world, making it super easy to install a wide-range of fish finders to the kayak including side-scan units with large transducers that must sit proud of the hull. These large transducers can be bolted to the bottom of the shield, which sits on a bungee cradle. The shield can be fully retracted within the hull by simply pulling a toggle and cord in the footwell. This raises the shield within the confines of the kayak protecting the otherwise exposed transducer from any damage when launching, landing, transporting and storing the kayak. Standard Dual-Beam, CHIRP and DownScan transducers can be installed on the topside of the shield, completely protecting them from any potential damage. To access the topside of the shield it is a case of unscrewing 3 bolts holding the shield frame to the hull. 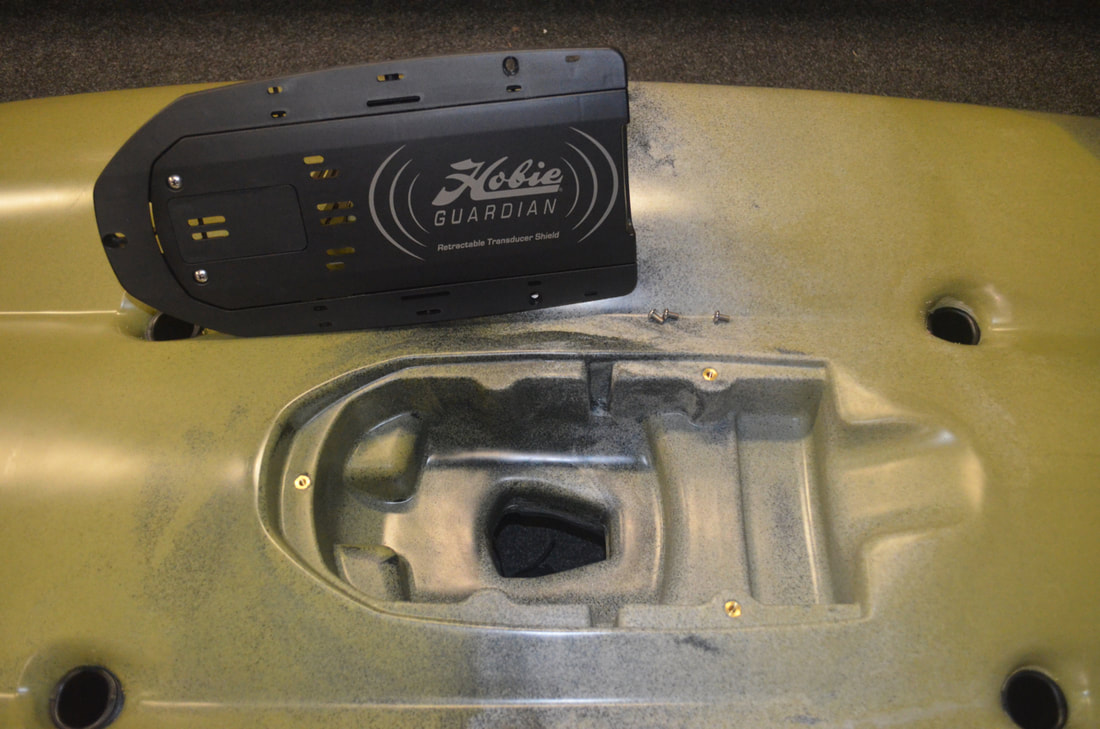 The recess beneath the shield is pretty big, measuring approx. 35cm x 15cm.
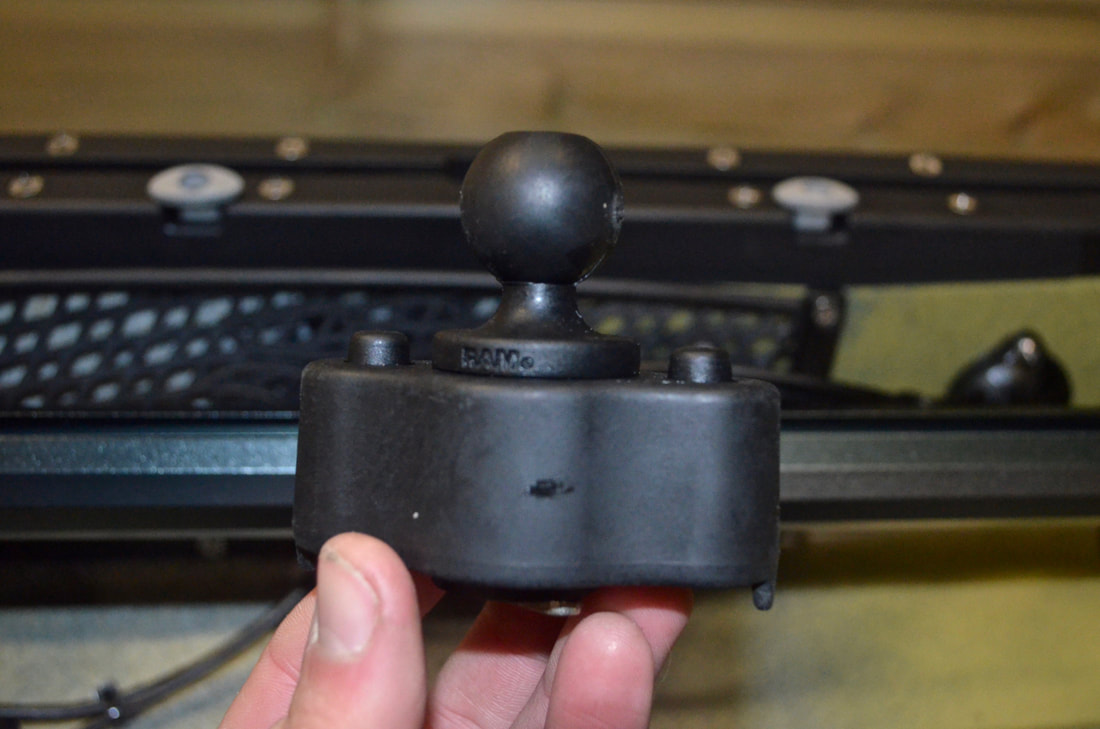
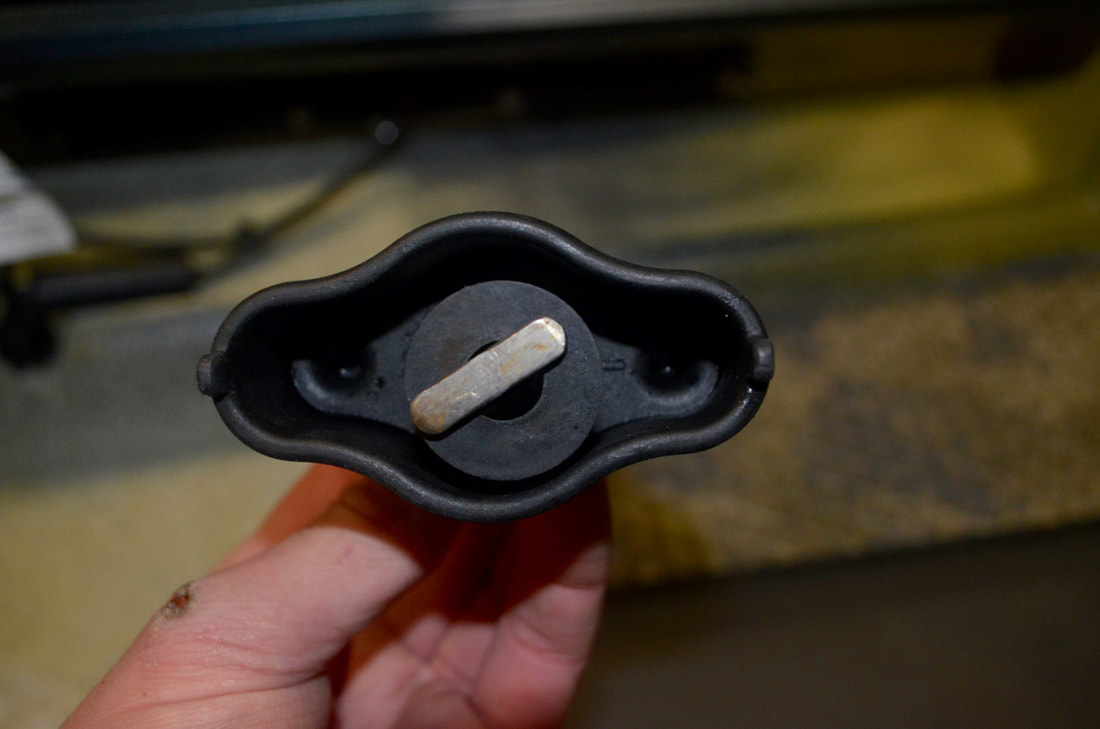
The top side of the shield features two upright plastic mounts for transducer attachment. 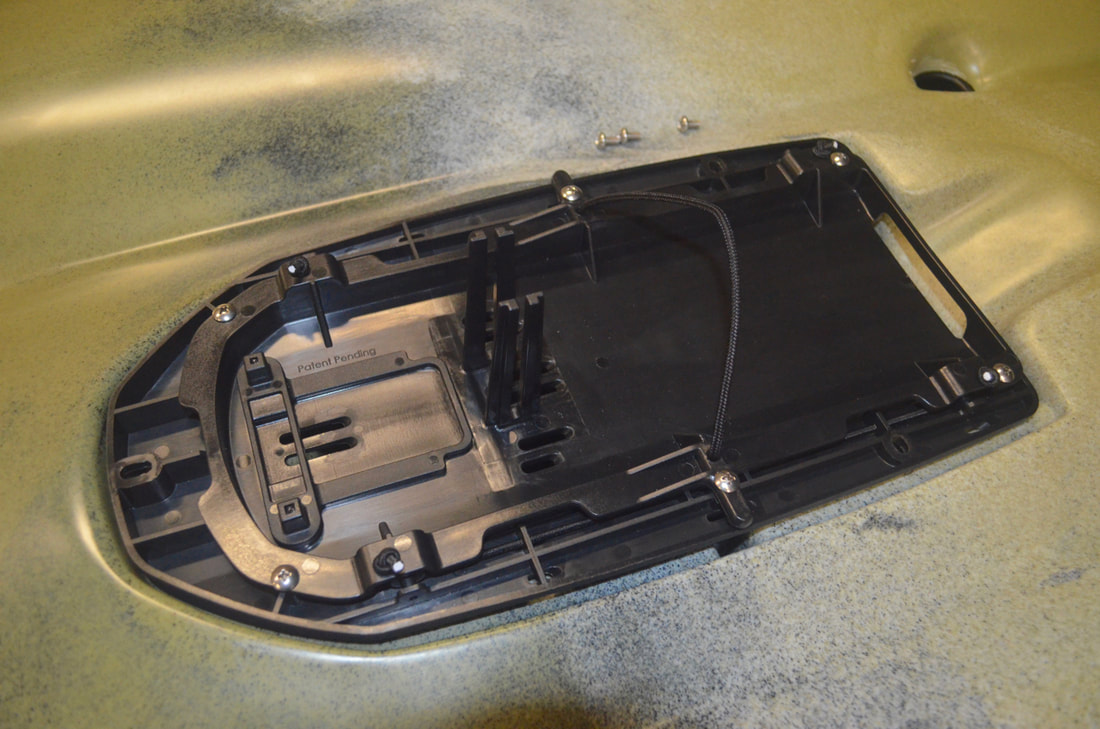 The Dragonfly transducer is fairly long and if placed on the shield the transom mount does not line up with the transducer mountings. 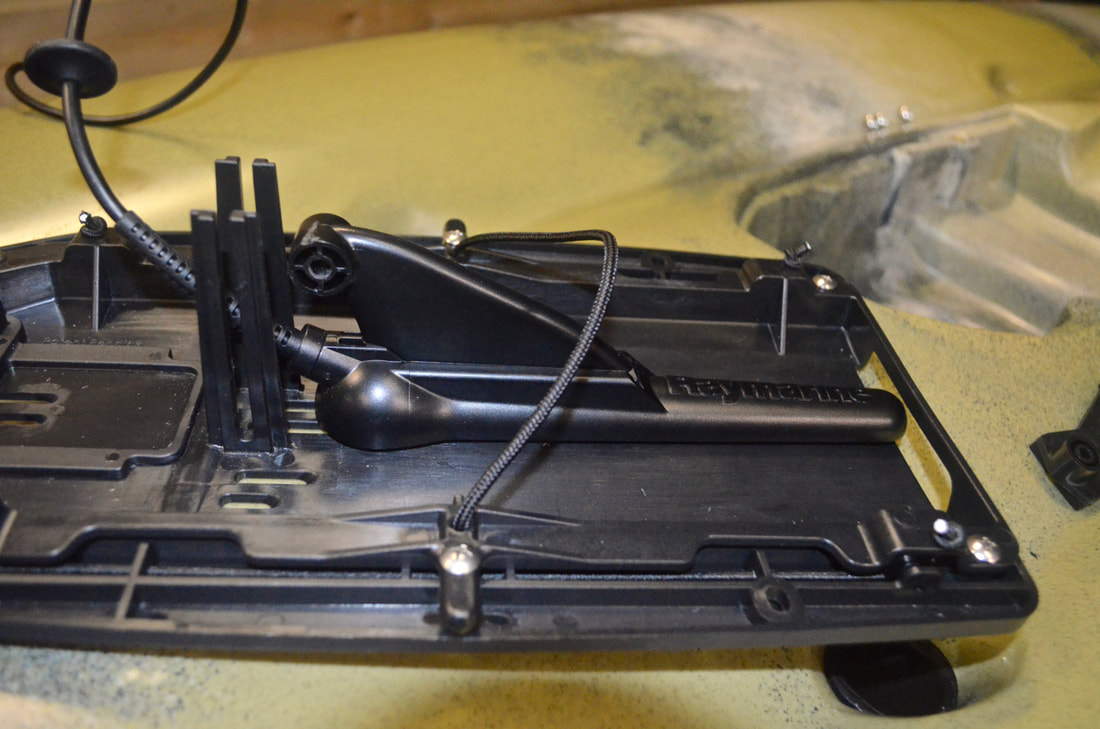 Hobie provide a 'universal' transducer adaptor and transducer fittings with the Outback to allow you extend the attachment point forwards or backwards of the mount to suit your transducer. 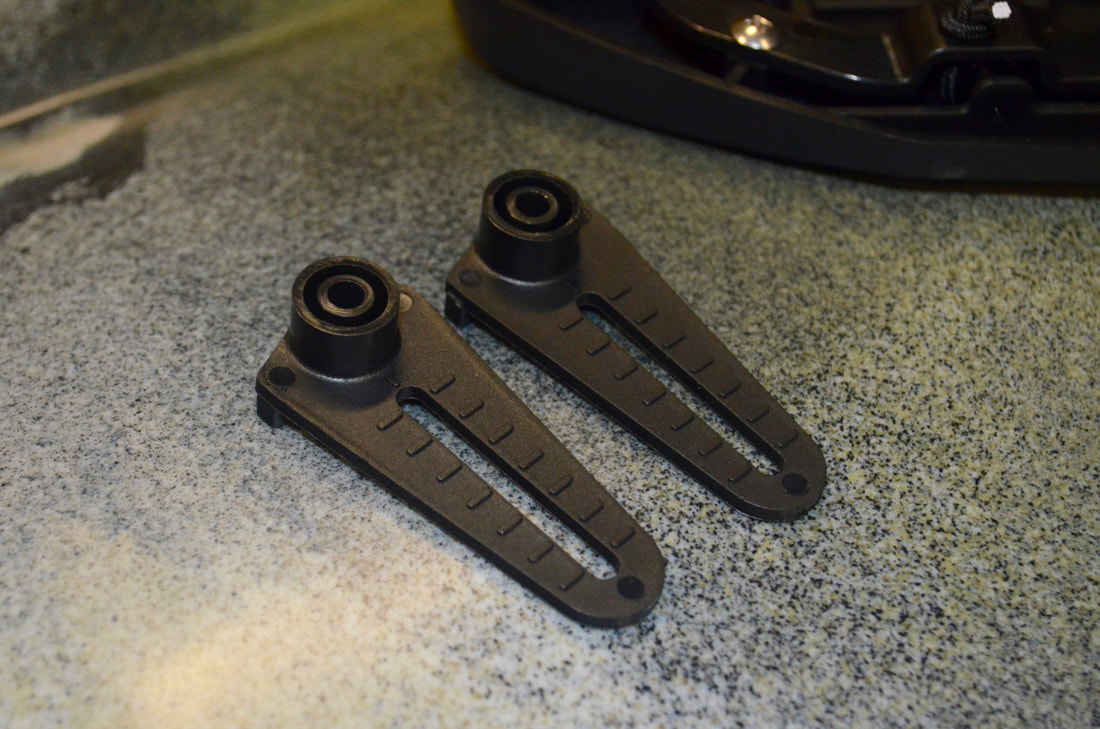 Using these mounts and the supplied bolt, nyloc nut and rubber friction washers it was fairly easy to fit the transducer. 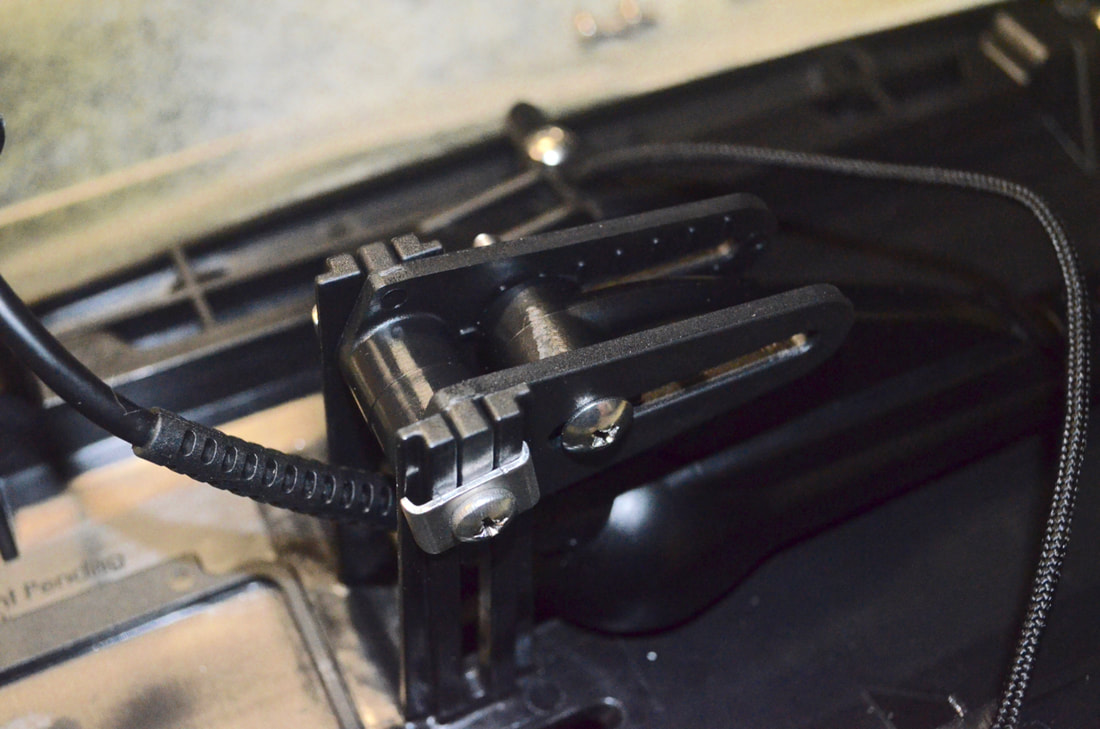 The friction washers must be used either side of the transducer mount eyelet so that fine adjustments can be made to its position and when tightened down it will hold firmly in place. The transducer must be raised a few millimeters to allow for water flow between the transducer and the shield. The sonar will shoot through the thin plastic shield with very little loss of resolution. 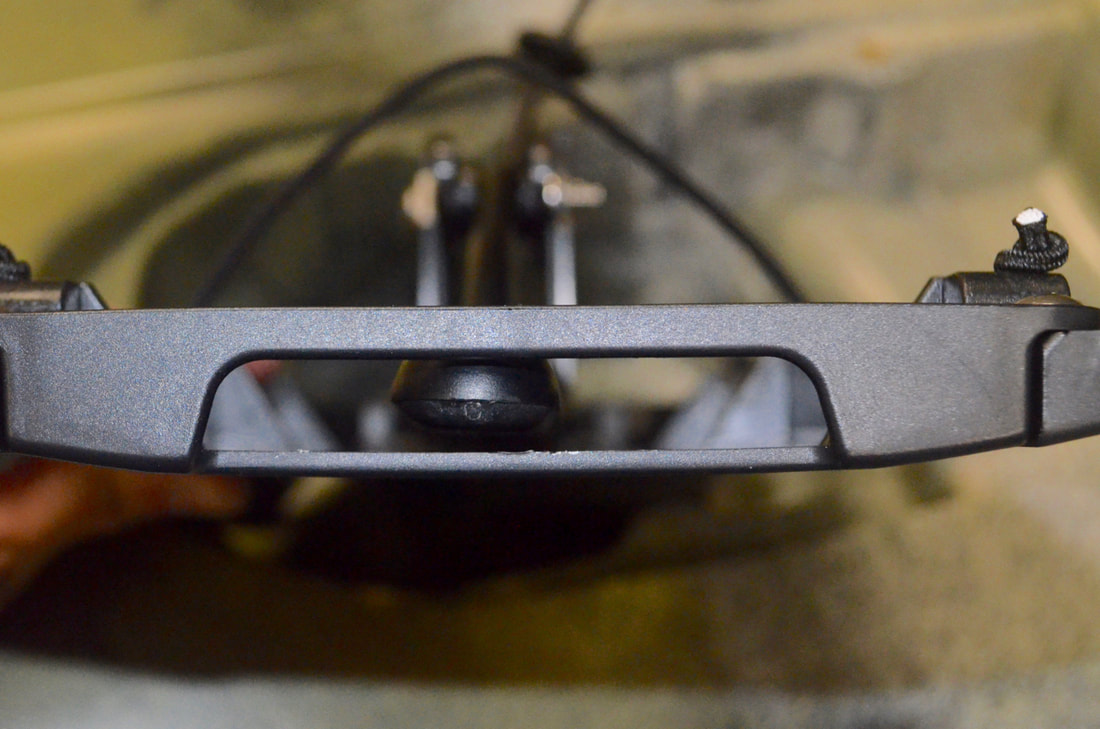 One Dragonfly transducer fitted!  It is now just a case of passing the transducer cable to the deck side of the kayak through the transducer scupper hole. To access this, a black cover plate must be removed beneath the seat. 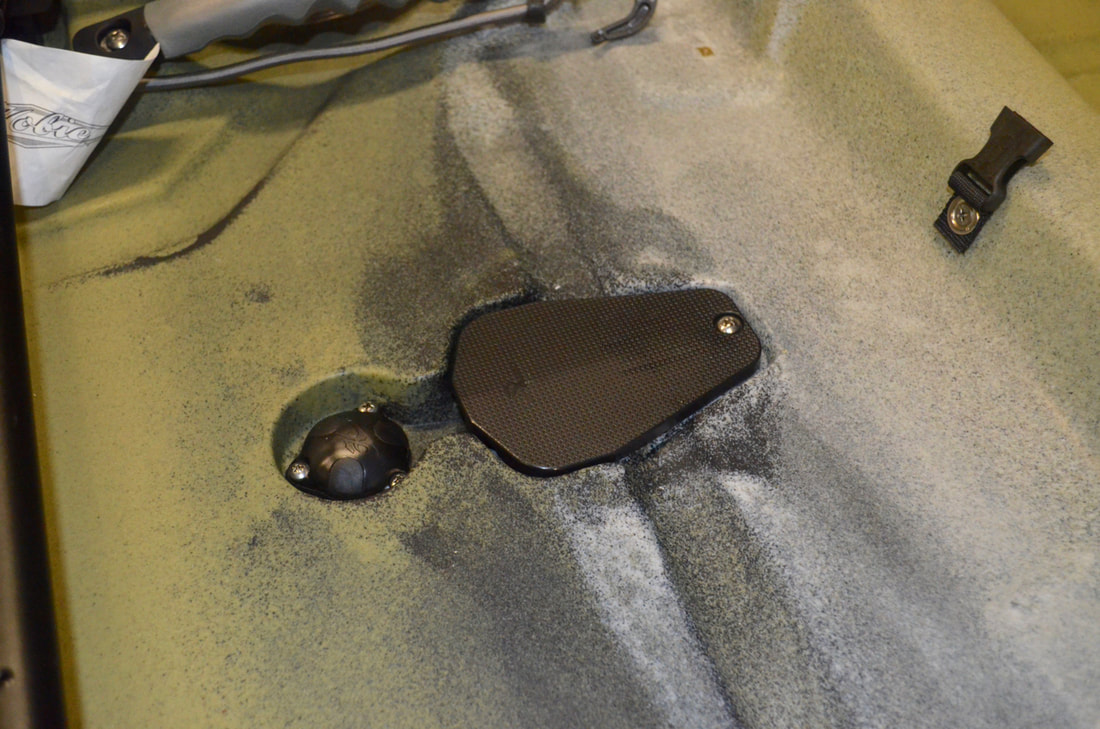 The cover is held on with a single screw and removing the plate reveals a pulley and cord. This is the cord which operates the retractable aspect of the Guardian Shield. As standard this is not connected to the shield and just tied to the pulley. To activate the retractable sheild you have to remove 6 screws from the top side of the shield, holding the central plate to the frame. Once undone the plate will retract on a bungee system. The cord from the pulley can be tied to the bridle on the plate to complete the system. When the transducer toggle is pulled in the foot well the shield will raise up into the hull. I do not require the retractable option so have left the 6 screws in-situ. 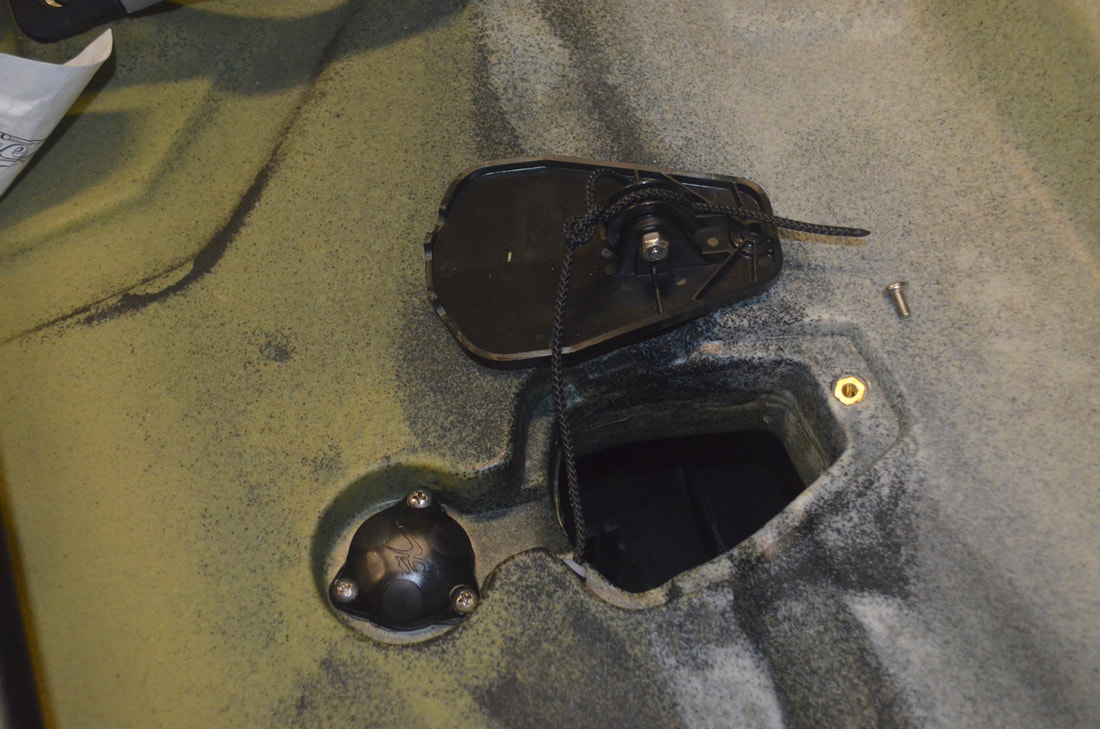 Simply pass the transducer and power cable up through this scupper hole onto the deck and then screw the Guardian Shield back onto the hull. 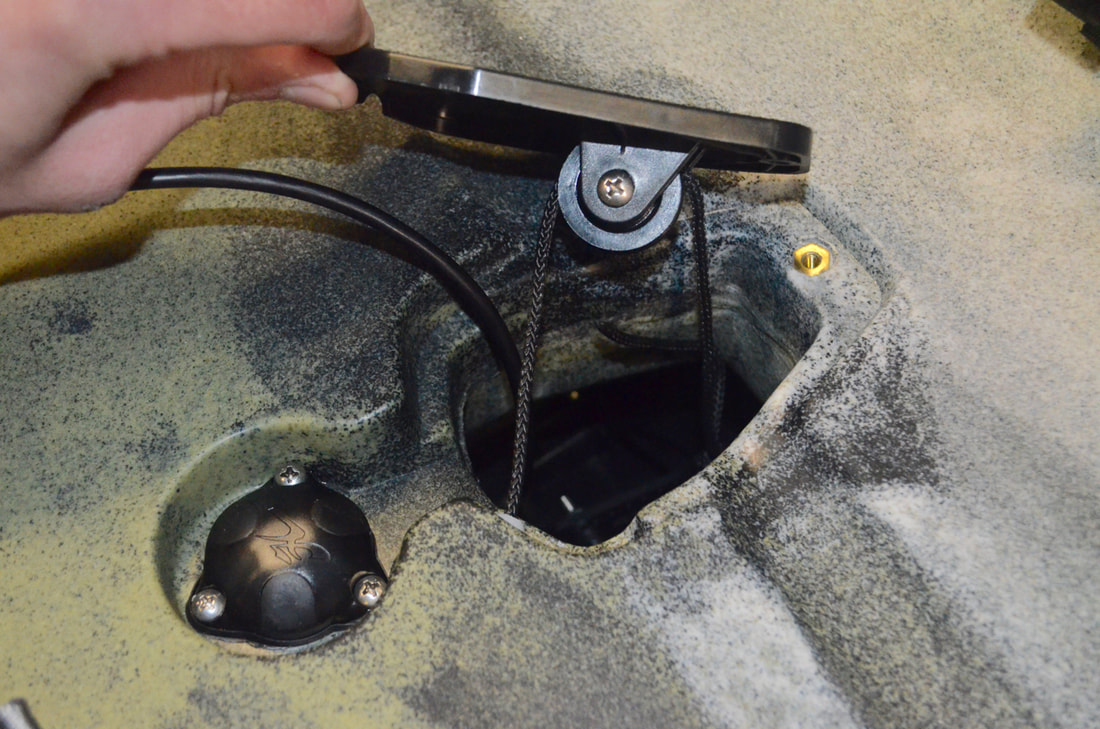 The transducer and power cable must then be passed back into the hull through the 3-Way Thru Hull fitting located just forwards of the cover plate. Simply unscrew the 3 small self-tapping screws holding this to the kayak. 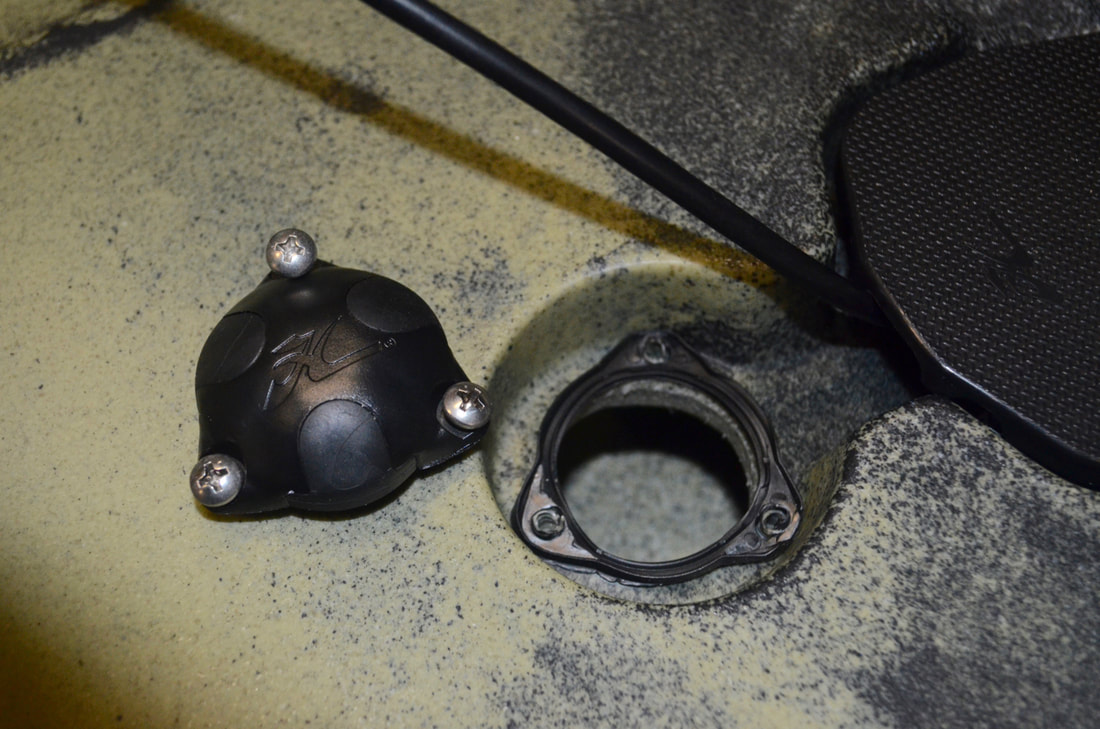 The thru-hull fitting features a rubber gasket and a design where three rubber plugs can be removed and replaced with cable seal plugs. The Outback is supplied with numerous plugs with various diameter holes to work with various power/transducer cables. It is just a case of finding the correct one for your cable and placing this around the cable and slotting it into the thru-hull fitting. Screw the fitting back onto the hull and the transducer is now fitted to the kayak. Super easy! 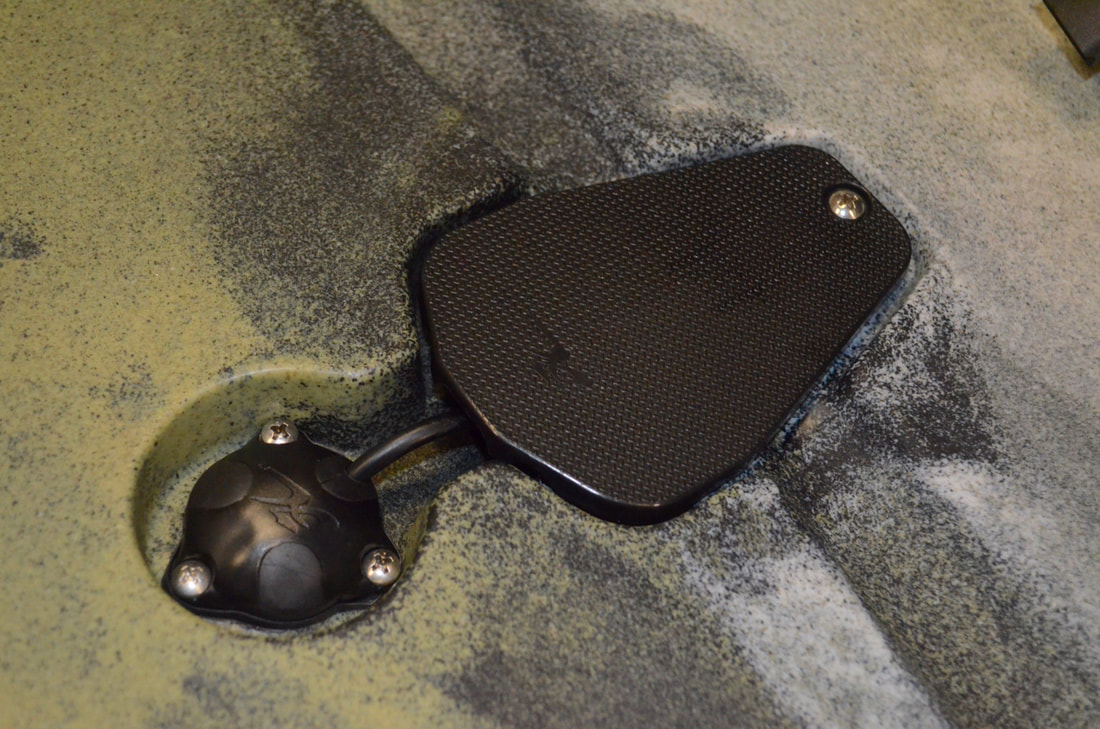 Wiring in the Fish Finder Power SupplyPrior to connecting up the power source i needed to decide which side to mount the fish finder, as i would have to pass the connector and cabling out through a thru-hull fitting on the chosen side. I opted to fit the unit on my right hand side. The first step was to remove the 3-Way Thru-Hull fitting fitted in the side storage area of the cockpit beside the hookless pocket. 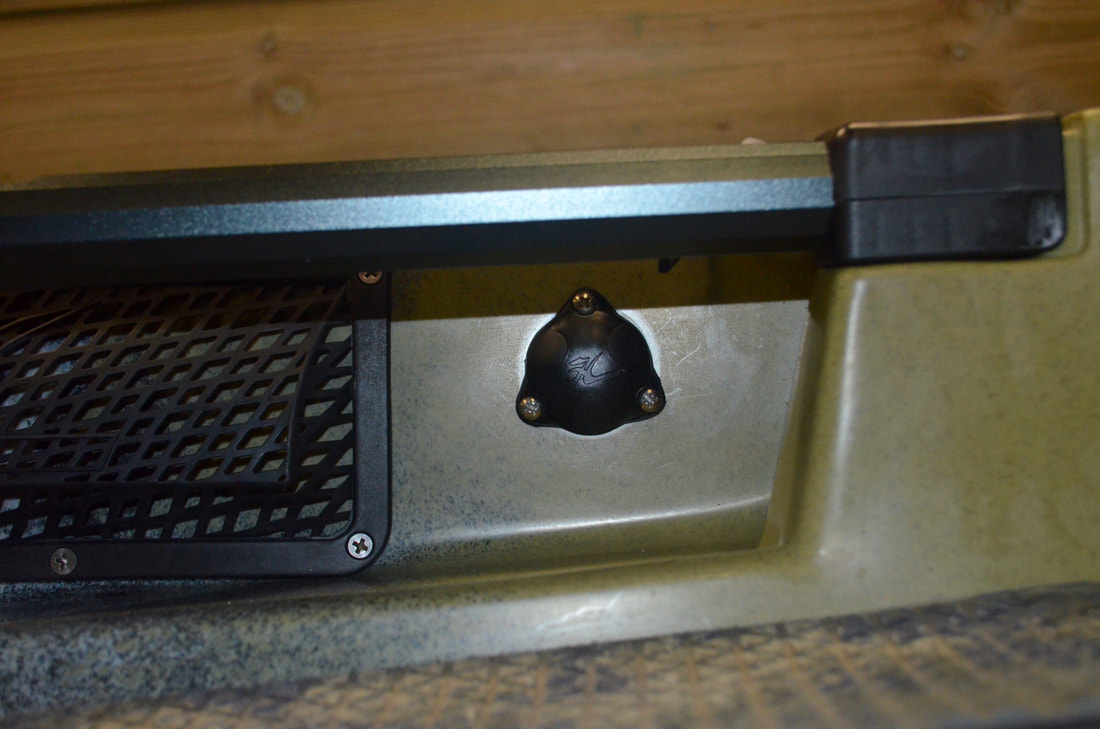 The connector that plugs into the back of the unit can then be pushed through the hole beneath the fitting, from the inside of the kayak out onto the deck. You can gain easy access to do this through the centre hatch. It is then just a case of selecting the right size rubber seal to fit around the transducer and power cable and fitting the thru-hull plug back to the kayak. Easy! Just remember to pull enough cabling through to allow for the connector to reach the unit wherever you wish to mount it. I left enough spare so that the fish finder could be mounted at the furthest point on the outside H-Track if needed. 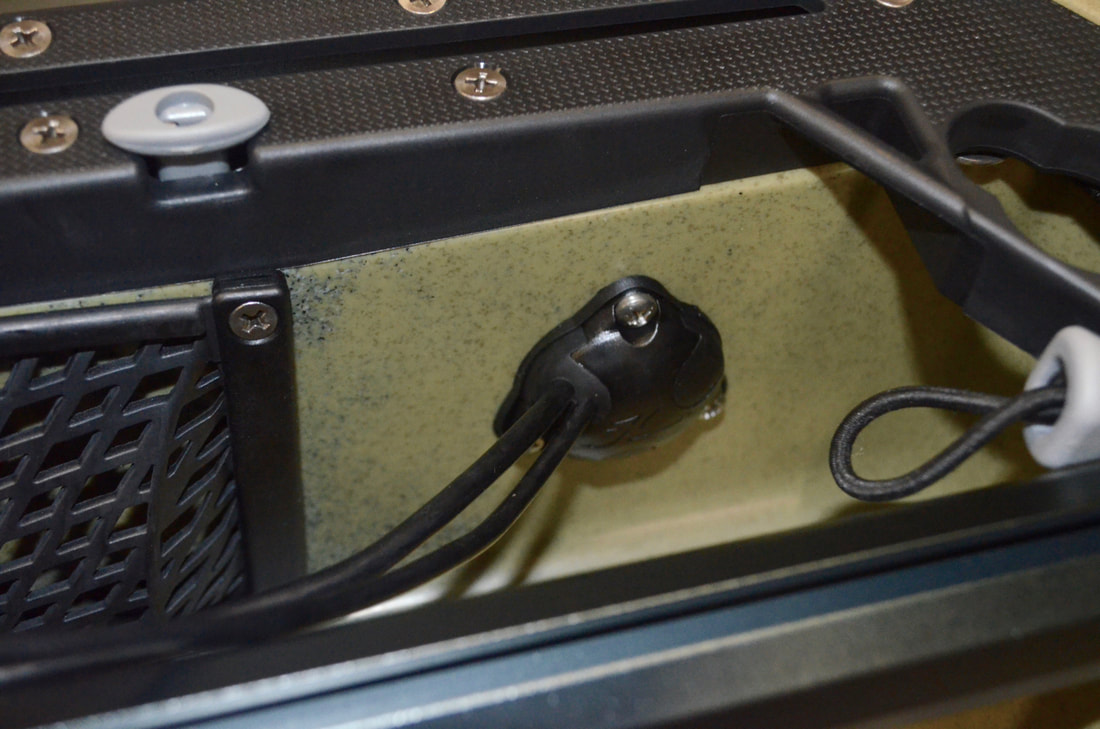 As usual there is loads of excess transducer cable now in the hull. I tidied this up using a couple of cable ties and attached it to the scupper hole to keep it out of the way. 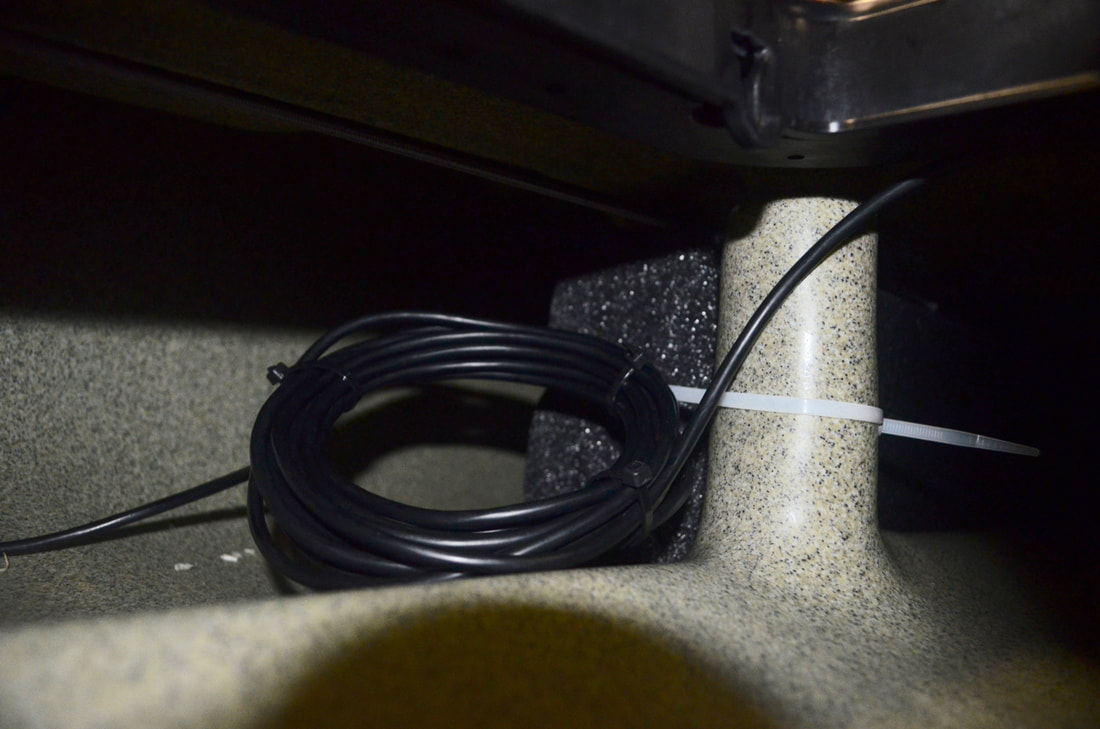 Time to attach the power source. The Dragonfly runs off a standard 12V power supply, and most people opt for a rechargeable sealed lead acid battery. I have recently moved over to using a Lithium-Ion battery, which are much lighter than the lead acid batteries, thus saving important weight on the kayak. I have put together a complete guide on how i built a waterproof lithium battery box which can be viewed by clicking here. 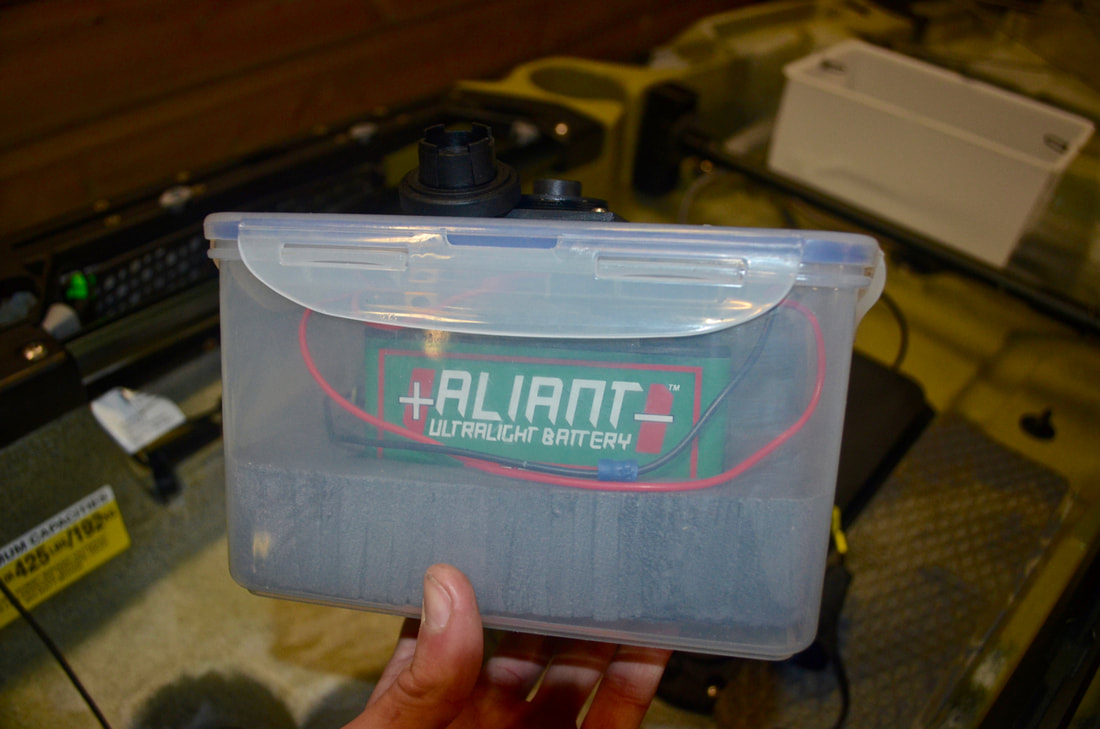 This battery box uses a Index Marine Bulgin 2-Pin Waterproof Socket as a connection point. 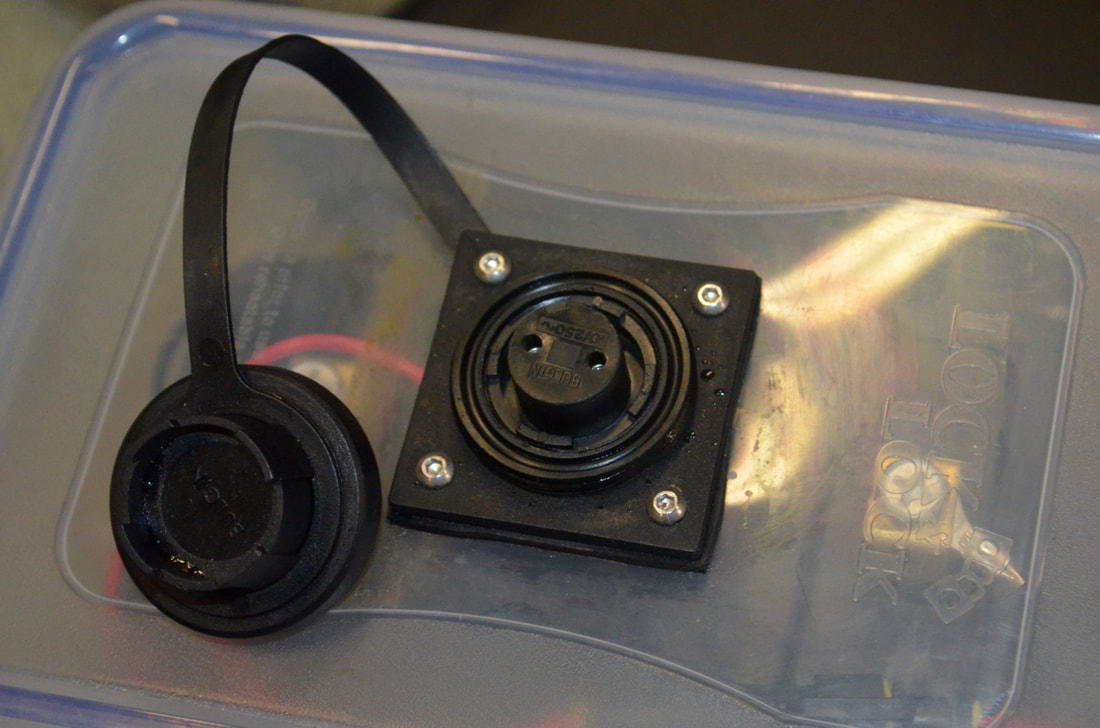 I would need to fit a Bulgin 2-Pin Waterproof Plug to my fish finder power lead to allow me to connect to the battery box. Take note of the grey wire - this is a drain wire and is not required for installation on a kayak, i trimmed this back to the outer wire coating. 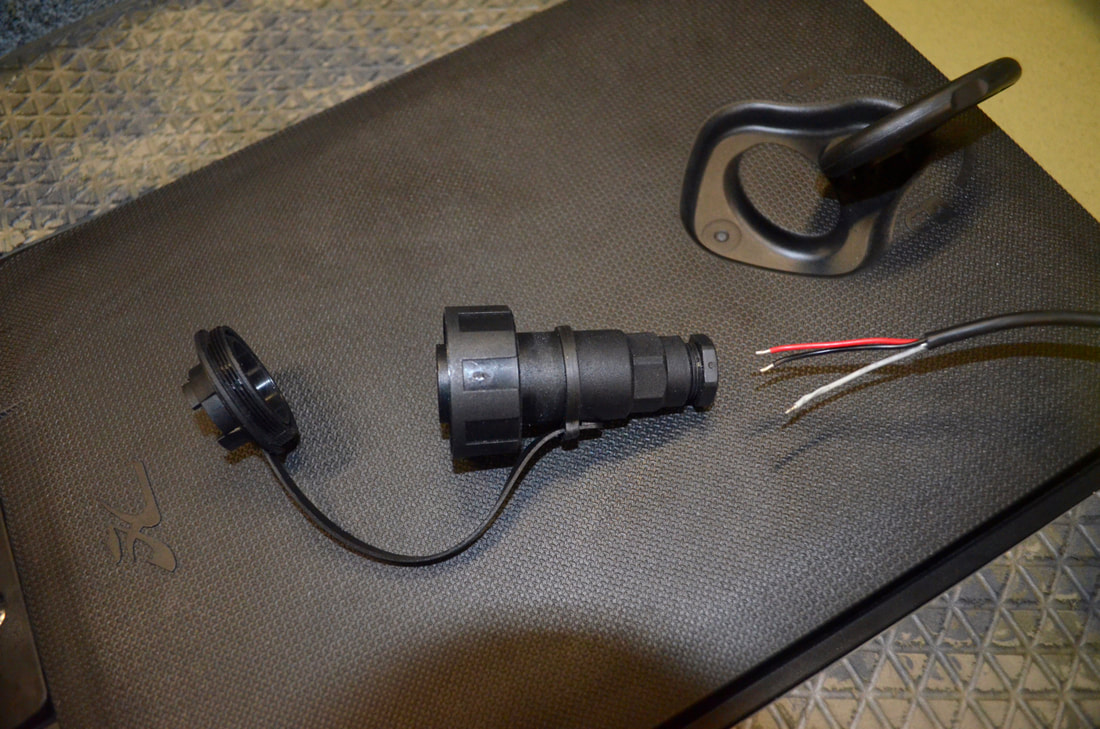 These plugs offer a waterproof connection and are fairly easy to install to your wiring. It comes complete with a screw cap fitting which waterproofs the terminals when the plug is disconnected. The cap also doubles up as an assembly tool. Use the notched side of the cap to unscrew the ring holding the terminals in place. You can then remove the terminal block. The wiring can be pushed through the plug and the wires then connected to the screw-down terminal connectors. Just strip back a few millimeters of wire coating and fit to the relevant terminal - these are marked L and N and must correspond with the wiring in the battery box socket. I'm using Red to L, and Black to N. 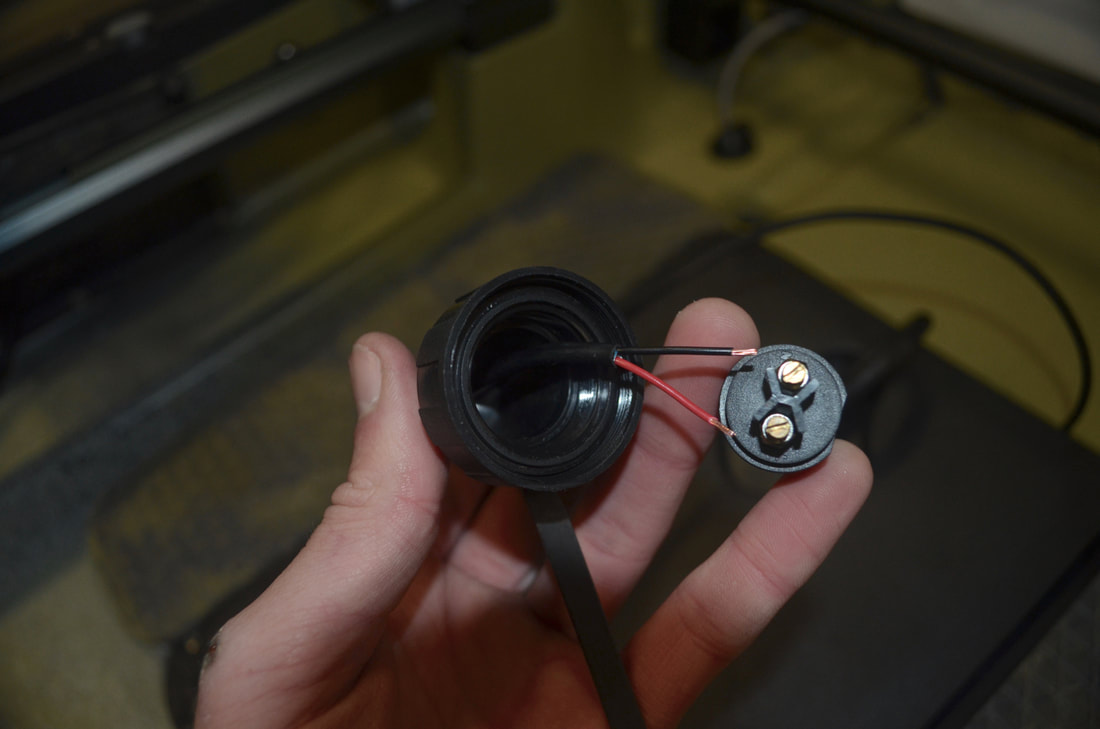 With the wires connected to the terminal block, this can be fitted back into the plug by screwing in the retaining ring. The top end of the plug features a screw-adjusted cable seal, whereby a rubber grommet seals around the wire as you screw the cable seal down. I also filled the gap between the wire and the plug housing with some sealant to completely ensure a waterproof fit. 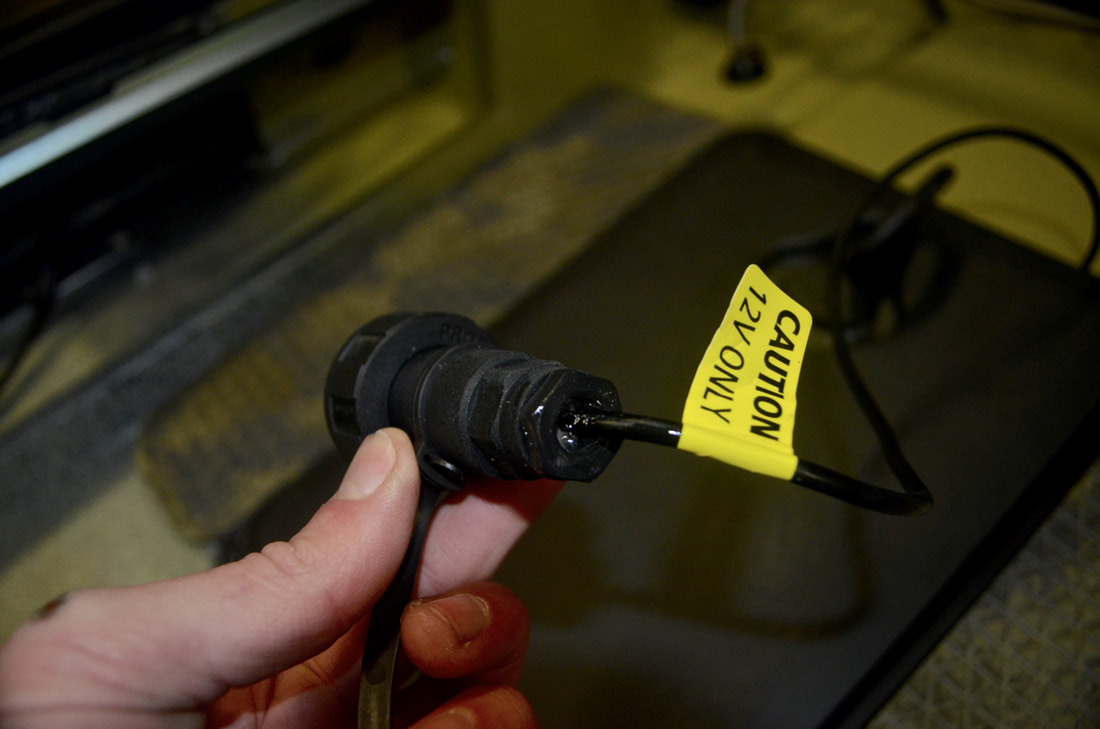 The connector is now fitted to the power cable and can be used with my battery box. I have decided to store my battery box in the bow hatch of the kayak so it was just a case of running the power cable up front to meet the battery box. 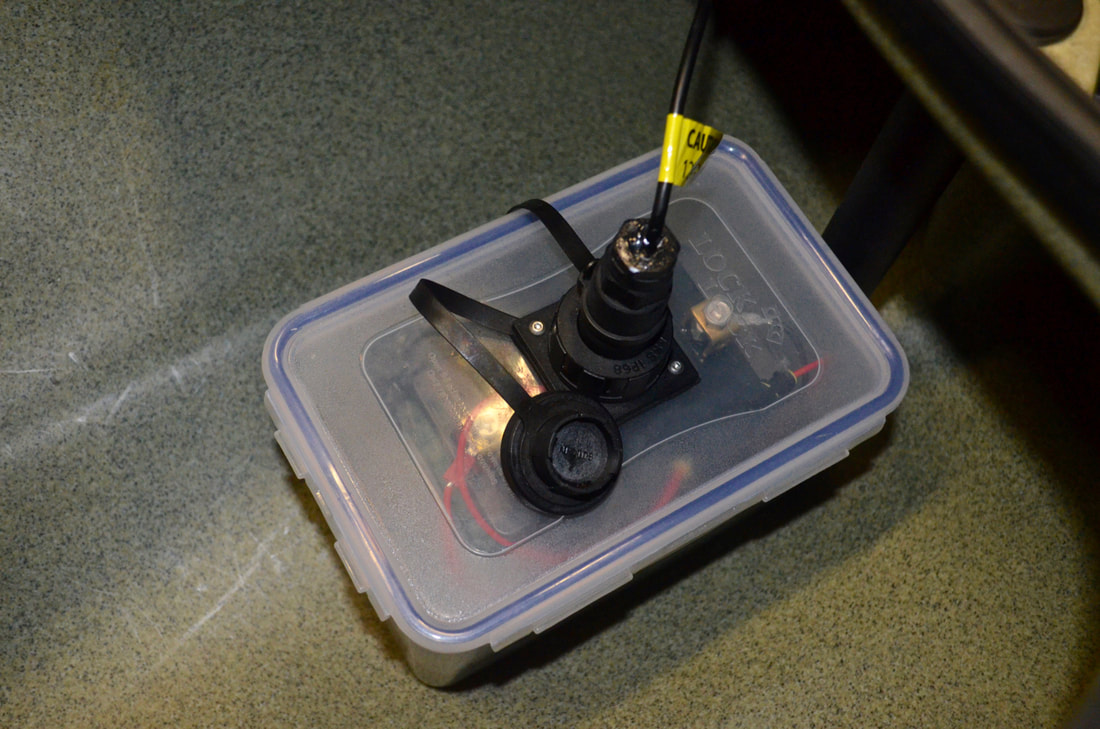 I used a small loop of bungee cord attached to the leash point on the inside of the hatch to retainer the connector during transport and storage. This keeps it elevated off the hull which can often get damp. 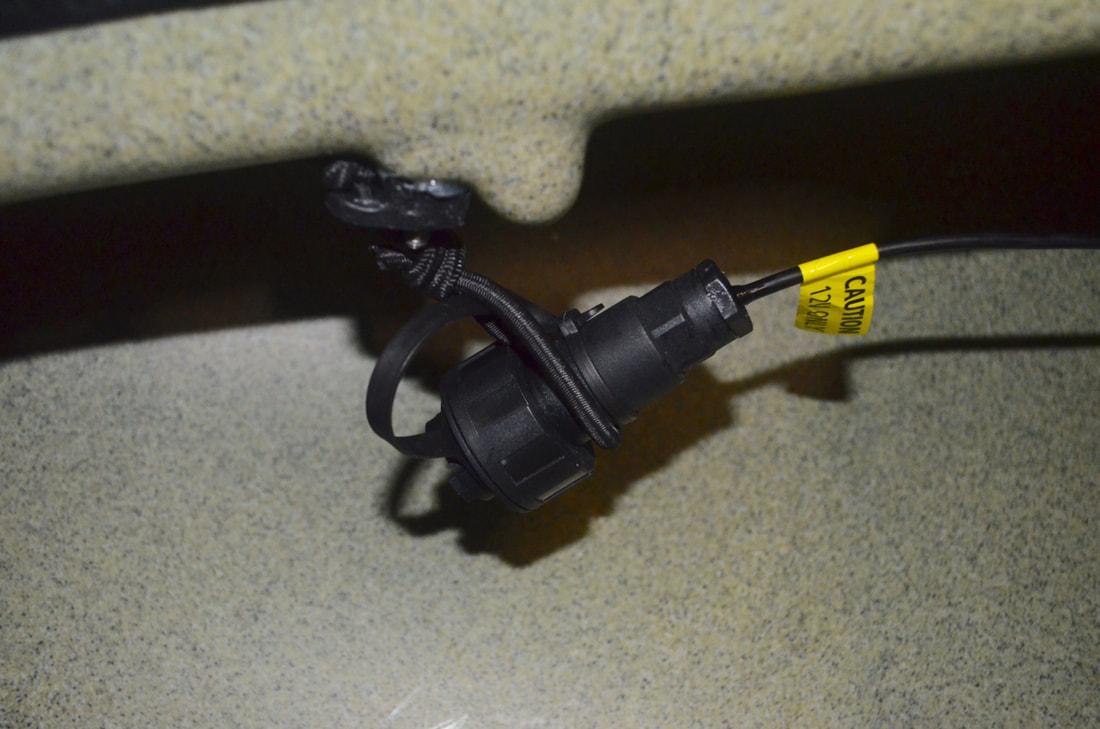 Mounting the Raymarine Dragonfly head unitAll that was left to do was mount the main display. I would be mounting this on the outer H-Track on the Outback. In this position it is within easy view and reach whilst pedalling and fishing. Track mounting allows for easy position adjustment and easy removal at the end of a session. I would be using a Ram Mount system. I like these mounts as they use ball and socket technology, allowing you to find the perfect viewing angle for your fish finder screen. The first part used in the system is a Ram 1 inch Quick Release Track Mount (Part No: RAM-B-383). This mount features a slim T-bolt which attaches the mount to the T-Track. There are two width settings for the T-bolt, A and B. The narrower A setting worked best for the Hobie H-Track.
To install you hold down the two outer buttons and unscrew the ball a little to lower the T-bolt. Then slide this into the track and into the desired position. To lock into place simply screw up the ball until tight. The outer buttons operate a ratchet system so that the mount cannot loosen off accidentally. 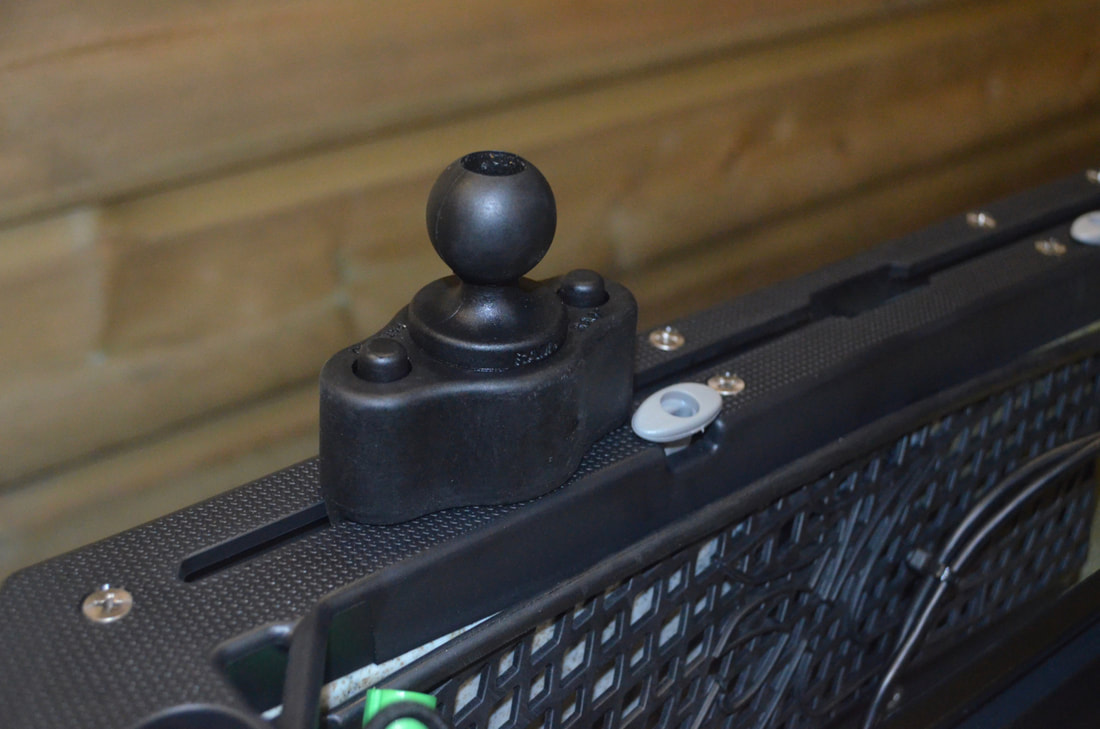 The other two Ram Mount components required are a Double Socket Arm for 1 inch balls (Part No: RAM-B-201) and a 1 inch Tough Ball with M6 X 6mm Male Threaded Post (Part No: RAP-B-379-M616). The Tough Ball screws directly into the back of the Dragonfly unit into a threaded insert. The double socket arm then makes the connection between the track mount and head unit. Put the screen into the desired position and tighten down the double socket arm wing nut to hold in position. Simple! I have also used a BerleyPro Raymarine Dragonfly 4/5 Sun Visor on my fish finder - this is great for reducing screen reflection on bright days, and helps reduce splashes from soaking the unit and display. BerleyPro Fish Finder Visors are available to buy through Cornwall Canoes in the UK - click here to see the range. 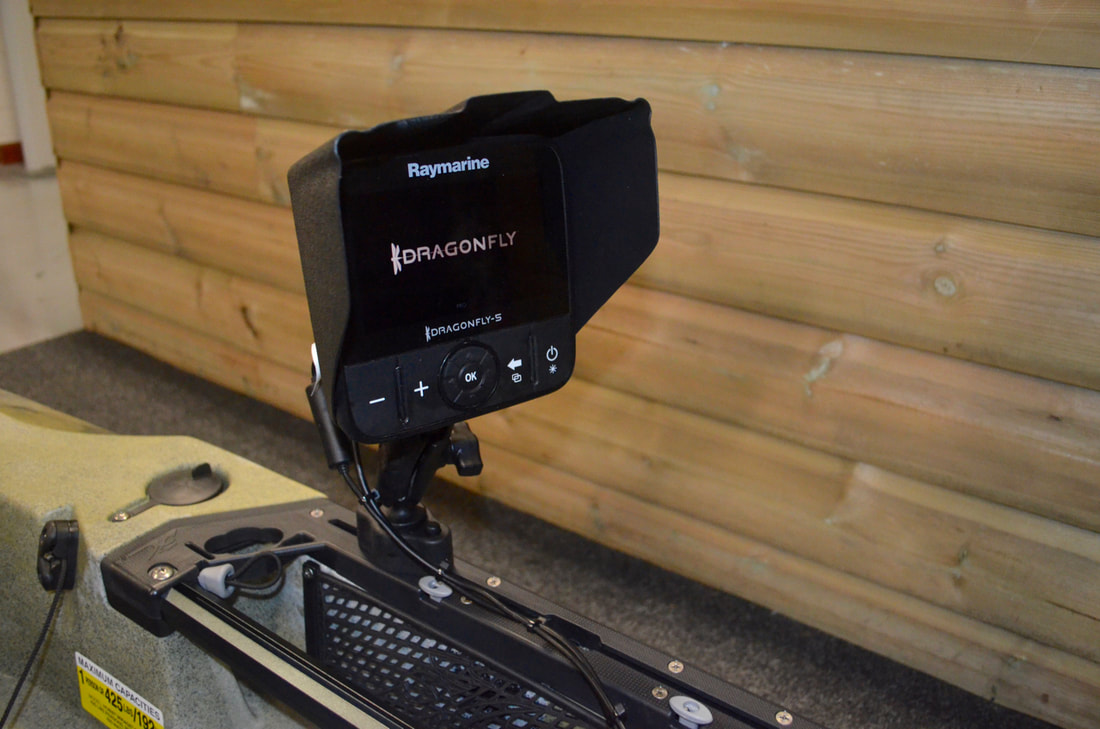 The transducer is fully protected and the power supply and head unit can easily be removed at the end of a session. The wiring connector features a rubber cap so once disconnected it can be covered and the wiring curled up and stored in the hookless pocket during transport and storage. I tidied up the cabling between the thru-hull fitting and the connector using a few cable ties to keep the power and transducer cable together. The installation is now complete. I now have CHIRP Sonar, DownVision Imaging and full GPS chart plotting with high definition Navionics+ Sonar Charts at my disposal on the Outback. 
The Dragonfly 5Pro will certainly help put me on the fish and increase my efficiency on the water. Now it's time to find some fish.... On the waterI found the fish! The whole set up works perfectly. 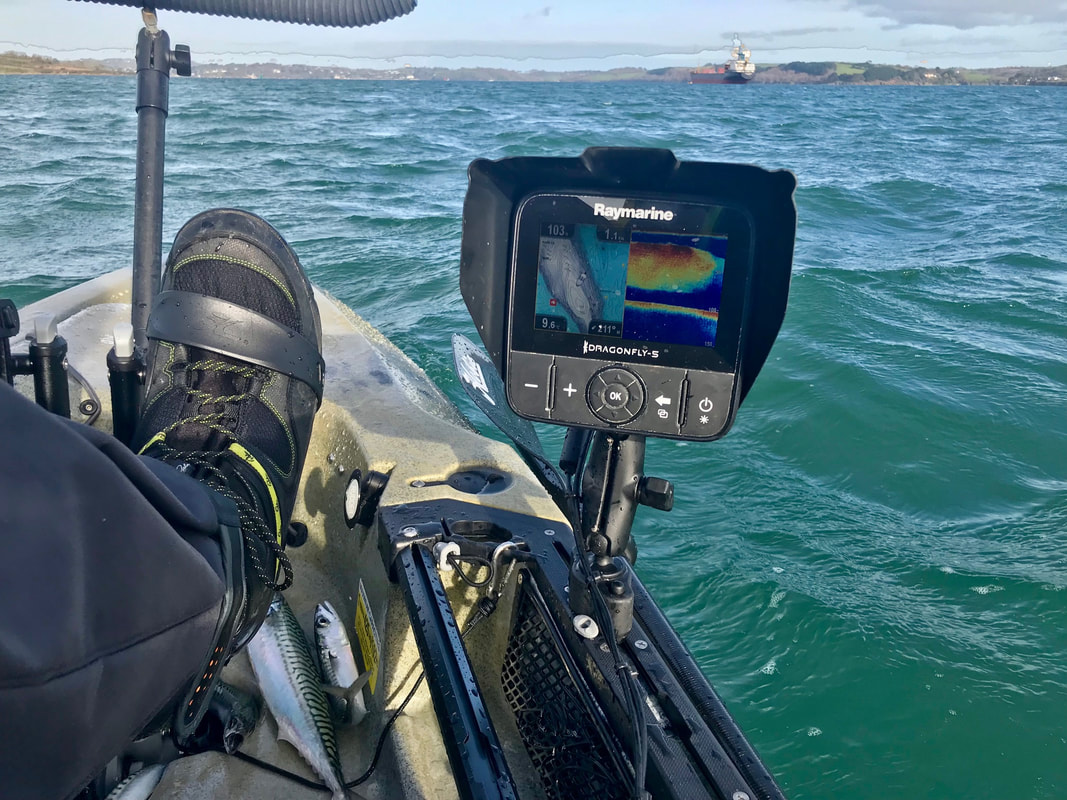 If you have any questions on this installation then feel free to ask below in the comments.
Ralph Reid
26/2/2019 13:36:19
Thanks for a great detailed instruction guide
Jimmy Mott
15/9/2019 01:05:36
Thanks for the detailed instructions! I just finished installing my Dragonfly 5 on my 2019 Outback today! This post certainly took away any guesswork and saved me time.
Andy Meade
25/6/2020 08:42:40
Great review, just one point, where did you get the screen shade? Comments are closed.
|
AuthorLiam Faisey 
My Tackle Shop
SPONSORS
Proudly associated with

Cornwall's only specialist kayak fishing shop
Archives
March 2023
Categories
All
Add my blog to your feed reader by clicking the button below
Get blog updates via email
Kayak Fishing Videos

Custom feed reader powered by FeedWind
Useful Links
Anglers Afloat
Cornish Shore & Kayak Fisherman Cornwall Canoes Palm Equipment Penzance Kayak Fishing Meet Info Saltwater Kayak Fisherman Magic Seaweed XC Weather 
|

 RSS Feed


|
|
Website powered by pasties and the hope of good weather!
© 2023 Liam Faisey
© 2023 Liam Faisey