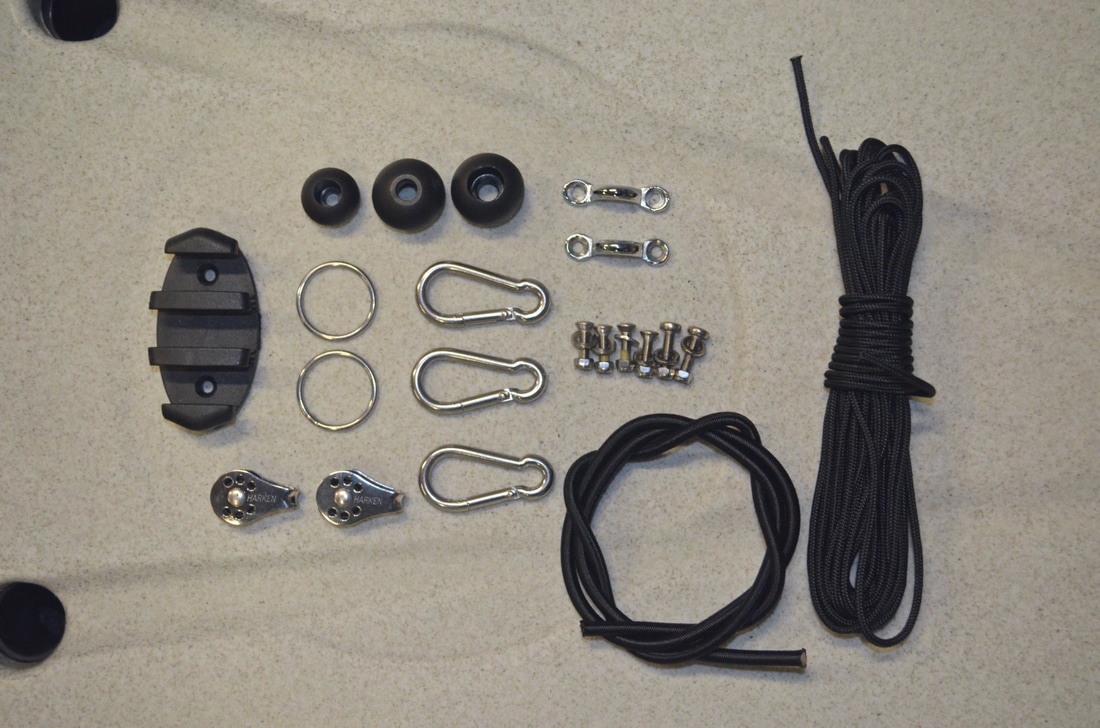
What is an Anchor Trolley and what is it used for?An Anchor Trolley is essential for safe anchoring. An anchor trolley allows you to shuttle your anchor line along the side of the kayak and choose the point at which the anchor line enters the water i.e. the position from which the kayak is anchored from. A kayak is designed to ride the water, and be most stable, along its length and therefore the safest position along the hull to anchor from is either the bow, or more commonly the stern. Even those with long arms would struggle to reach the ends of their kayak to tie off an anchor line - even if you could chances are you'd end up falling in whilst doing so! The anchor trolley allows you to position your anchor line at the stern, or bow, all from the comfort of your seat! Never tie your anchor line off to the side of the kayak as it will probably see you going for a swim and potentially getting into a dangerous situation if you become separated from the anchored kayak. An anchor trolley is basically a loop of cord that runs from bow to stern. The loop incorporates a karabiner or ring that the anchor line can pass through and be shuttled to either end of the kayak. Full length anchor trolleys are most common although some people prefer half trolleys that run from midship to bow or midship to stern. A midship to bow trolley works well for using a drogue. I quite often fish at anchor so an anchor trolley and anchoring system had to be installed on the Revolution 16. It needed to be durable and reliable. I mainly anchor in waters from 6ft upto 200ft+ and in tidal flows up to approx. 2 knots. The water is often lively with chop and swell. I like the versatility of having a full length anchor trolley but there was an issue before i even started.... which side to fit it on! I'm used having an anchor trolley on the right hand side of a kayak but on the Revo 16, the paddle holder is on this side. As the paddle won't often be used and for the majority of the time be in it's holder, it would constantly be interfering with the anchor trolley. I couldn't be having that, so i opted to install the anchor trolley on the left.... i'll soon get used to it! So here is how i done it.... Anchor Trolley ComponentsThere are all sorts of incarnations of the anchor trolley, from off the shelf kits to various DIY options. I have made my own anchor trolley for each kayak i have owned and over the years have adapted and modified it to suit my needs - strong, durable, effective and reliable! I purchased most of this stuff from either Cornwall Canoes and a local chandlery shop. Where components are available online i have hyperlinked in the below list....
 Tools Required
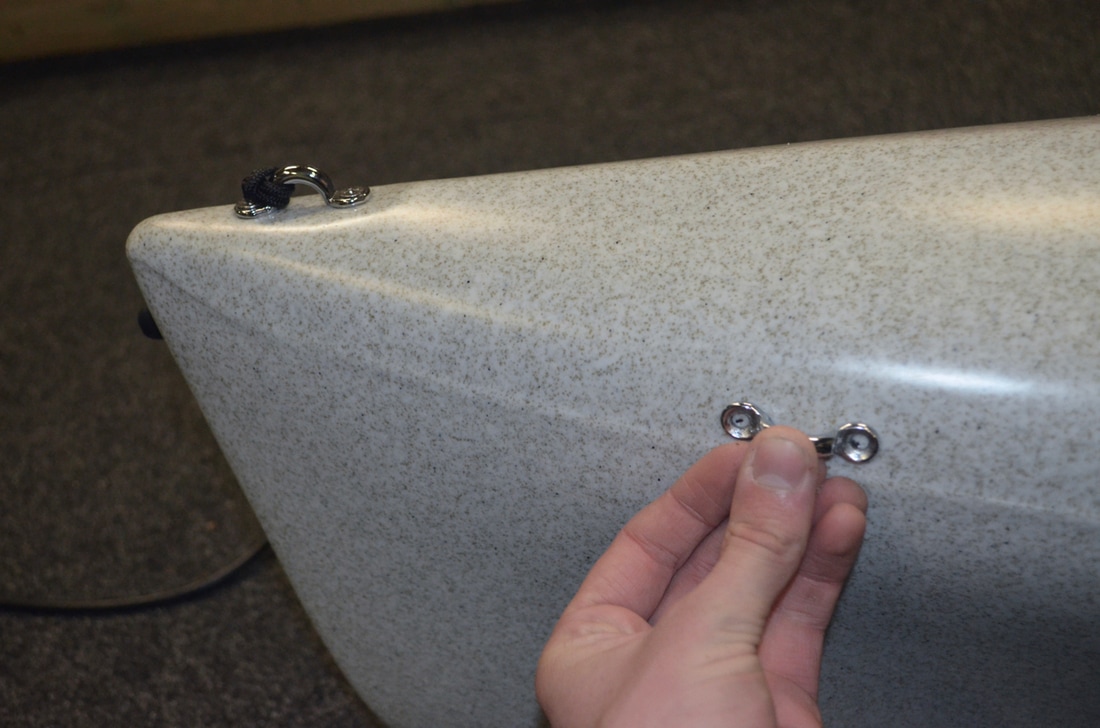
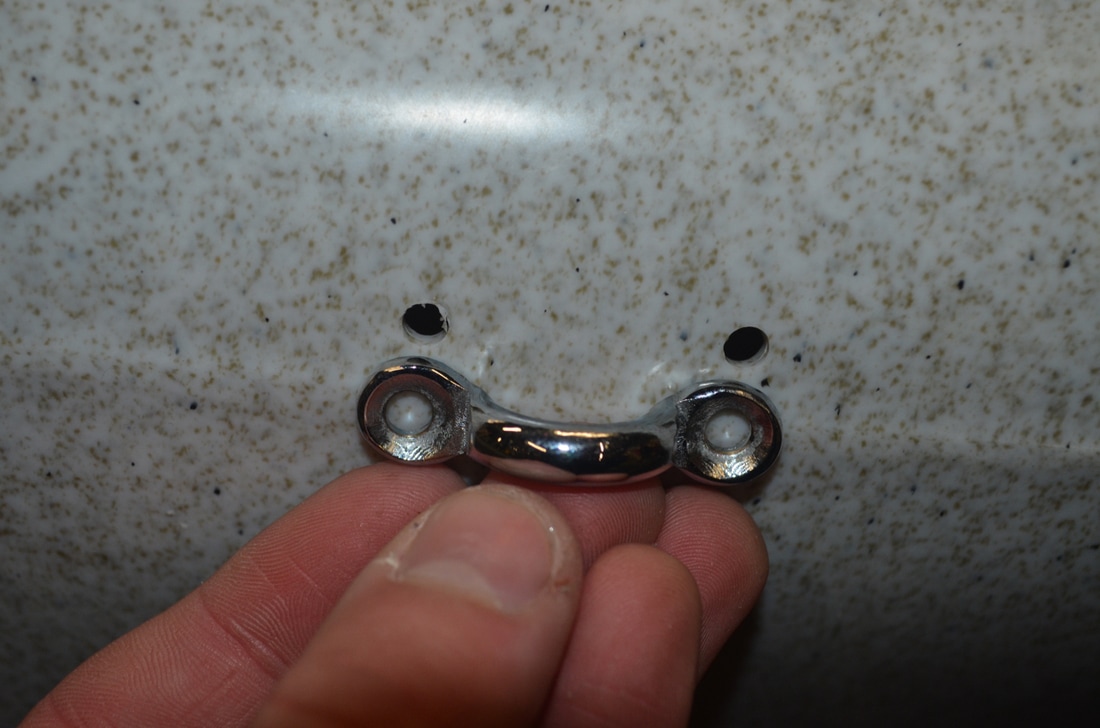
Fitting an Anchor Trolley to the Revolution 16Fitting the Stern Pad EyeThe first step is to fit the pad eyes at either end of the kayak. These are used to attach the pulleys too, which the trolley line will run between. I've opted for the Hobie Chrome Pad Eyes to match the other pad eye fittings on the kayak. Stern first.... I wanted the pad eye to be as close to the back as possible without interfering with the rudder, which up hauls to the left hand side of the kayak. The pad eye will have a karabiner and pulley attached to it, so once in place should provide enough clearance between the anchor line and rudder blade to allow the rudder to be hauled if i forget to do it before anchoring. 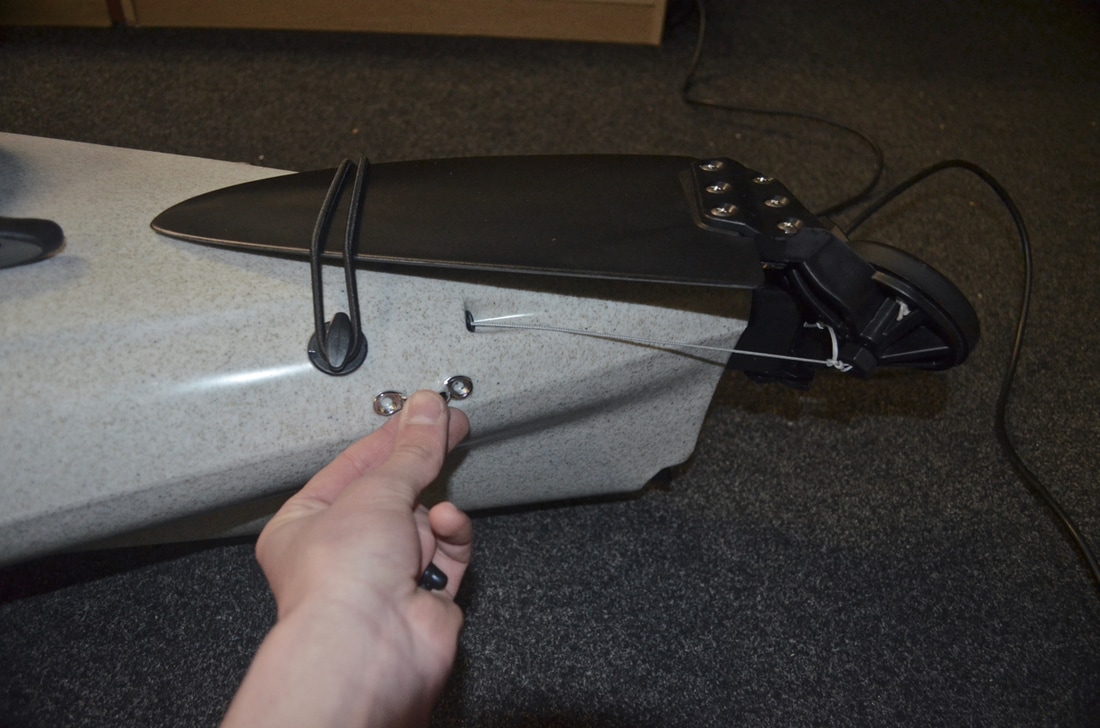 Mark up the holes and then drill with a 5mm drill bit. 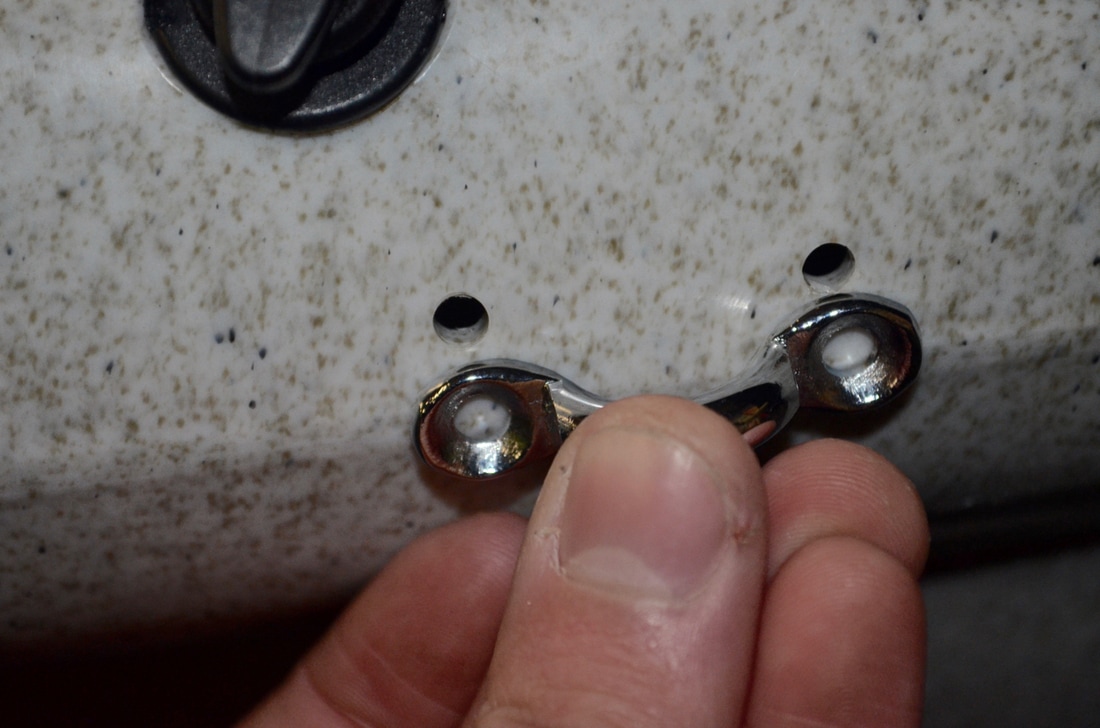 I then applied a good dollop of Marine Goop to the holes before bolting the pad eye to the hull using the A4 Stainless M5 Bolts with a Washer and Nyloc Nut on the inside of the hull. These can easily be done up by reaching inside the stern hatch. 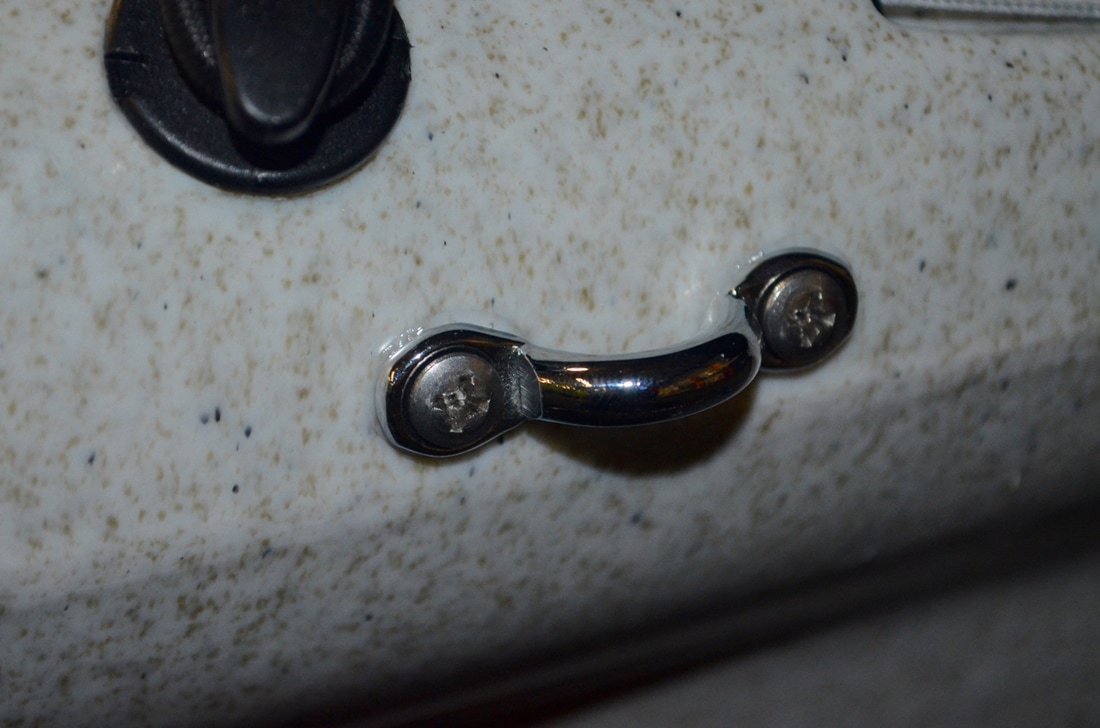 One pad eye securely attached and sealed to the stern of the Revo 16.... 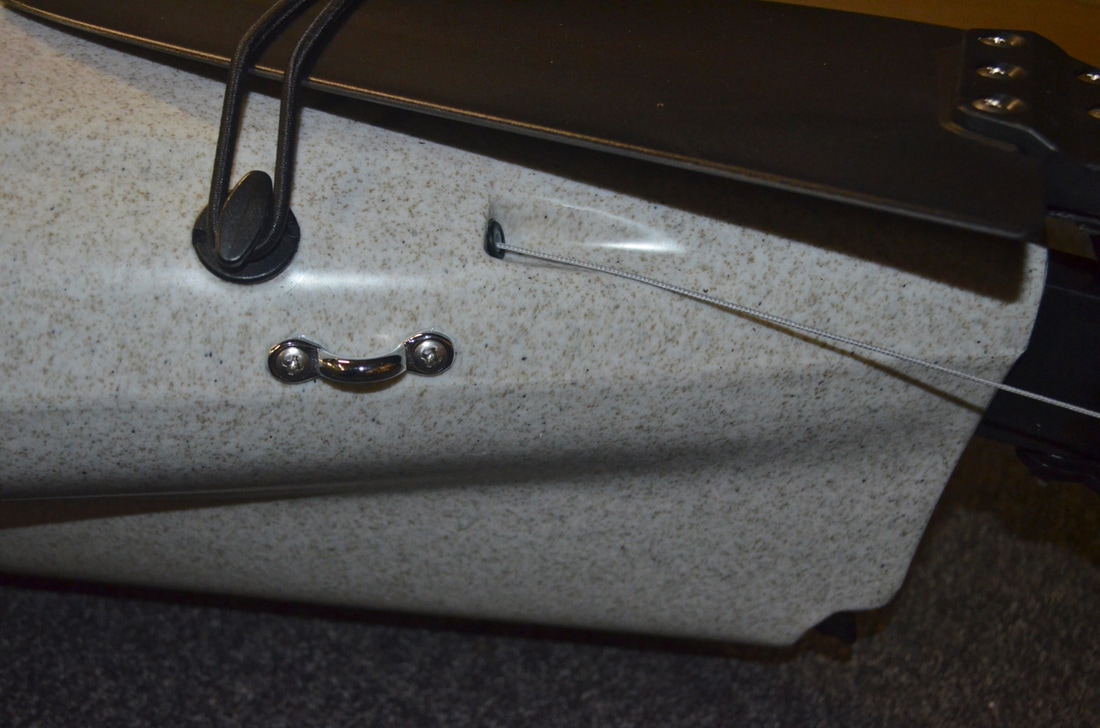 Fitting the Bow Pad EyeThis one takes a bit more effort and thinking about. You can only reach so far inside the bow hatch to do up nuts and bolts. I could have used trifold rivets but a bolt/washer/nut fixing is stronger and this kayak is being outfitted to last! Reaching as far as i possible i could get around 8-10 inches back from the bow which i was happy with. Holes were marked a drilled.
Again, a good dollop of Marine Goop in each hole to provide a waterproof seal 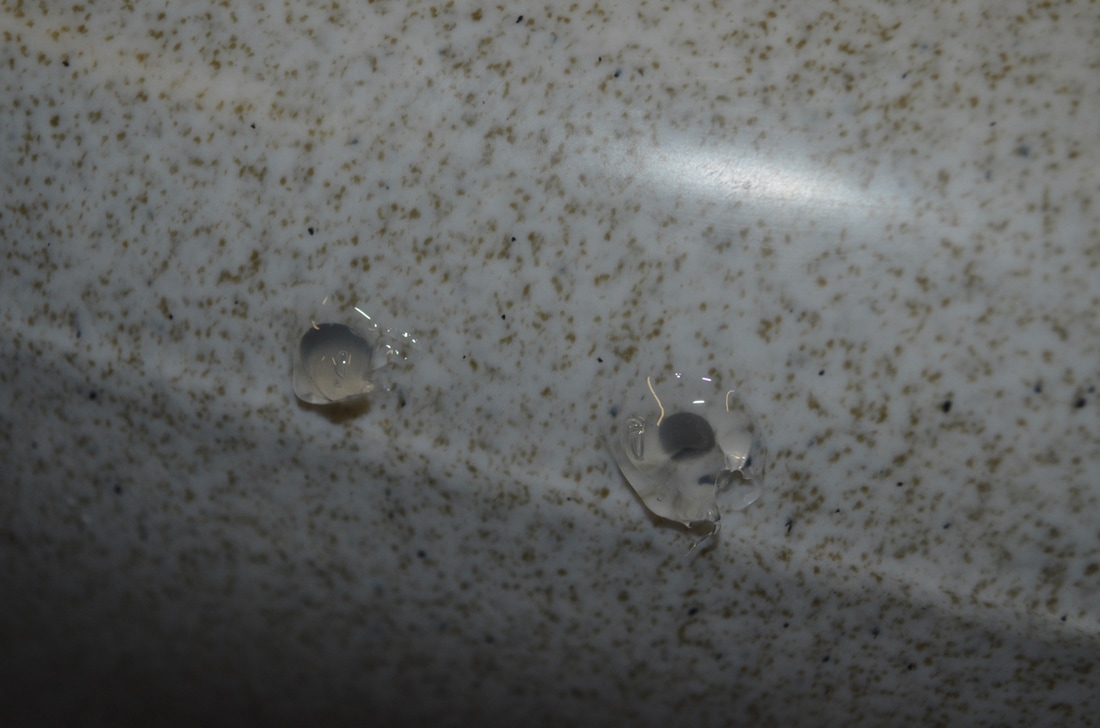 This next bit wasn't easy. Whilst i could reach a spanner up to the holes inside the bow hatch, i couldn't actually reach outside to screw up the bolts! A bit of an oversight, and a helping hand doing this step was needed, but i was on my own.... A bit of head scratching with much swearing and i soon had two mole grips and a spanner on the end of each other to make a long reach spanner! It wasn't easy but i wasn't going to be beaten. One pad eye installed at the bow.... 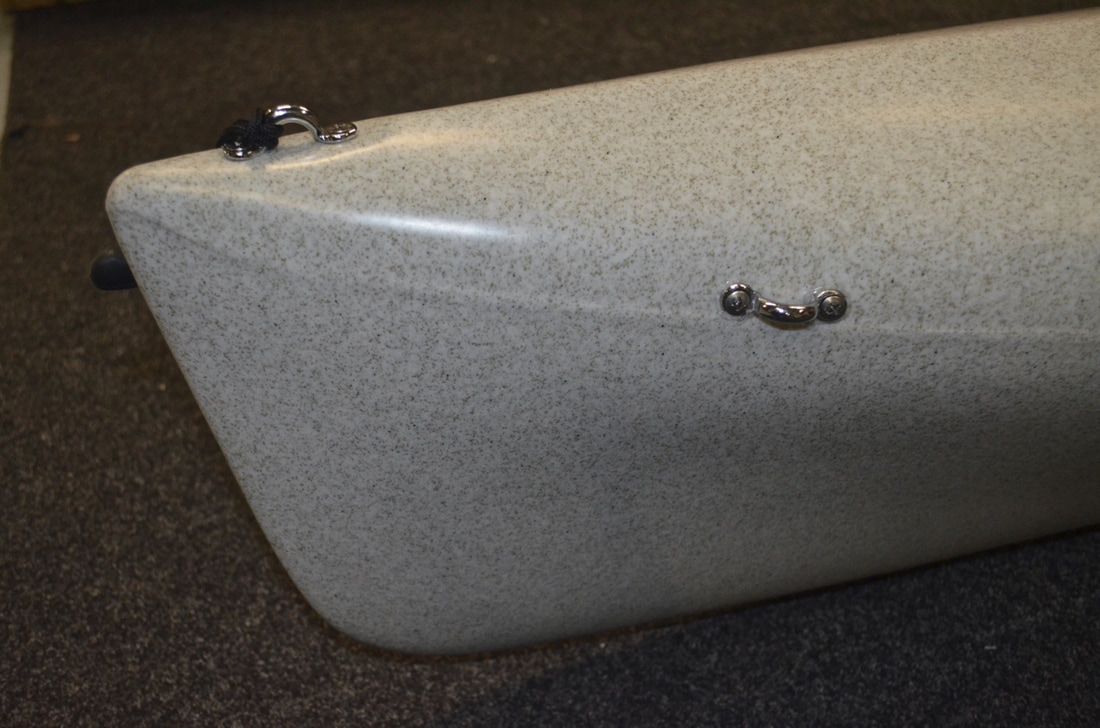 Creating the Anchor TrolleyNow that the fixings are in place, i could start assembling the trolley itself. At the bow pad eye i would be incorporating a small length of bungee shock cord. This serves two purposes. It will help to dampen and absorb some of the kayak's movement when anchored in lively conditions, and it will also keep the anchor trolley line taut to the kayak hull. I made a bungee loop of around 6 inches long using 5mm bungee cord and a Parrel bead as shown below. Use a lighter to melt the ends of the bungee once cut to prevent fraying. 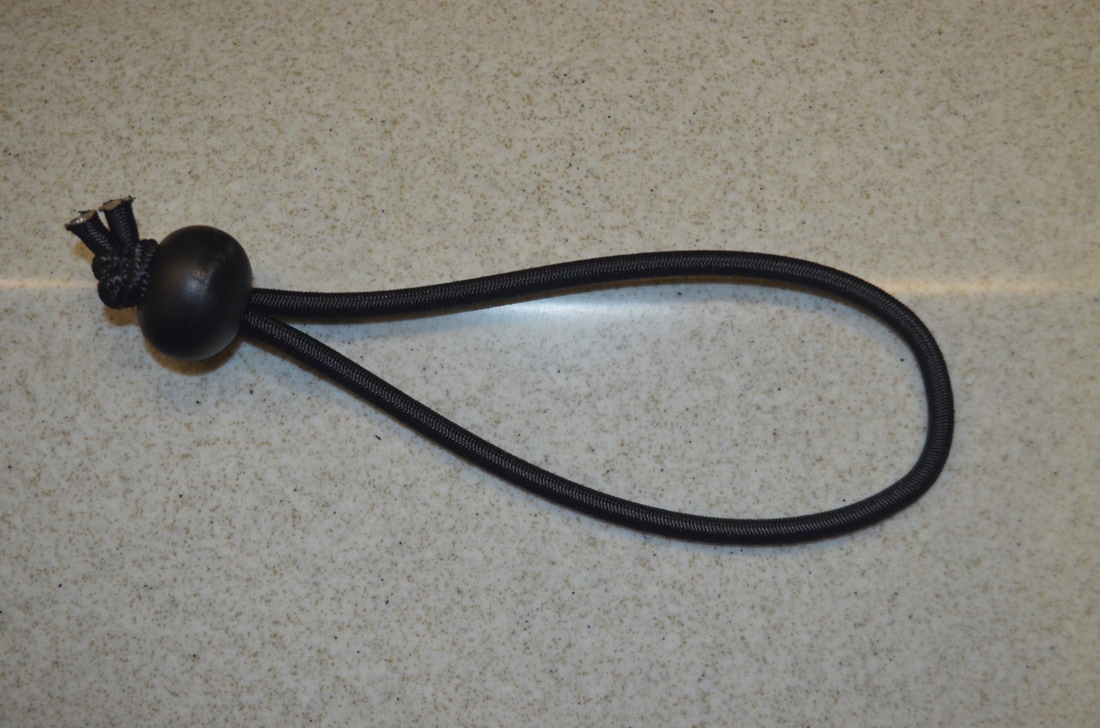 This loop can then be passed through the bow pad eye and held in place against the eye by the Parrel bead. I then used a 60mm A4 (316) Stainless Steel Karabiner to attach a Harken Micro Block Pulley to the bungee cord. The Harken pulley uses ball bearings for a super smooth action even under load - they cost a little more than basic pulleys but they are quality! 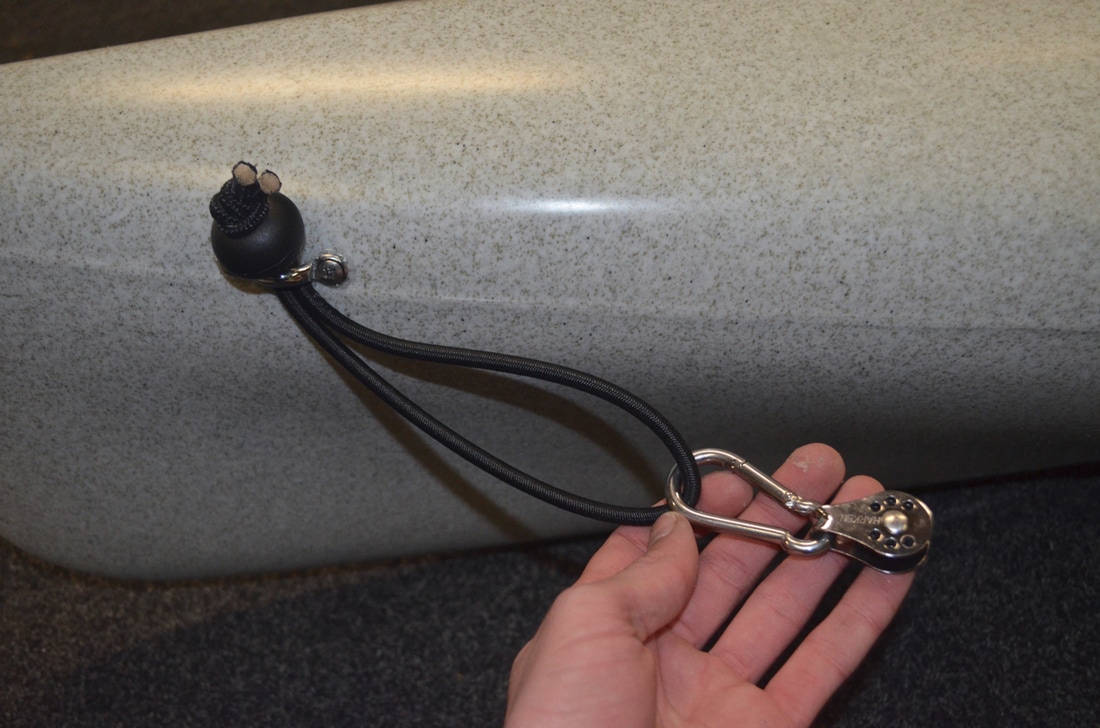 Back to the stern and i used another 60mm A4 (316) Stainless Steel Karabiner to attach a Harken Micro Block Pulley to the pad eye, but this time without any bungee. I will be anchoring from the stern 95% of the time so i want to point of anchoring to be as close to the stern as possible so that the kayak will sit as straight as possible at anchor. The absence of the bungee allows the trolley karabiner to sit closer to the stern. The use of a karabiner at either end of the trolley allows for the whole set up to be removed if needed. 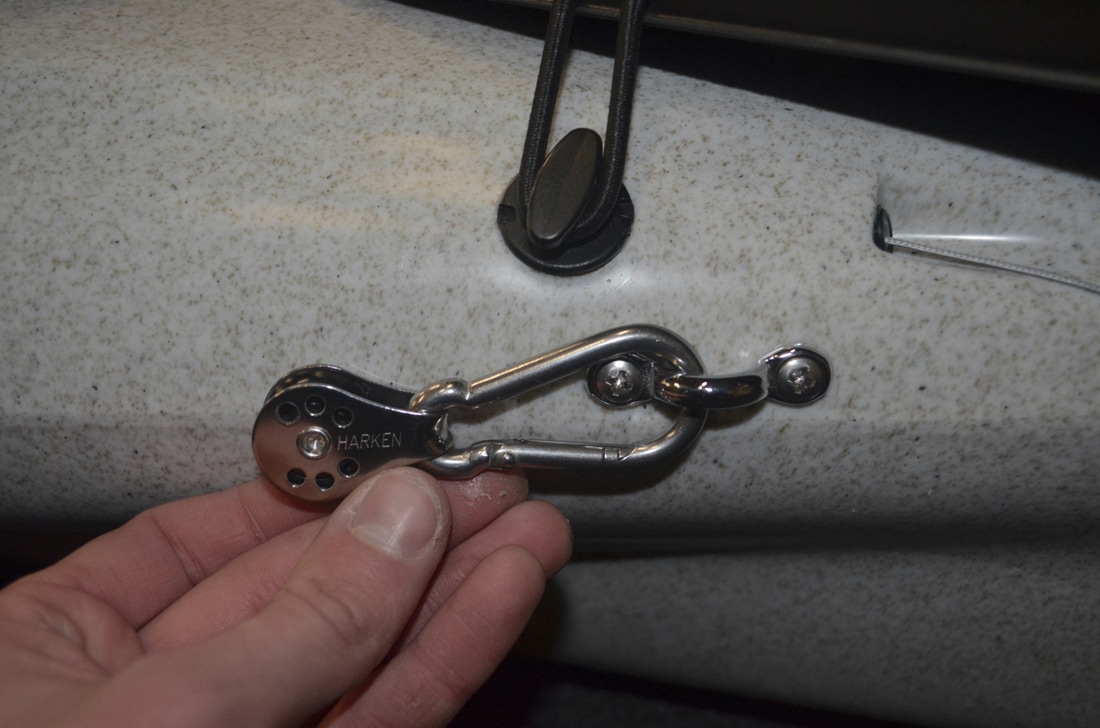 The next step was to form the loop of cord that runs between the pulleys. I am using 4mm braid-on-braid for the anchor trolley line - this is low stretch and very durable. Simply pass the braid through both pulleys, topside to bottom, and bring together on the bottom side of the pulleys to create the loop. Thread a parrel bead onto each end and then tie a 30mm stainless steel ring to each end of the braid, using a tucked blood knot or similar sliding knot, and connect these with a 60mm karabiner. It takes a few goes to get the trolley taut and the knots tight at the same time! Again use a lighter to melt the ends of the braid to stop it from fraying. The use of the rings comes from Mark Crame who uses this set up as a towline as well as an anchor trolley. Simply unclip the carabiner from one of the rings and you have either a bow or stern tow line to clip onto another kayak! I'm sure that'll come in useful at some point. This is the same set up i use on my RTM Rytmo and it works well however i have made one small modification this time around. Instead of letting the Parrel beads run free on the trolley line i have tied a small knot behind each one to hold them in place against the Stainless rings. I find this allows the trolley to run smoother - the beads hold the karabiner and to some extent the rings off the kayak hull wth just the beads in contact. Also, when shuttling from bow to stern (or vice-versa) the beads allow to line to smoothly hit and then run past the cleat (shown further down) without hinderance. The Anchor Trolley positioned at the Bow of the Revo 16.... 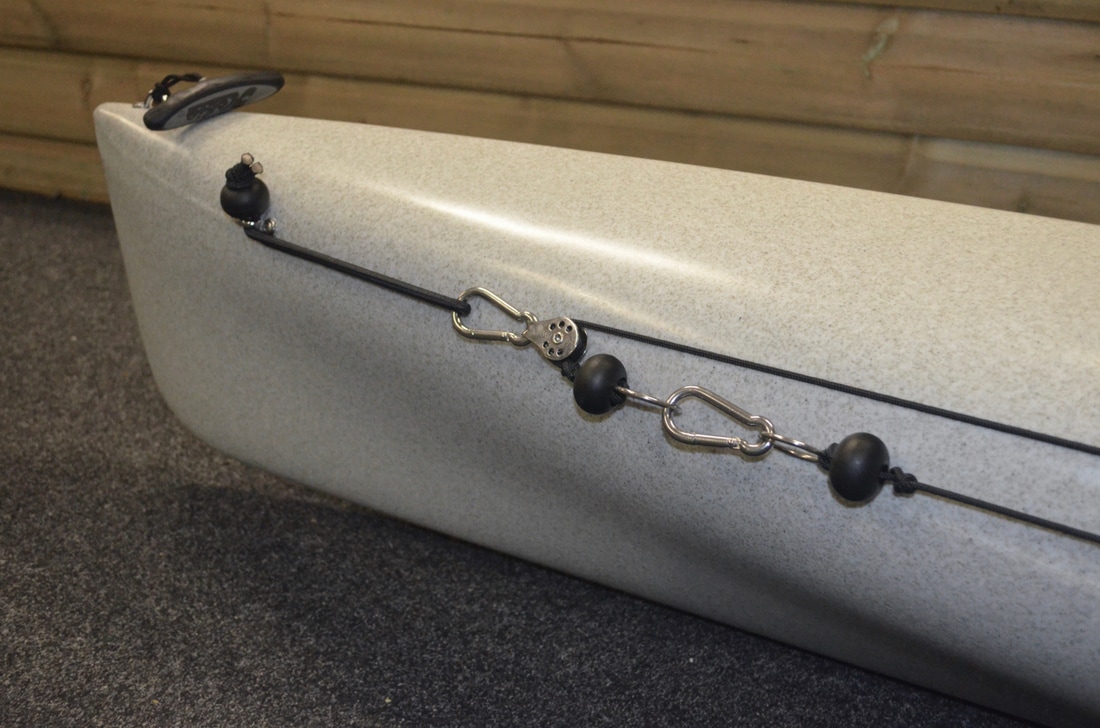 And at the bow.... 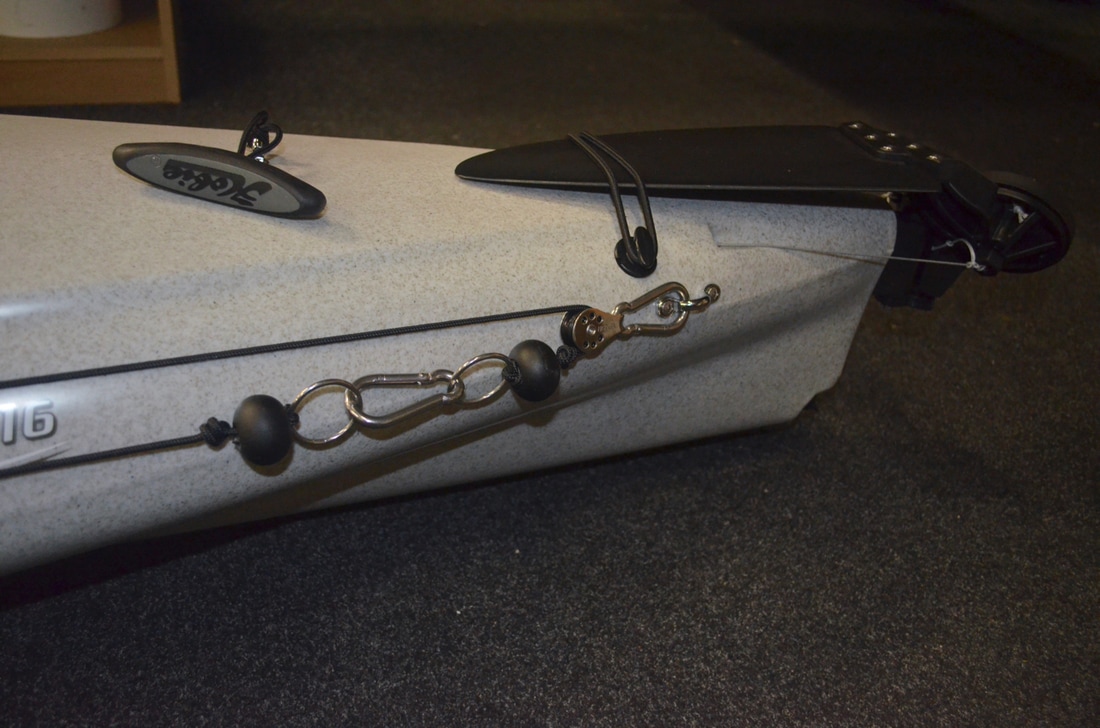 Fitting a Zig-Zag CleatThe anchor line can now pass through, or be clipped into, the karabiner and shuttled from bow to stern however there is nothing to stop the trolley moving. A cleat is required to lock the trolley in position. I use a zig zag cleat as the one cleat can be used to lock off the anchor trolley and cleat off the anchor line. This needs to be positioned where it can be easily accessed from the seating position but also out of the way of your paddling arc so that you don't go catching your hands or knuckles. After a bit of thought i opted for placing this approximately inline with the back rest on the Vantage seat, and above the seam line of the kayak. Holes were marked and drilled, again with a 5mm drill bit. 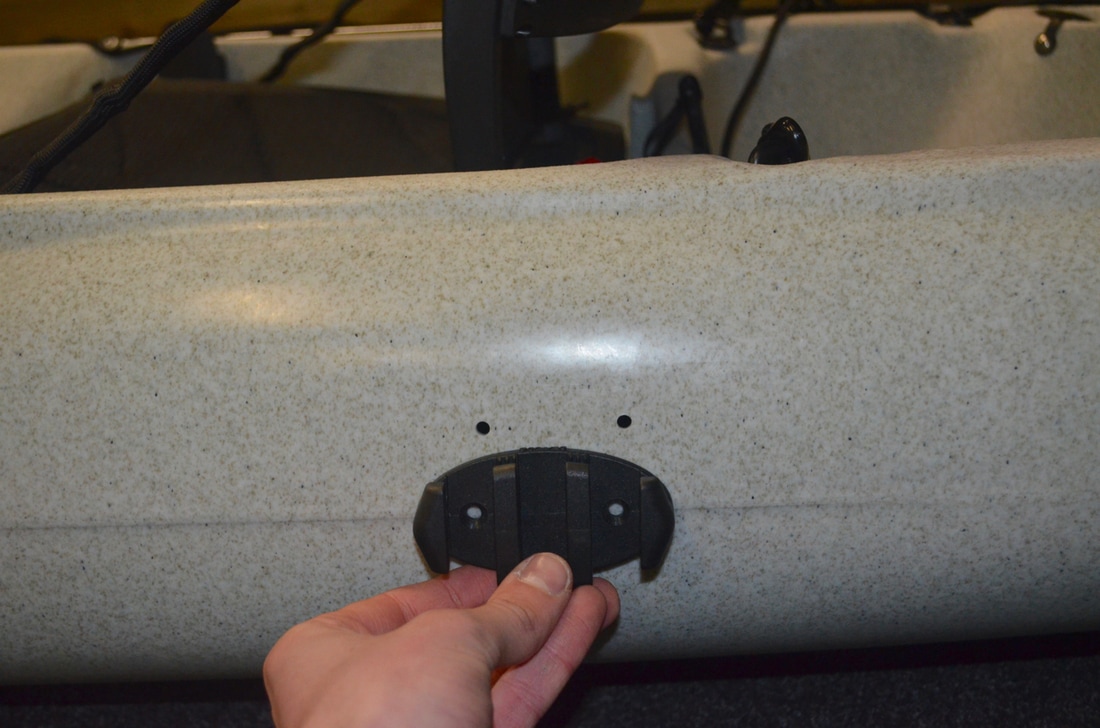 This has to be a strong fixing as it is subject to a fair load while the kayak is at anchor, so a plenty of Marine Goop adhesive/sealant was applied. 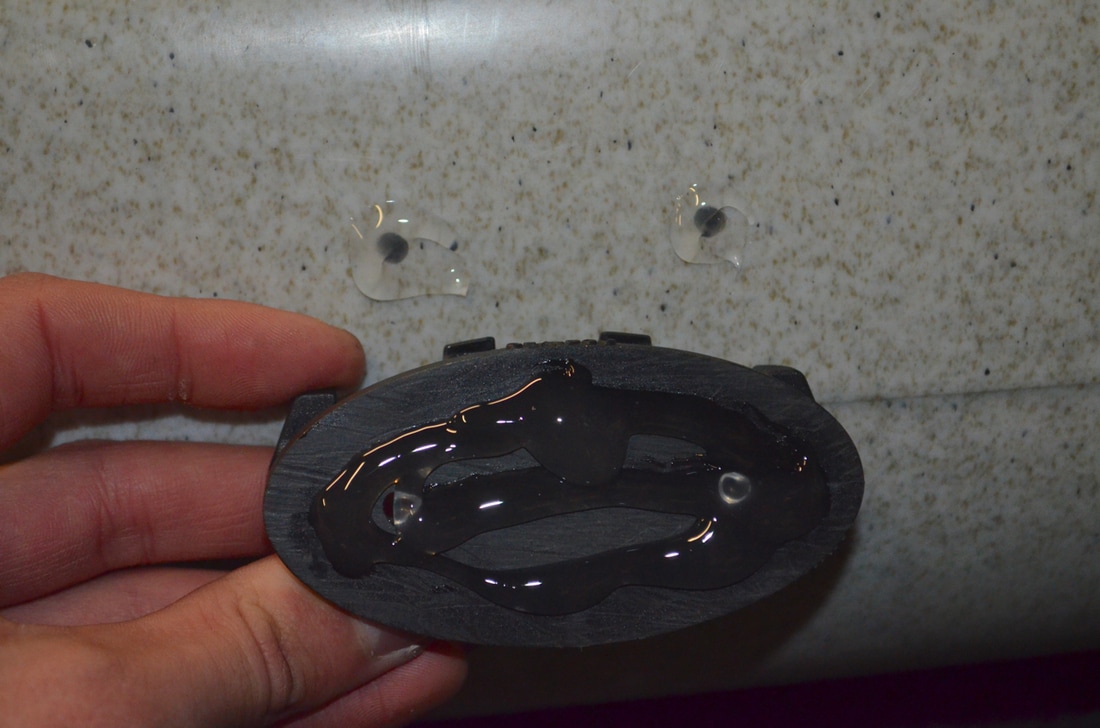 Marine-Grade A4 Stainless M5 Bolts with Washers and Nyloc Nuts were again used for a strong fitting. These could be done up by reaching inside the centre hatch. One firmly attached Zig-zag Cleat.... 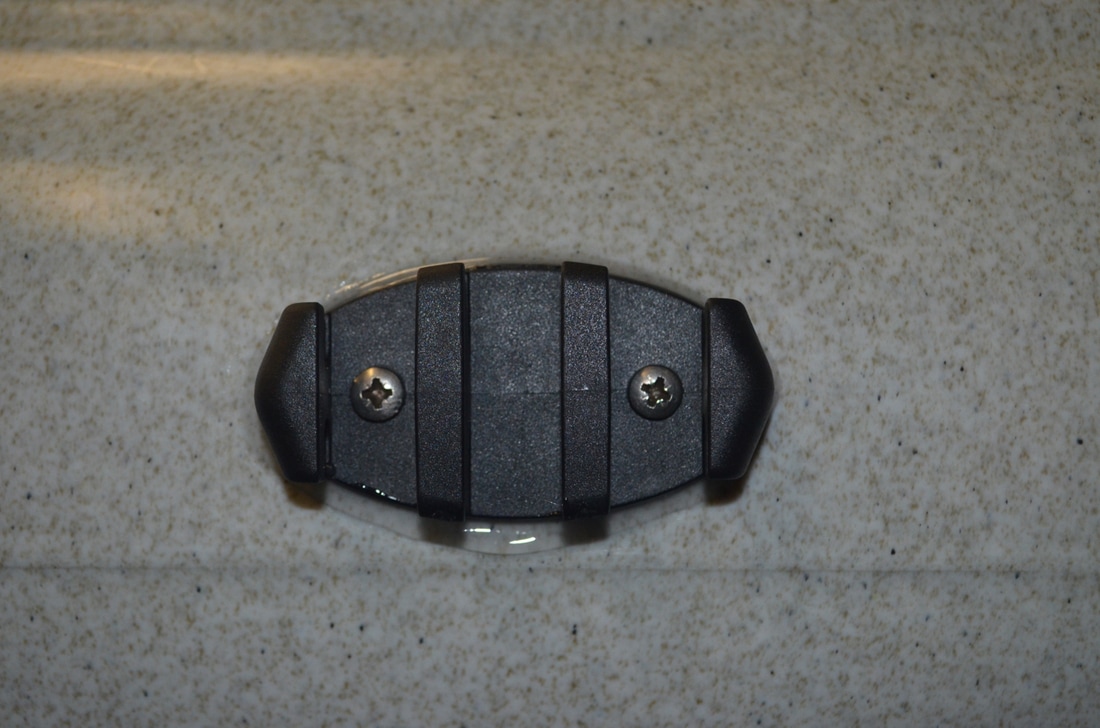 Here you can see how the bead would hit the cleat allowing for the rings and karabiners to travel across the cleat without getting andy knots getting caught up or jammed - it works really well! 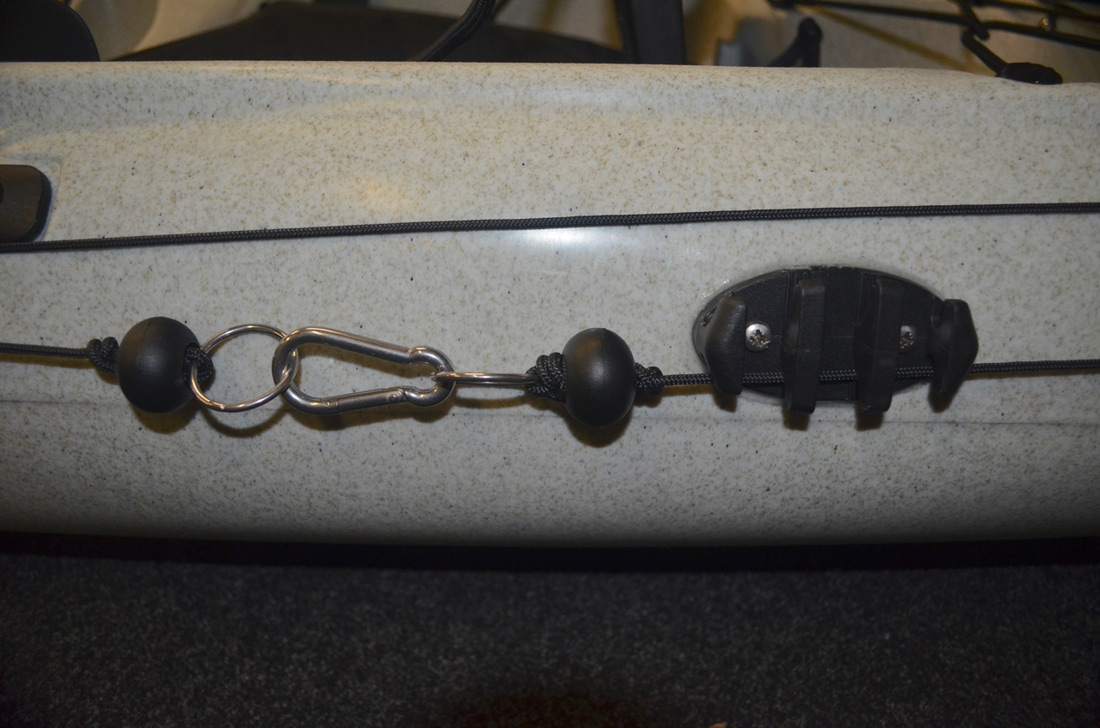 The anchor trolley line can now be locked off in position by zig-zagging the line from one side of the cleat to the other. The anchor line can also be locked off here by zig-zagging in the other direction as below... 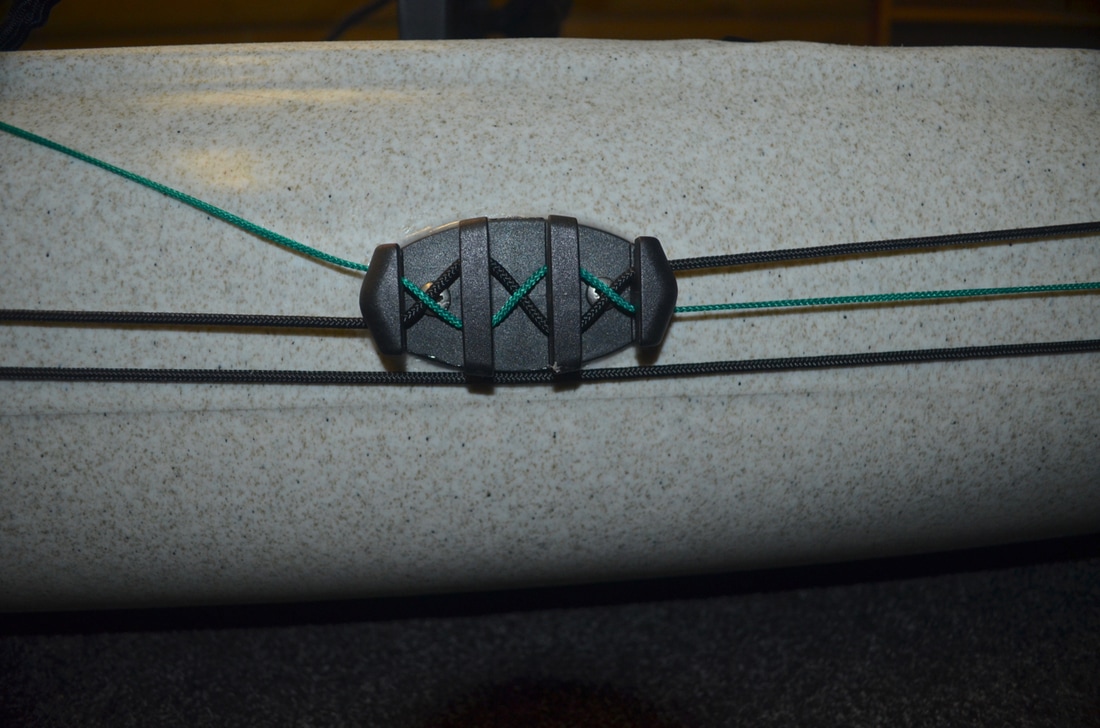 Adding an Anchor Reel and AnchorI have made my own anchor reel suitable for my needs - you can find out more on that here. I use 2mm polypropylene cord as anchor line on the reel, and this terminates in a karabiner which allows the line to be quickly and easily clipped on or off my anchor set-up. My anchor set-up consists of a 1.5kg galvanised grapnel anchor and 1m of short link galvanised 6mm chain. The chain provides greater holding power to the bottom and helps to dampen any movement of the kayak against against the anchor. The chain attaches to the base of the anchor using a small shackle. A small 2 or 3mm cable tie is then tied between a chain loop and the top eye of the anchor in a position that puts little or no strain on the cable tie when the chain is being pulled in line with the anchor shaft. If the anchor becomes snagged i pedal/paddle up tide, if possible, in order to put pressure against the cable tie. A sharp pull will then hopefully break the cable tie and allow the anchor to be pulled out of the snag from it's base. That's the idea anyway, sometimes it works great, other times the anchor is just too snagged! 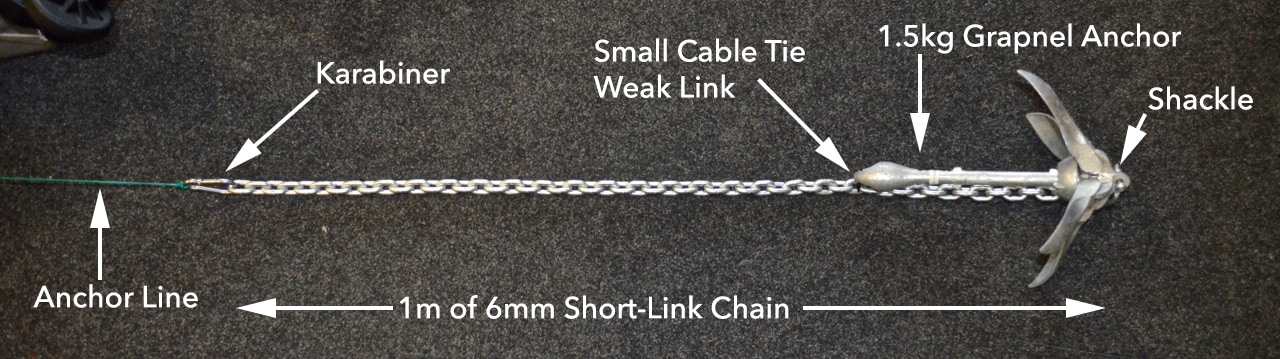 The Finished Anchoring System on the Revolution 16The anchoring system is now complete and can be fully operated from the seating position. i use a 'Simple and Direct' anchoring method. My anchor line runs directly from my cleat, through the anchor trolley karabiner, shuttled to the stern, and then down to the anchor, as in the simplified diagram below. Once anchored my reel gets clipped off to the side of the kayak, or put in the tank well and is not subject to any tension from the anchored kayak. This is not a quick-release method that incorporates a pick-up buoy, which floats an anchor reel beneath it in the water - this method is recommended for those who haven't anchored before. If i am in serious danger and need to un-anchor at speed, i simply slice through my anchor line with a knife or rope cutter (always attached to my PFD) and the kayak is instantly freed from the anchor. That is how i quick-release. I lose the anchor but if i am in a position that i need to un-anchor at speed then that will probably be the least of my worries! 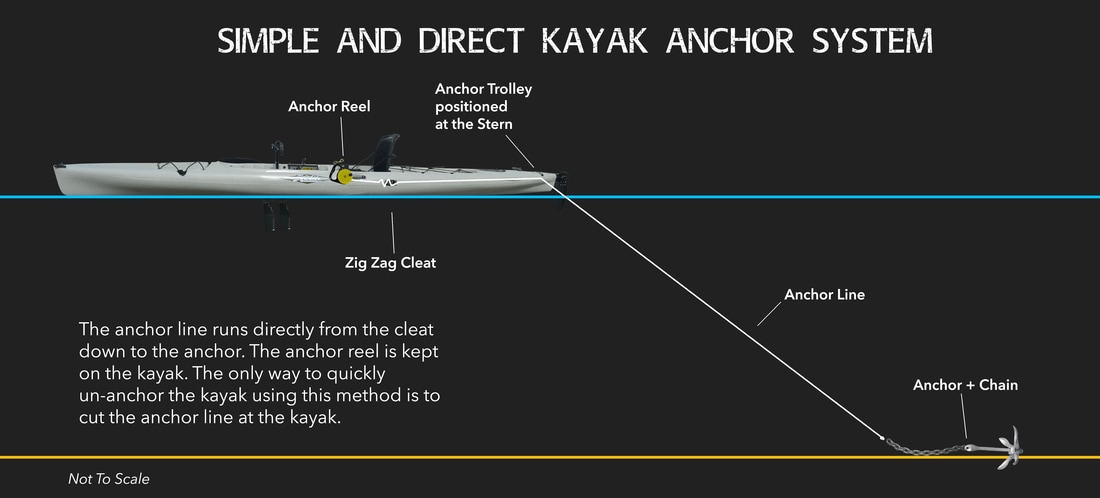 When anchoring, i bring the anchor trolley karabiner to the seating position and pass through it the karabiner on the end of the anchor line. i then clip on the anchor chain/anchor set-up and drop this into the water. As the anchor is falling to the bottom i can quickly shuttle the trolley back to the stern position and lock off the anchor trolley line in the zig-zag cleat. Once the anchor line hits the bottom i can let out as much line as necessary and when ready i can cleat off the anchor line in the zig-zag cleat to anchor the kayak. The anchor reel can then be placed out of the way in the rear tank well. It should look something like this! 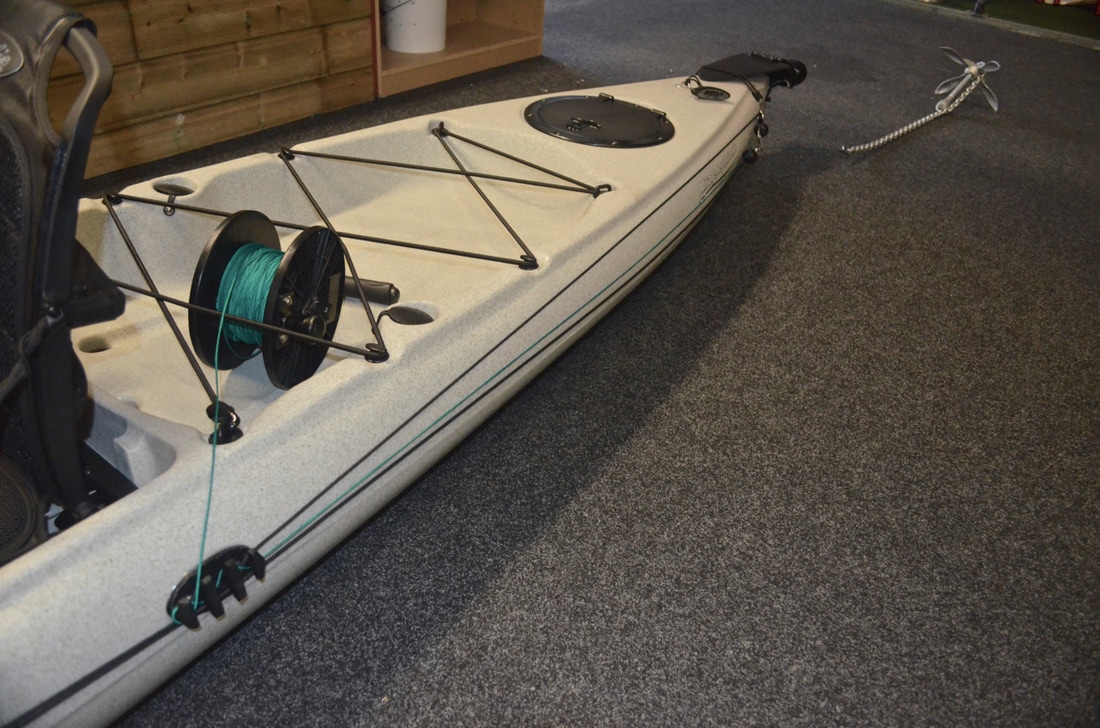 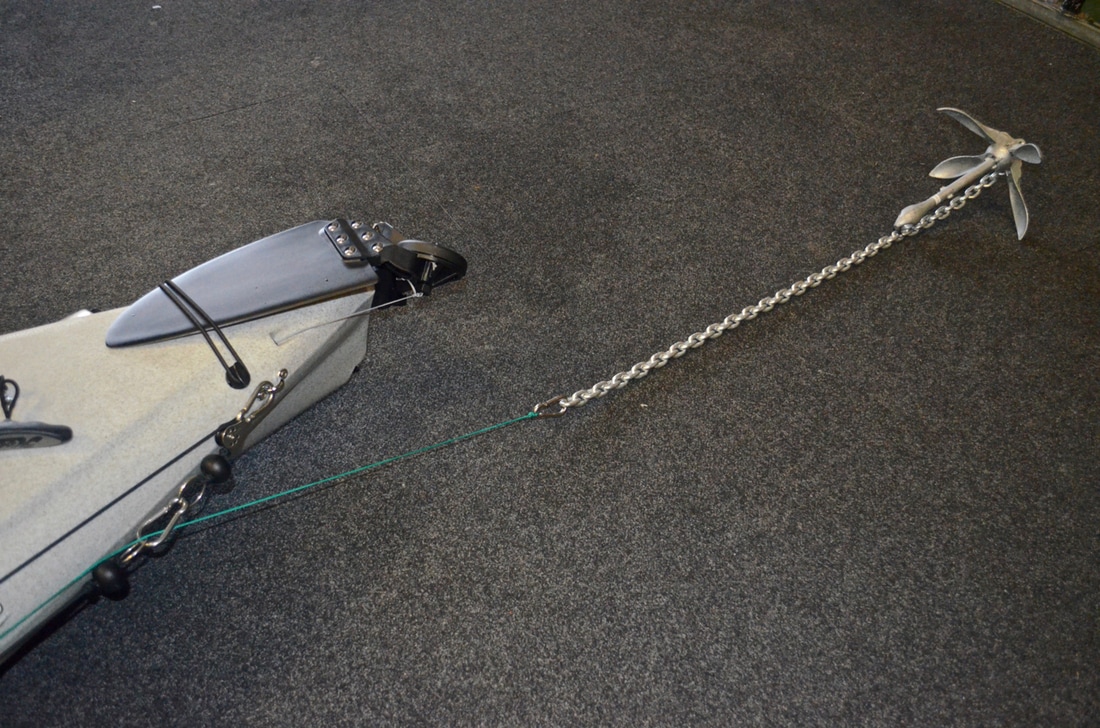 The anchor line can run freely through the anchor trolley karabiner without hinderance. 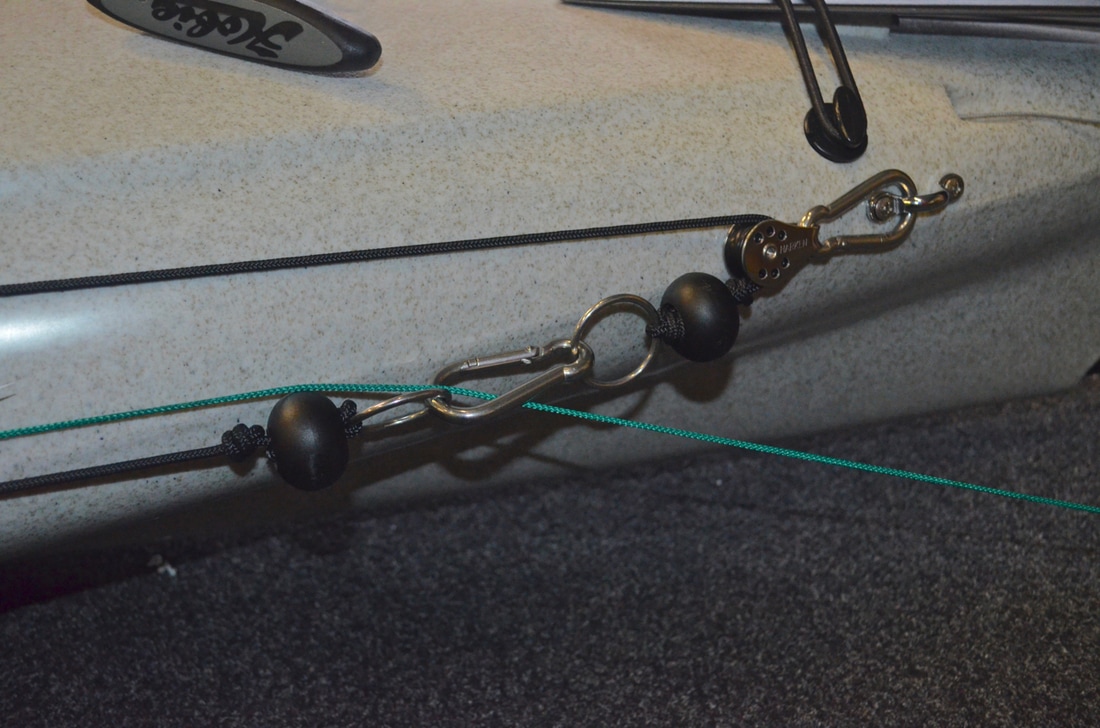 When it comes to anchor retrieval i can either haul the line with the trolley at the stern, or release anchor line and shuttle the trolley to the bow (this turns the kayak around - care must be taken doing this in fast tides), cleat off the trolley again and then haul the anchor from the bow - which is easier in some conditions and allows you to wind directly onto your anchor reel. The Anchor trolley can also be used to position a Drogue/Drift Chute off the bow to help slow a drift in windy conditions. Simply clip the drogue line onto the anchor trolley karabiner and shuttle to the bow position, and lock off the trolley line in the cleat. The drogue opens out in the water like a parachute and slows the kayaks drift in the wind. The drogue will still move the kayak at the same speed as the tide/current but often the wind speed is more than this. The anchor trolley install is complete and i can now fish at anchor from the Revo 16, and use a drogue off the bow if needed. The trolley line can also double up as a bow or stern towline of needed too. The anchor trolley uses strong and well sealed fittings, and runs smooth without hinderance between the bow and stern. The whole anchoring system has been kept as simple as possible whilst remaining strong and effective. Now where are those fish!
paul pope
5/2/2019 22:38:10
good thank you Comments are closed.
|
AuthorLiam Faisey 
My Tackle Shop
SPONSORS
Proudly associated with

Cornwall's only specialist kayak fishing shop
Archives
March 2023
Categories
All
Add my blog to your feed reader by clicking the button below
Get blog updates via email
Kayak Fishing Videos
Custom feed reader powered by FeedWind
Useful Links
Anglers Afloat
Cornish Shore & Kayak Fisherman Cornwall Canoes Palm Equipment Penzance Kayak Fishing Meet Info Saltwater Kayak Fisherman Magic Seaweed XC Weather 
|

 RSS Feed


|
|
Website powered by pasties and the hope of good weather!
© 2023 Liam Faisey
© 2023 Liam Faisey